


3
Section 1: Installation
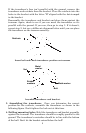
Thank you for buying a Lowrance
®
sonar! Your unit is a high quality
sonar designed for both professional and novice fishermen. All
Lowrance sonars have an automatic mode that finds and displays the
bottom, fish, underwater structure and more – right out of the box. All
you have to do is press the on (
PWR) key.
NOTICE!
The storage and operation temperature range for your unit is from
-4 degrees to +167 degrees Fahrenheit (-20 degrees to +75 degrees
Celsius). Extended storage or operation in temperatures higher or
lower than specified will damage the liquid crystal display in your
unit. This type of damage is not covered by the warranty. For more
information, contact the factory's Customer Service Department;
phone numbers are inside the manual's back cover.
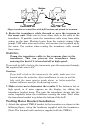
Installation Preparations
You can install the sonar system in some other order if you prefer, but
we recommend this installation sequence:
Caution:
You should read over this entire installation section before
drilling any holes in your vessel!
1. Determine the approximate location for the sonar unit, so you can
plan how and where to route the cables for the transducer and power.
This will help you make sure you have enough cable length for the
desired configuration.
2. Determine the approximate location for the transducer and its cable
route.
3. Determine the location of your battery or other power connection,
along with the power cable route.
4. Install the transducer and route the transducer cable to the sonar
unit.
5. Install the power cable and route it to the sonar unit.
6. Mount the sonar unit.
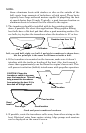
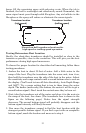
Transducer Installation
These instructions will help you install your Skimmer
®
transducer on a
transom, on a trolling motor or inside a hull. Read these instructions
carefully before attempting the installation. Determine which of the