


BEFORE CONNECTING YOUR TOOL
TO
A
POWER SOURCE
Be sure
you
have
read
all
GENERAL POWER TOOL SAFETY RULES
GENERAL SAFETY PRECAUTIONS
1.
KEEP
GUARDS IN PLACE and in working order.
2.
REMOVE ADJUSTING KEYS AND WRENCHES. Form habit of checking
to
see
that keys and adjusting wrenches are removed from
tool
before turning
it
on.
3.
KEEP
WORK AREA CLEAN. Cluttered areas and benches invite accidents.
4. AVOID DANGEROUS ENVIRONMENT. Dont't use power tools in damp
or
wet
locations. Keep work area well lit.
5.
KEEP
CHILDREN AWAY.
All
visitors should be kept safe distance from work
area.
6.
MAKE WORKSHOP KID PROOF with padlocks, master switches,
or
by removing
starter keys.
7.
DON'T FORCE TOOL.
It
will do the job better and safer at the rate for which it
was designed.
8.
USE RIGHT TOOL. Don't force
tool
or
attachment
to
do a job
it
was not designed
for.
9.
WEAR PROPER APPAREL. No loose clothing
or
jewelry
to
get caught in moving
parts. Rubber-soled footwear is recommended for best footing.
10.
USE SAFETY GLASSES. Also use face
or
dust maskif cutting operation is dusty.
11. SECURE WORK.
Use clamps
or
a vise
to
hold work when practical. It's safer than
12. DON'T OVERREACH. Keep proper footing and balance at all times.
13.
MAINTAIN TOOLS WITH CARE. Keep tools sharp and clean for best and safest
performance. Follow instructions for lubricating and changing accessories.
14.
DISCONNECT TOOLS before servicing; when changing accessories such as blades
or
adjusting guides.
15.
AVOID ACCIDENTAL STARTING. Make sure switch is in off position before
plugging in.
16.
USE RECOMMENDED ACCESSORIES. Consult the owner's manual for recom-
mended accessories. The use of improper accessories may cause hazards.
17. NEVER STAND ON TOOL. Serious injury could occur if the
tool
is
tipped
or
if
the cutting
tool
is accidentally contacted.
18.
CHECK DAMAGED PARTS. Before further use of the tool, a guard
or
other part
that is damaged should be carefully checked to ensure that
it
will operate properly
and perform its intended function
-
check for alignment of moving parts, binding
of moving parts, breakage of parts, mounting, and any other conditions that may
affect
its
operation. A guard
or
other part that is damaged should be properly
repaired
or
replaced.
using your hand and it frees both hands to operate tool.
PRELIM
IN
AR
Y
I
NST
R
UCTl ONS
Your electric tool is precision built and manufactured
to
satisfy the highest standards.
For
maximum
performance, long
tool
life, and your safety, follow these instructions carefully.
VOLTAGE WARNING
:
Before connecting the tool
to
a power source (receptacle, outlet, etc.1
be
sure the voltage
supplied
is
the
same as that specified on the nameplate of the tool. A power source
with voltage greater than that specified for
the
tool can result in SERIOUS INJURY to the user
-
as
well as damage to the tool.
If
in doubt,
DO
NOT PLUG IN THE TOOL. Using a power source with
voltage
less
than the nameplate rating is harmful to the motor.
<.
Precautions Before Use
A. Before plugging in the miter saw,
use
this checklist:
Check Item Checkpoint
(2)
(3)
(4)
(5)
B.
Set the miter saw on a level bench, sturdy stand
or
table.
If
you intend to use the tool
in
just one spot, fasten
it
securely by means
of
bolts
in
the
four
mounting feet. Always
obtain a steady base for safe, sure cutting action.
C.
These miter saws are equipped with a locking stopper which is used to keep the head
in
the lowered position. To release from the hold-down position, lower the operation
handle slightly and turn the lever on the locking stopper
to
the release position.
To
lock the head in the hold-down position, lower the operation handle fully and turn the
lever
on the stopper
to
the hold position.
Is
the saw blade installed correctly?
Is
the saw blade tip contacting the turn base when the blade
is
fully lowered?
Does
the safety cover operate smoothly when you raise and
lower the head with the operating handle?
Is
the miter clamp grip tightened firmly?
HOW
TO
USE
YOUR
MAKITA MITER SAW
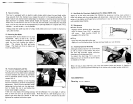
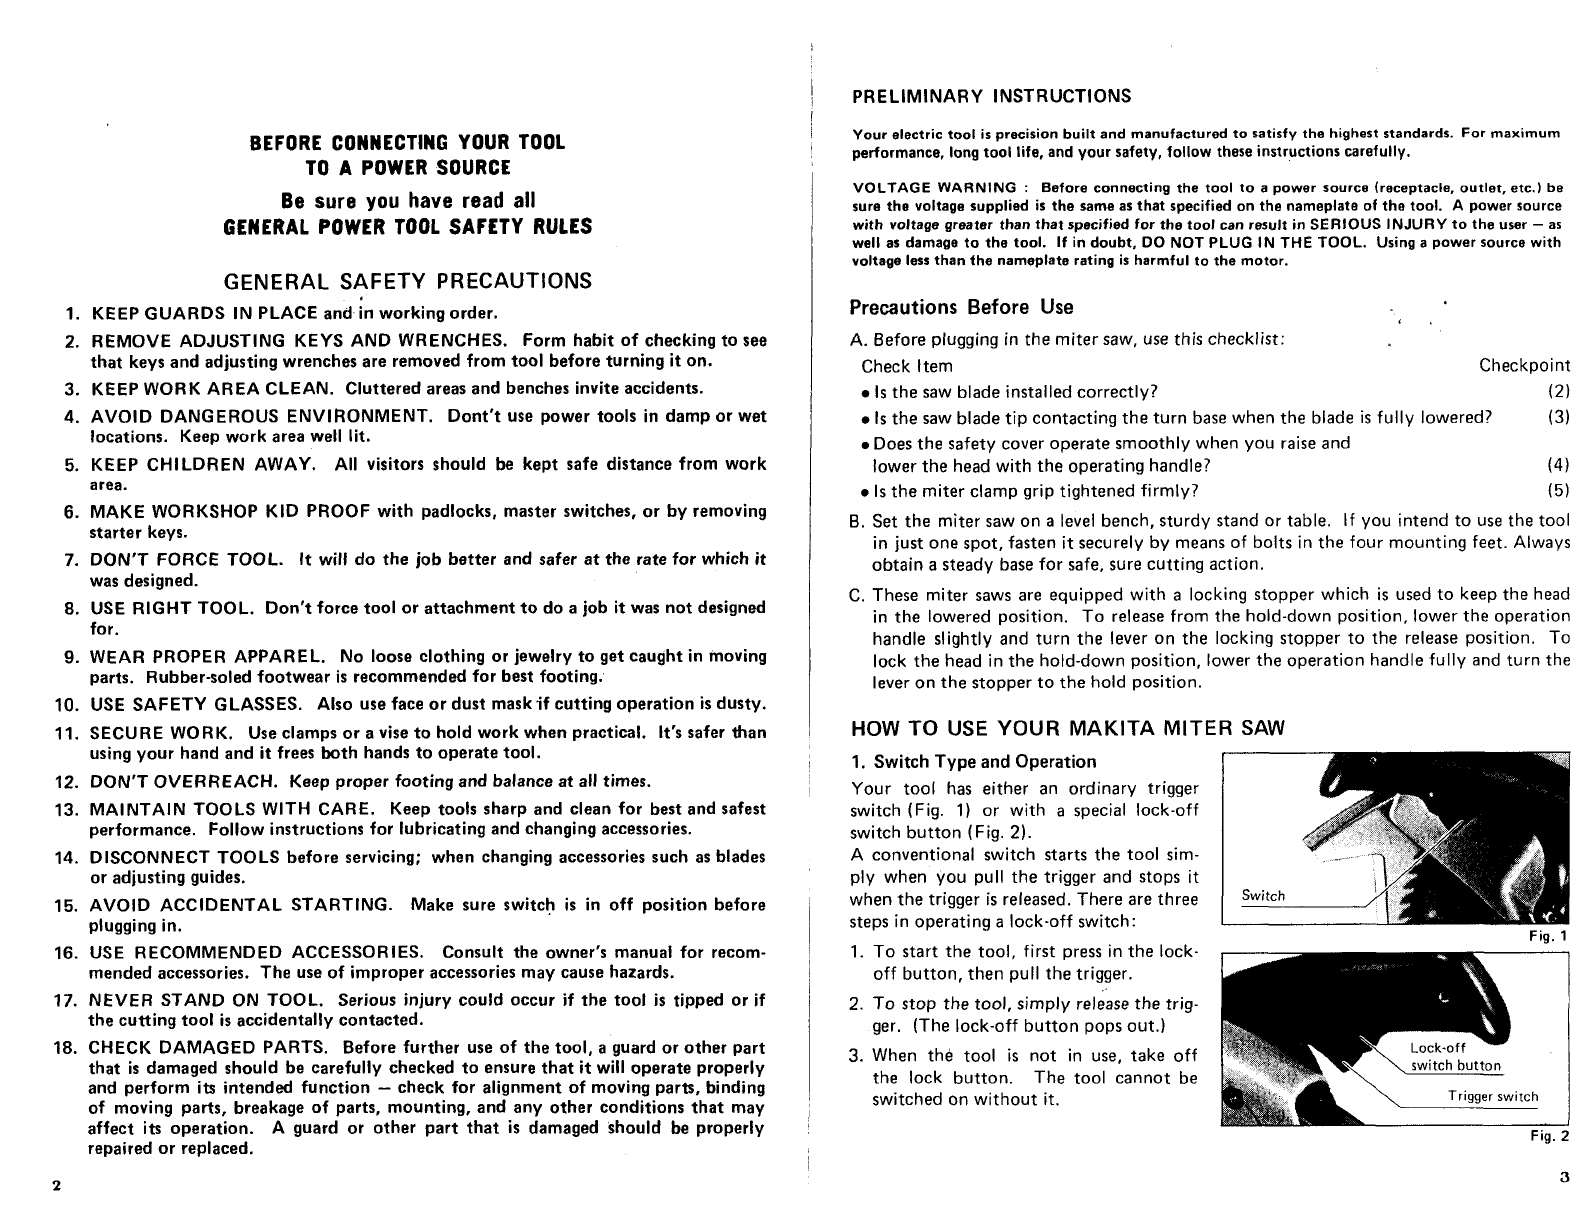
1. Switch Type and Operation
Your
tool
has either an ordinary trigger
switch (Fig.
1)
or
with a special lock-off
switch button (Fig.
2).
A conventional switch starts the
tool
sim-
ply when you pull the trigger and stops it
when the trigger is released. There are three
steps in operating a
lock-off
switch:
1.
To start the tool, first press
in
the lock-
off
button, then pull the trigger.
2.
To
stop the tool, simply release the trig-
ger. (The
lock-off
button pops out.)
3.
When the
tool
is
not in use, take
off
the lock button. The
tool
cannot be
switched on without
it.
Fig.
1
Fig.
2
,.
L
3