


2.
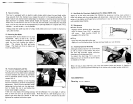
Installing Saw Blade
Press the shaft
lock
and use the socket
wrench provided
to
loosen the hex bolt
which serves
to
hold the saw blade in place.
Then remove the outer flange and install
the saw blade on the arbor shaft inside the
safety cover.
Model 2401B is equipped with an addaptor
ring
(16)
for
a
1"
arbor hole. Use this ring
to install a Makita blade. Without the ring,
there is a
5/8"
arbor hole.
3.
Adjusting Vertical Position of Blade
The miter saw is factory-adjusted with a
standard blade cutting depth for a 255mm
(10") saw blade (355mm (14") saw blade
for Model LS1410). Thus,
IF
YOU ARE
NOT USING A STANDARD SAW BLADE,
loosen the hex nut on the end
of
the gear
housing and use a minus escrewdriver
to
turn the cutting depth adjustment bolt to
the right. Adjust
so
that when the operat-
ing handle
is
in
the fully lowered position
there will be a distance
of
about 122mm
(4-13/16") (about 160mm (6-5/16") for
Model LS1410 from the front face
of
the
guide fence (guide rule)
to
the point where
the front edge
of
the blade enters the kerf.
(See diagram at right.) This will produce
the correct depth adjustment. Then tighten
the hex. nut.
4.
Safety Cover (Prevents Contact with Blade)
The see-through safety cover (lower blade
guard) raises as the work is contacted and
cutting begins, and
it
returns to its original
position when cutting is completed. Never
lock the guard at a fixed position. Always
use the guard in the freely telescoping con-
dition for your personal safety. Any irregu-
lar operation of the safety guard should be
corrected promptly. Never use the miter
saw with a faulty guard.
Fig.
3
Fig.
4
Fig.
5
cover
__
Fig.
!
6
*If
the see-through guard becomes dirty
or
sawdust adheres in such a way that the blade
and/or work may not be easily visible, clean it
off
carefully with a damp cloth.
ALWAYS UNPLUG
THE
TOOL before you perform any cleaning.
4
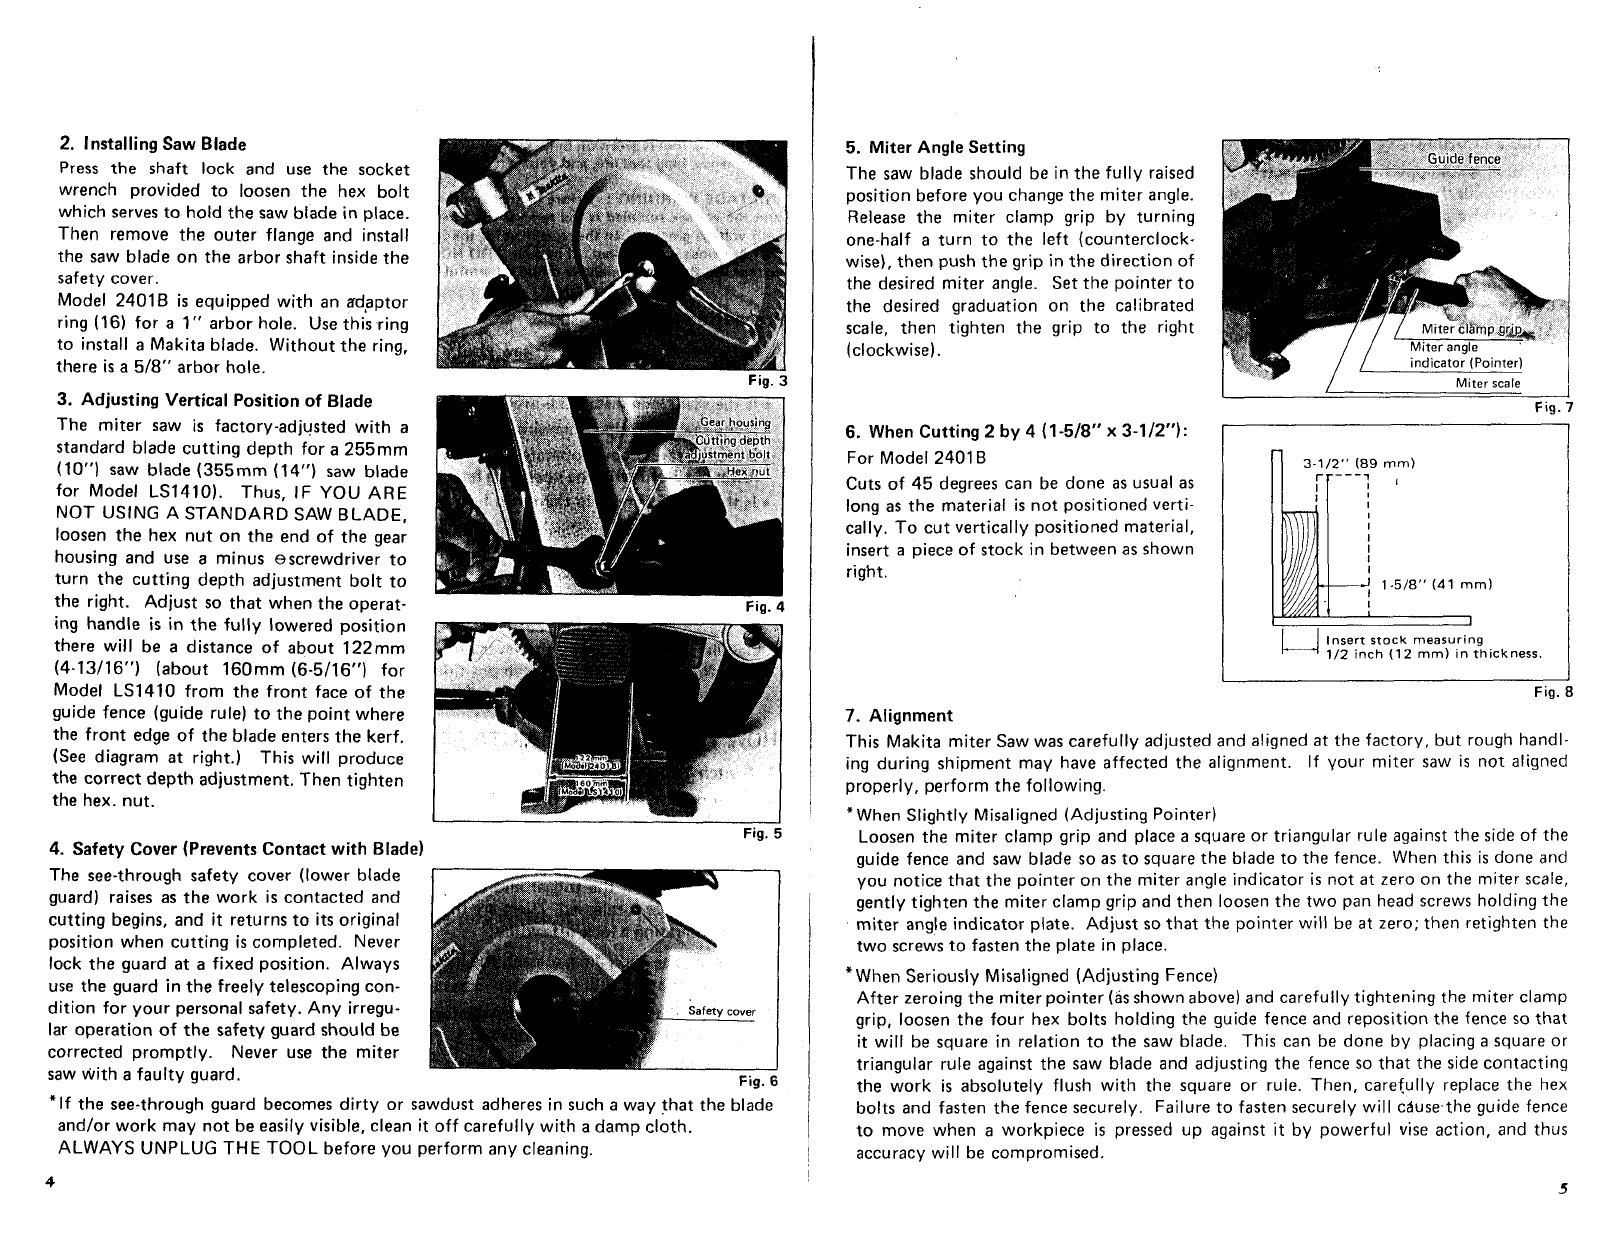
5.
Miter Angle Setting
The saw blade should be in the fully raised
position before you change the miter angle.
Release the miter clamp grip by turning
one-half a turn
to
the left (counterclock.
wise), then push the grip in the direction
of
the desired miter angle. Set the pointer to
the desired graduation on the calibrated
scale, then tighten the grip to the right
(clockwise).
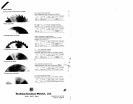
6.
When Cutting
2
by
4
(1-5/8"
x
3-1/2"):
For
Model 2401
B
Cuts
of
45
degrees can be done as usual as
long as the material is not positioned verti-
cally.
To
cut vertically positioned material,
insert a piece
of
stock in between as shown
right.
I
Miter
scale
--
Fig.
---
I'
I
I
I
I
I
I
I
I
-J
1~5/8"
(41
mm)
I
L
Insert
stock
measuring
(12
mm)
in thickness.
Fig.
7.
Alignment
This Makita miter Saw was carefully adjusted and aligned at the factory, but rough handl-
ing during shipment may have affected the alignment.
If
your miter saw
is
not aligned
properly, perform the following.
*When Slightly Misaligned (Adjusting Pointer)
Loosen the miter clamp grip and place a square
or
triangular rule against the side
of
the
guide fence and saw blade
so
as to square the blade to the fence. When this
is
done and
you notice that the pointer on the miter angle indicator is not at zero on the miter scale,
gently tighten the miter clamp grip and then loosen the two pan head screws holding the
miter angle indicator plate. Adjust
so
that the pointer will be at zero; then retighten the
two screws
to
fasten the plate in place.
After zeroing the miter pointer
(as
shown above) and carefully tightening the miter clamp
grip, loosen the
four
hex bolts holding the guide fence and reposition the fence
so
that
it will be square in relation
to
the saw blade.
This can be done by placing
a
square
or
triangular rule against the saw blade and adjusting the fence
so
that the side contacting
the work is absolutely flush with the square
or
rule. Then, carefully replace the hex
bolts and fasten the fence securely. Failure to fasten securely will cduse,the guide fence
to
move when a workpiece
is
pressed up against it by powerful vise action, and thus
accuracy will be compromised.
*When Seriously Misaligned (Adjusting Fence)
5