


P 2/ 5
Repair
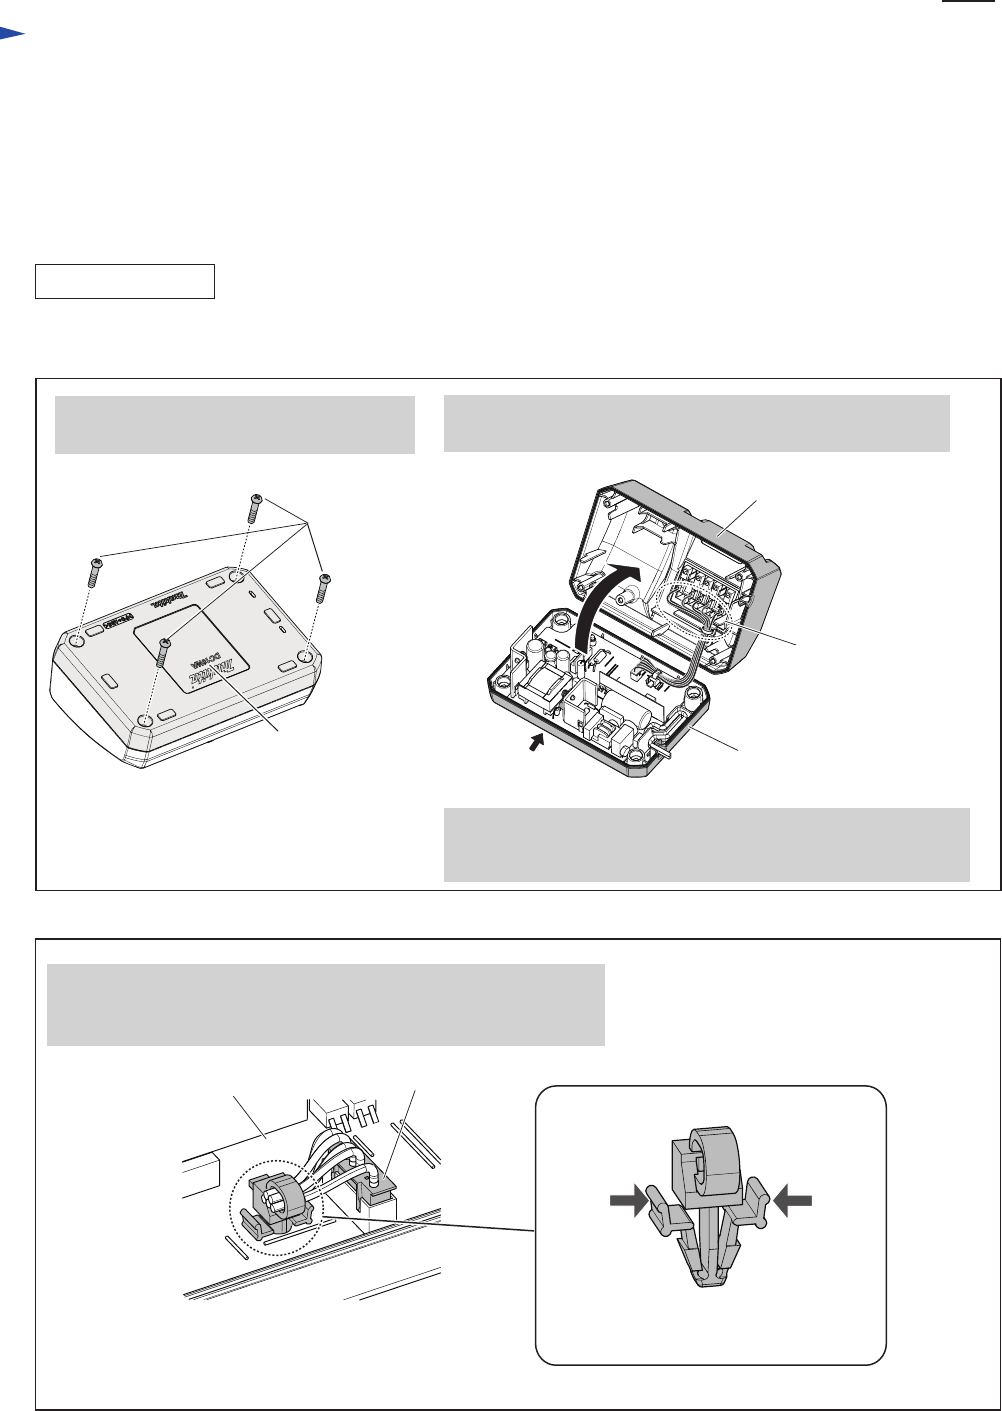
[1] DISASSEMBLY/ASSEMBLY FOR DC18WA
[1] -1. Terminal unit and Charger case complete
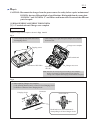
Fig. 1
CAUTION: Disconnect the charger from the power source for safety before repair/ maintenance!
DC18WA has two different kinds of specifications. Distinguish them by name plate
“DC18WA” and “DC18WA U” and follow each insturction. Do not use the different
parts in repair.
DISASSEMBLING
1. Turn Charger upside down and remove
four tapping screws.
2. Turn Charger over again and open Charger case complete
from rear side.
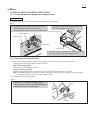
Charger case complete
Terminal unit
Charger case cover
*Open from
this side
Replace Charger case complete as drawn in Figs. 1 and 2.
Note: Terminal unit is fully integral with Charger case complete.
When it is necessary to replace Terminal unit, replacing
Charger case complete and Charging condition label is required.
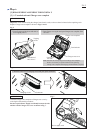
Fig. 2
Charging circuit
Connector
3. When replacing Charger case complete;
(1) By pinching Push mount tie, remove it from Charging circuit.
(2) Remove Connector from Charging circuit.
Push mount tie
Pinch both levers of Push mount tie
when pulling it off from Charger circuit.
Tapping screws
Indication of DC18WA