


P 3
/ 5
Repair
[1] DISASSEMBLY/ASSEMBLY FOR DC18WA
[1] -1. Terminal unit and Charger case complete (cont.)
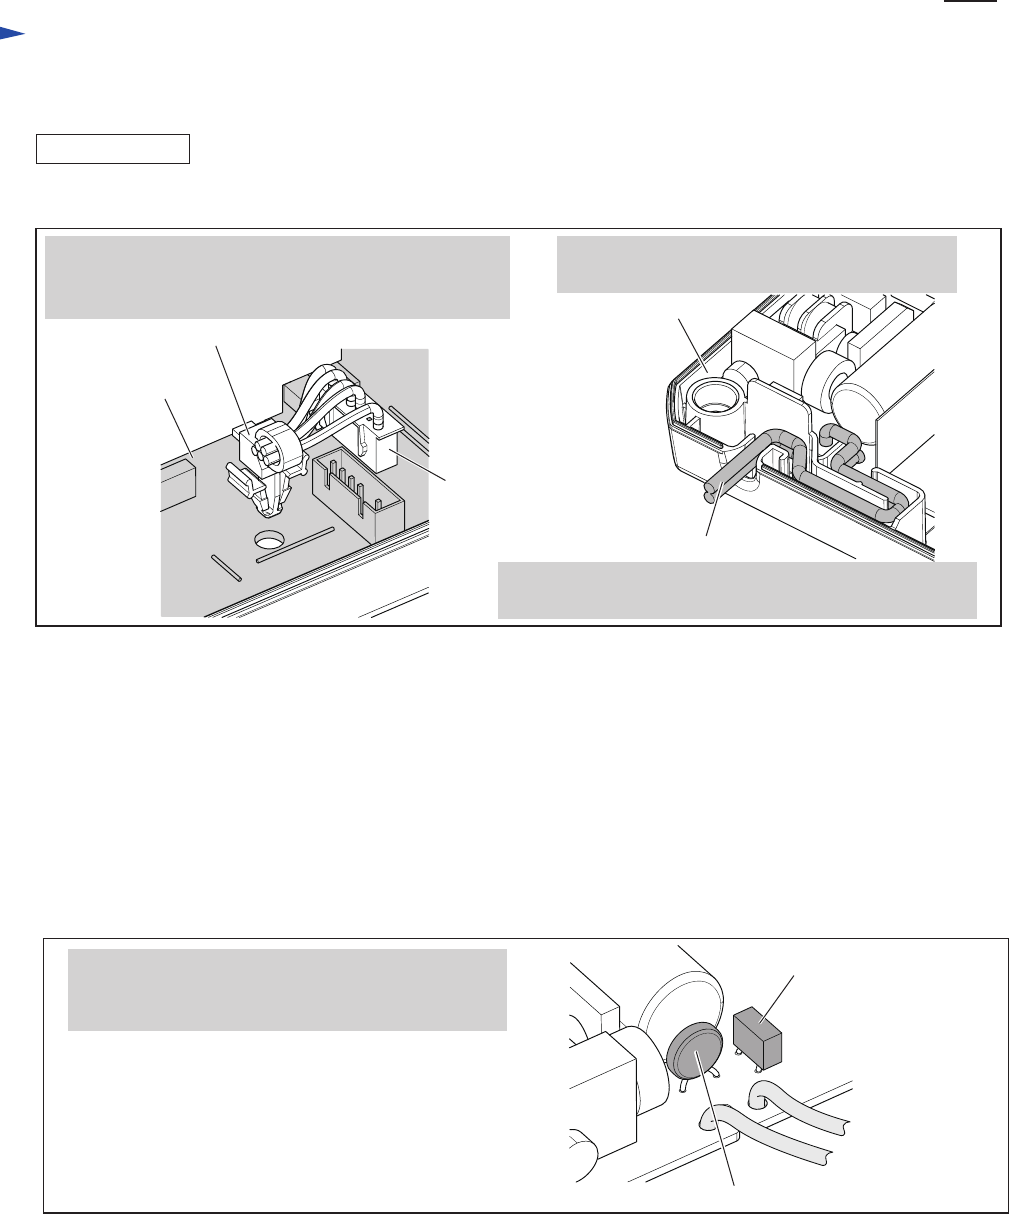
Fig. 3
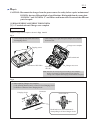
1. Set Connector on Charging circuit as drawn below.
Then insert Push mount tie into the hole of
Charging circuit until its levers are fixed in the hole.
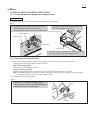
3. Assemble Charger case complete to Charger case cover.
Be sure to securely tighten four tapping screws.
ASSEMBLING
Assemble Charger case cover and Charger case complete as drawn in Fig. 3.
Charging circuit
Push mount tie
Connector
Lead wires
Charger case cover
[1] -2. Replacing Varistor and Fuse
(1) If the cause of Battery charger trouble is the breakage of Varistor and Fuse, you need not replace
Charging circuit, but simply replace Varistor and Fuse.
Sign of Varistor breakage:
Cracks exists in the surface of Varistor.
Cause of Varistor breakage:
Charger is plugged in a power source of two times or more than the rated voltage of Varistor.
Note: If Fuse has burned out meanwhile Varistor is not broken, something else in Charging circuit is probably
causing the trouble. In this case, replace Charger circuit.
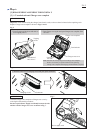
(2) Replace Varistor and Fuse. (Fig. 4)
Fig. 4
Varistor/ Fuse is soldered on Charging circuit.
Remove a broken Varistor/ Fuse with soldering iron.
And solder new one with soldering iron.
Fuse
Varistor
2. Push Lead wires firmly between the ribs and
the wall of Charger case cover.