


[4] DISASSEMBLY/ASSEMBLY
[4]-7. Ignition (cont.)
Repair
P 8/ 14
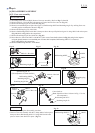
ASSEMBLING OF IGNITION COIL
See Fig. 34.
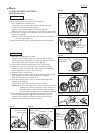
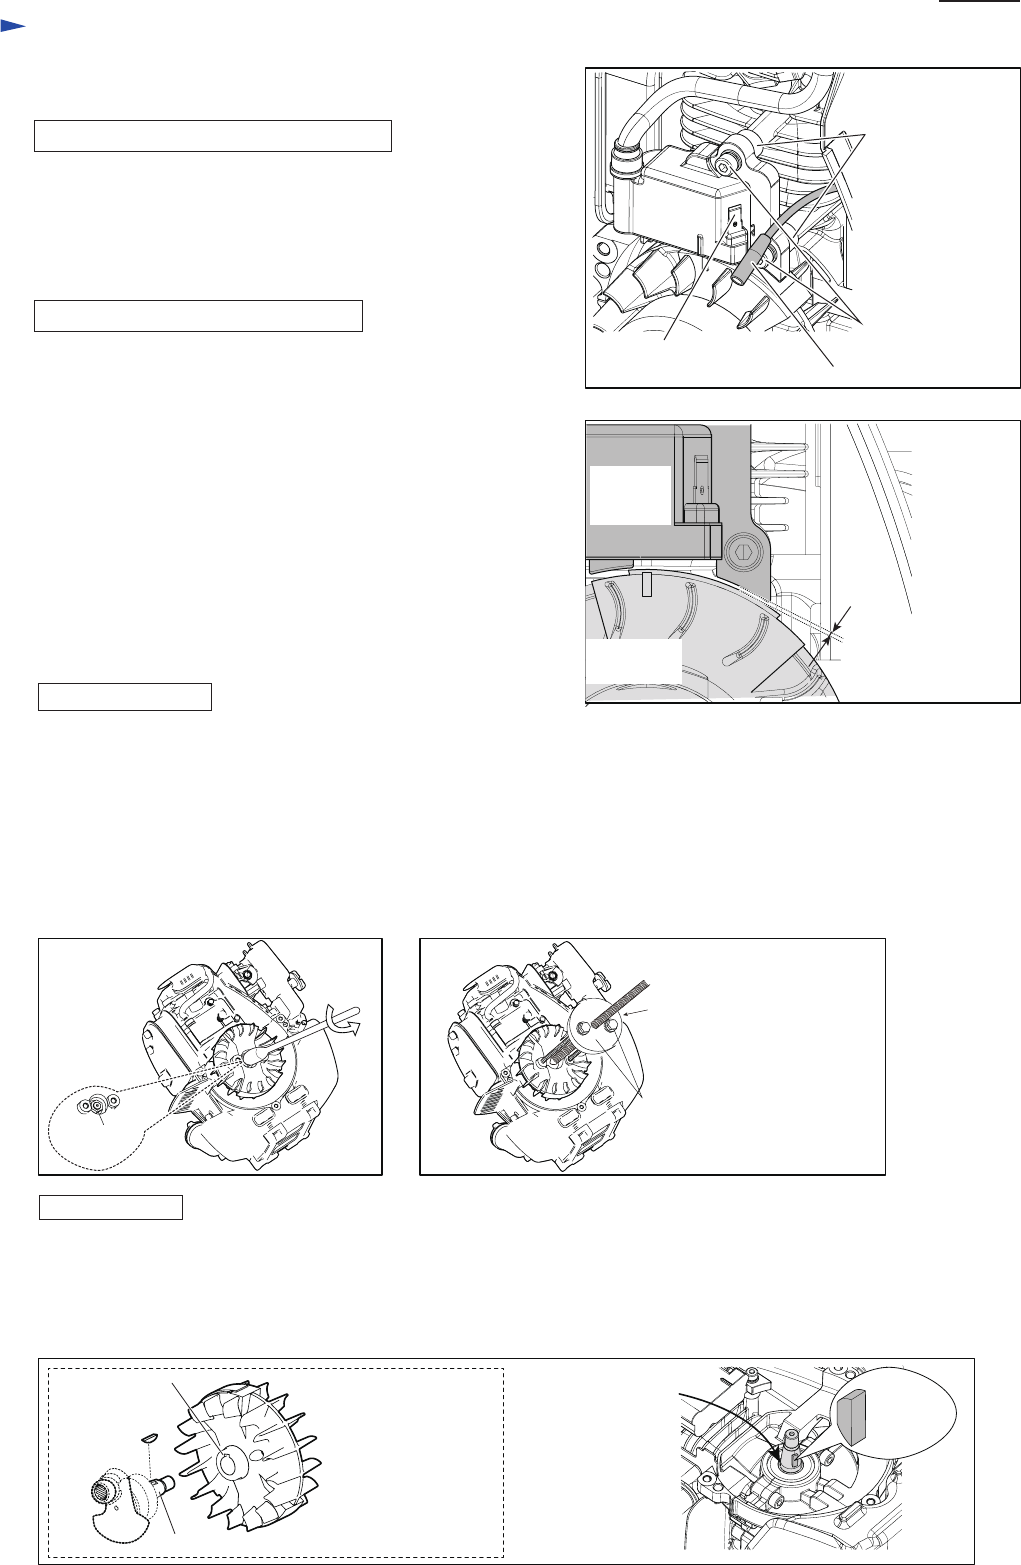
(1) Remove Cylinder cover and cable from Ignition coil terminal.
(2) Loosen two M4x20 Hex socket head bolts and remove Ignition
coil from Engine.
Note: Do not lose two spacers on the bolts as the heat protection.
See Fig. 35.
(1) While attaching 0.3mm thickness gauge of 1R366 to the magnet
portion of Flywheel, set Ignition coil in place.
Note: Two M4x20 Hex socket head bolts (Fig. 34) are with
threadlocker. Therefore, when re-using them,
apply ThreeBond 1342 or Loctite 242 to the threads.
(2) After setting Ignition coil, remove the thickness gauge then turn
Flywheel by hand to check if it turns smoothly
without being stuck.
Note: Be sure to insert Spacer on M4x20 Hex socket head bolt
when fastening Ignition coil to Engine. (Fig. 34)
(3) Assemble Cylinder cover to Engine.
Fig. 34
Fig. 35
DISASSEMBLING OF IGNITION COIL
M4x20 Hex socket
head bolt (2pcs.)
Spacer
(2pcs.)
Earth terminal of Ignition
coil to connect with Cable
Connector of Cable
Clearance between
Flywheel and
Ignition coil: 0.3mm
Ignition
coil
Flywheel
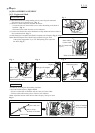
[4]-8. Flywheel
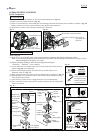
Note: • Flywheel can be easily removed without holding the piston.
• Do not remove Spark plug as compressed air resistance has to be used for the disassembling.
• Plug cap with Plug cap spring has to be removed from Spark plug to prevent Engine from running. (Fig. 31)
(1) Turn M8 Flange nut in the center of Flywheel counterclockwise using Cordless impact driver with 13mm Socket bit.
(Fig. 36)
(2) Install 1R364 on Flywheel then screw two M6 bolts into Flywheel as drawn in Fig. 37 instead of
M6x25 shoulder hex bolts. Flywheel is removed from Engine.
Important: Screw two M6 bolts evenly.
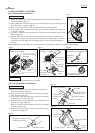
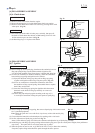
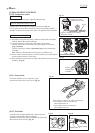
ASSEMBLING
(1) Wipe off the grease and oil from Crank shaft. (Fig. 38)
(2) Put Woodruff key 3 into Crank shaft, then align the key groove of Flywheel to the crank shaft with the key. (Fig. 38)
(3) Screw M8 Flange nut to the thread of Crank shaft by turning the nut clockwise by hand.
(4) Tighten M8 flange nut about two seconds using Cordless impact driver with 13mm socket bit.
Fig. 36
Fig. 38
Fig. 37
DISASSEMBLING
1R364
M6 bolts
(the components of 1R364)
Flange nut
(M8)
Wipe off the grease and
oil from Crank shaft
in advance.
Woodruff
key 3
Crankshaft in cylinder block assembly)
Key groove of
Flywheel’s hole