


Repair
P 6 / 22
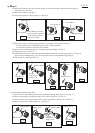
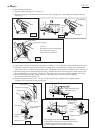
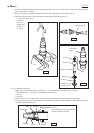
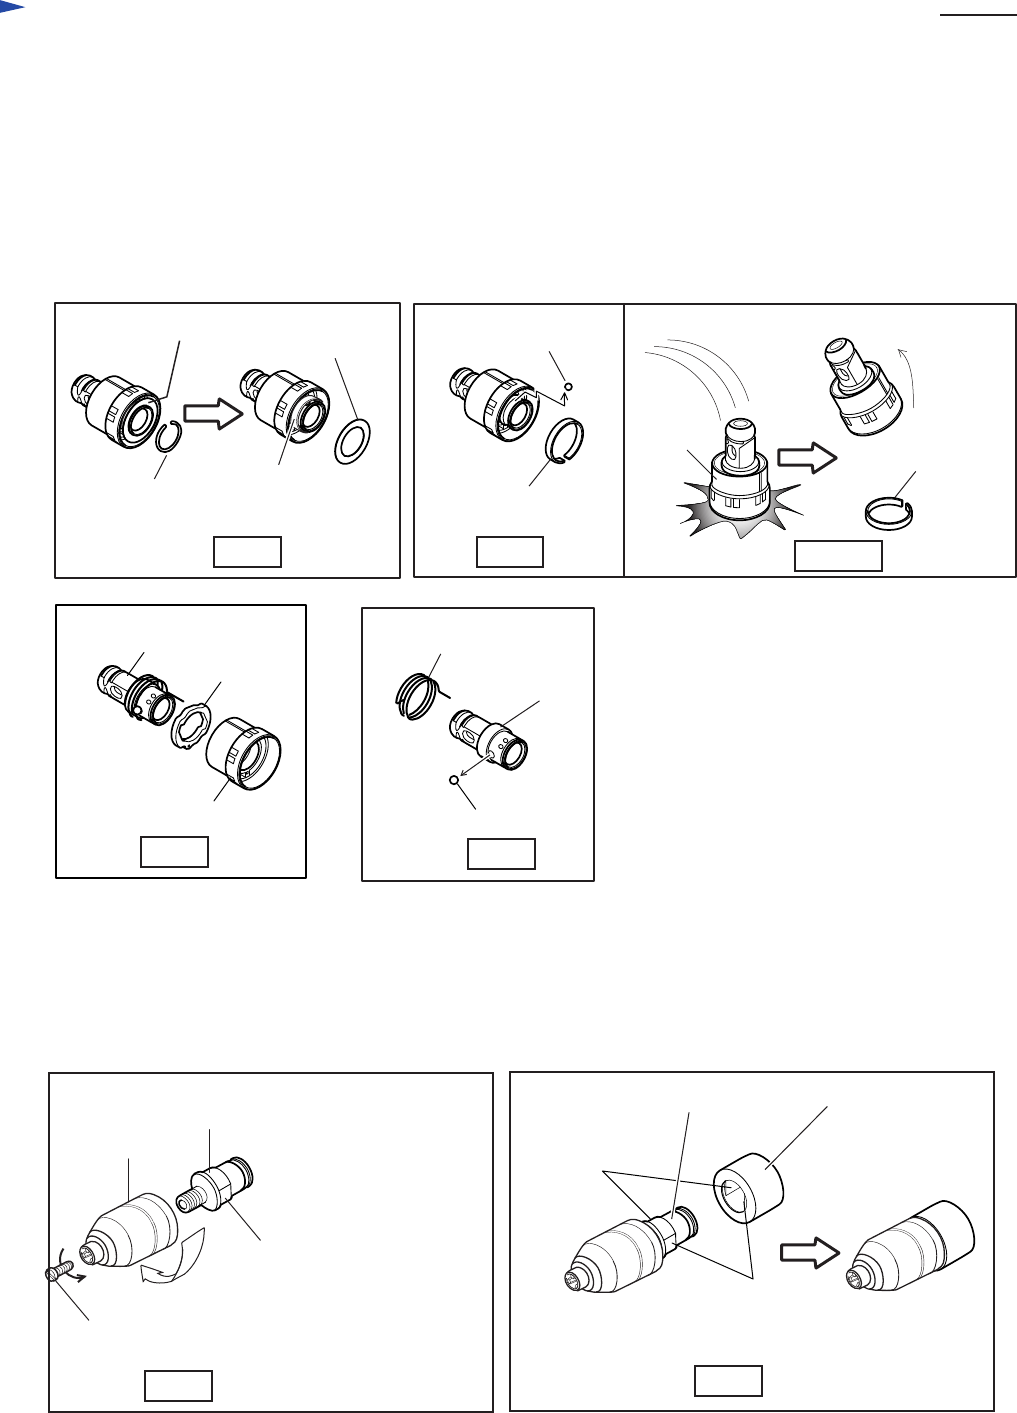
< 5 > Assembling quick change drill chuck
Leaf spring
Flat washer 24
Flat washer 24
Ring spring 21
Steel ball 5.0
Leaf spring
Leaf spring
Fig. 15
Fig. 16
Fig. 18
Fig. 16A
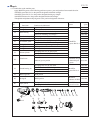
(5) Remove ring spring 21. Then, flat washer 24 can be removed from tool holder. See Fig. 15.
(6) Remove leaf spring with No.1R212 "Retaining Ring Plier". Then, steel ball 5.0 can be removed from tool holder.
See Fig. 16.
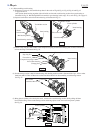
If it is difficult to remove leaf spring with No.1R212 "Retaining Ring Plier", slightly knock the change cover
to the working table several times. Then, leaf spring can be removed. See Fig. 16A.
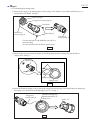
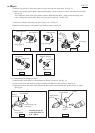
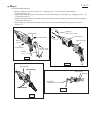
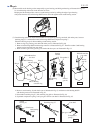
(7) Remove tool holder and change ring from change cover. See Fig. 17.
(8) Remove torsion spring 31 and steel ball 6.0 from tool holder. See Fig. 18.
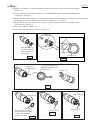
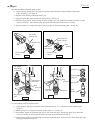
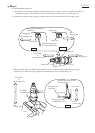
(1) Mount keyless drill chuck 13 to chuck holder by turning it clockwise. See Fig. 19.
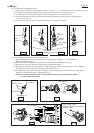
(2) Secure the keyless drill chuck by turning flat head screw M6x22 counter-clockwise. See Fig. 19.
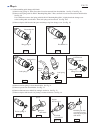
(3) Mount the keyless drill chuck, while aligning the flat portion of chuck holder with the flat portion of spacer.
See Fig. 20.
Fig. 17
Tool holder
Change ring
Change cover
Torsion spring 31
Tool holder
Steel ball 6.0
Chuck holder
Hold this part with
vise firmly.
Keyless
drill chuck 13
Flat head
screw M6x22
Fig. 19
Align the flat
portion.
Align the flat
portion.
Chuck holder
Spacer
Fig. 20
Change
cover
Fastening torque for
keyless drill chuck 13
is 36 - 46N.m.