


8
FUNCTIONAL DESCRIPTION
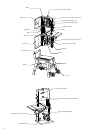
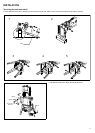
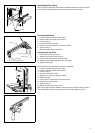
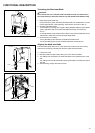
Switch action
CAUTION:
• Before operation, make sure that the tool is turned on and off.
The switch cover can be opened easily by sliding it upwards.
To start the tool, press the ON (I) button.
To stop it, press the OFF (O) button or the switch cover.
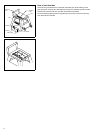
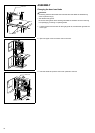
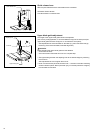
Lighting up the lamps
Push the upper position (I) of the switch for turning on the light and the lower position
(O) for off.
To start the tool, raise the switch lever.
To stop it, lower the switch lever.
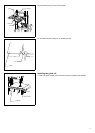
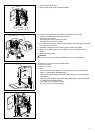
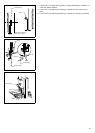
Push stick
The push stick serves as an extension of the hand and protects against accidental
contact with the saw blade.
The push stick must always be used if the distance between band saw blade and a
rip fence is less than 150 mm.
Guide the push stick at an angle of 20º ... 30º against the saw table’s surface.
When the push stick is not used it can be stored on the push stick holder provided at
the band saw frame.
Replace push stick if damaged.
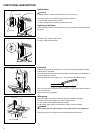
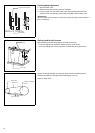
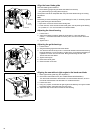
Miter gauge
The miter gauge is inserting into the table slot from the tables front edge.
For miter cuts the miter gauge turns to 60º in both directions.
For 45º and 90º miters positive stops are provided.
To set a miter angle: loosen lock handle by turning it counter-clockwise.
WARNING:
When cutting with the miter gauge the lock handle must be firmly tightened.
The auxiliary fence can be taken off and reversed after loosening knob.
Switch cover
Light switch
ON switch
OFF switch
ON
Push stick
Miter gauge
Lock handle
Knob