


14
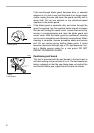
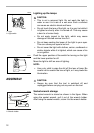
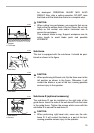
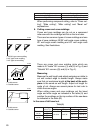
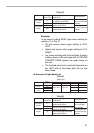
To install the blade, mount it carefully onto the spindle, mak-
ing sure that the direction of the arrow on the surface of the
blade matches the direction of the arrow on the blade case.
Install the outer flange and hex bolt, and then use the socket
wrench to tighten the hex bolt (left-handed) securely counter-
clockwise while pressing the shaft lock.
Return the blade guard and center cover to its original posi-
tion. Then tighten the hex bolt clockwise to secure the center
cover. Release the handle from the raised position by pulling
the stopper pin. Lower the handle to make sure that the
blade guard moves properly. Make sure shaft lock has
released spindle before making cut.
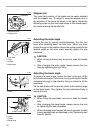
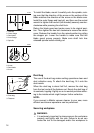
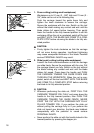
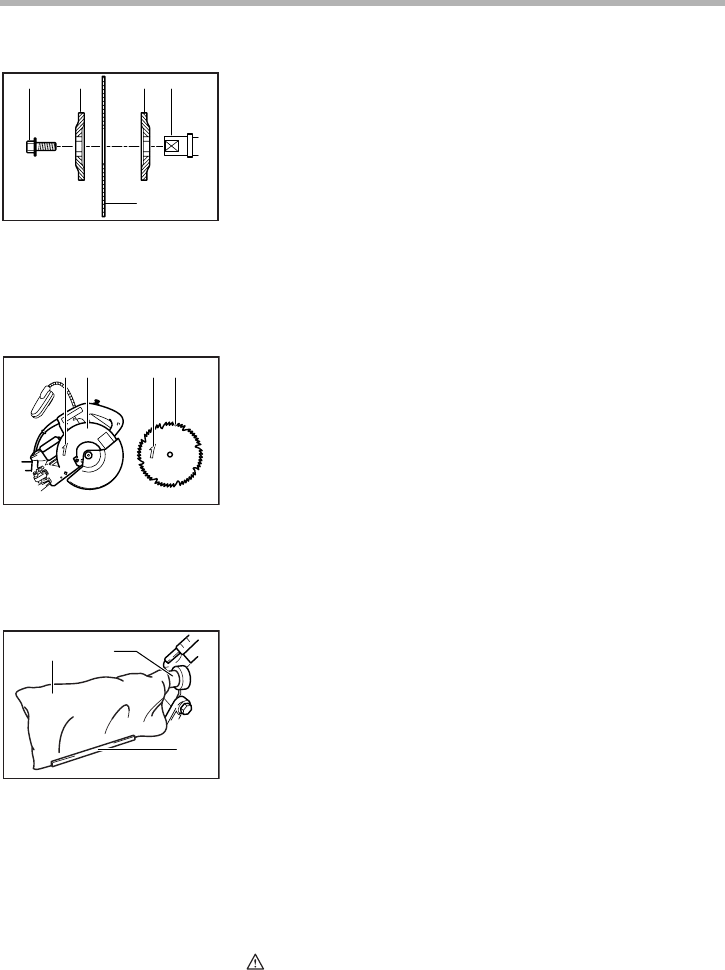
Dust bag
The use of the dust bag makes cutting operations clean and
dust collection easy. To attach the dust bag, fit it onto the
dust nozzle.
When the dust bag is about half full, remove the dust bag
from the tool and pull the fastener out. Empty the dust bag of
its contents, tapping it lightly so as to remove particles adher-
ing to the insides which might hamper further collection.
NOTE:
If you connect a Makita vacuum cleaner to your saw, more
efficient and cleaner operations can be performed.
Securing workpiece
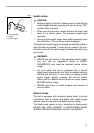
WARNING:
• It is extremely important to always secure the workpiece
properly and tightly with the vise. Failure to do so can
cause the tool to be damaged and/or the workpiece to
1. Hex bolt
2. Outer flange
3. Saw blade
4. Inner flange
5. Spindle
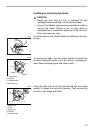
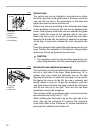
1. Blade case
2. Arrow
3. Saw blade
4. Arrow
12 4
3
5
001786
2 1 4 3
002021
1. Dust nozzle
2. Dust bag
3. Fastener
3
1
2
001536