


OM-1572 Page 4
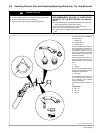
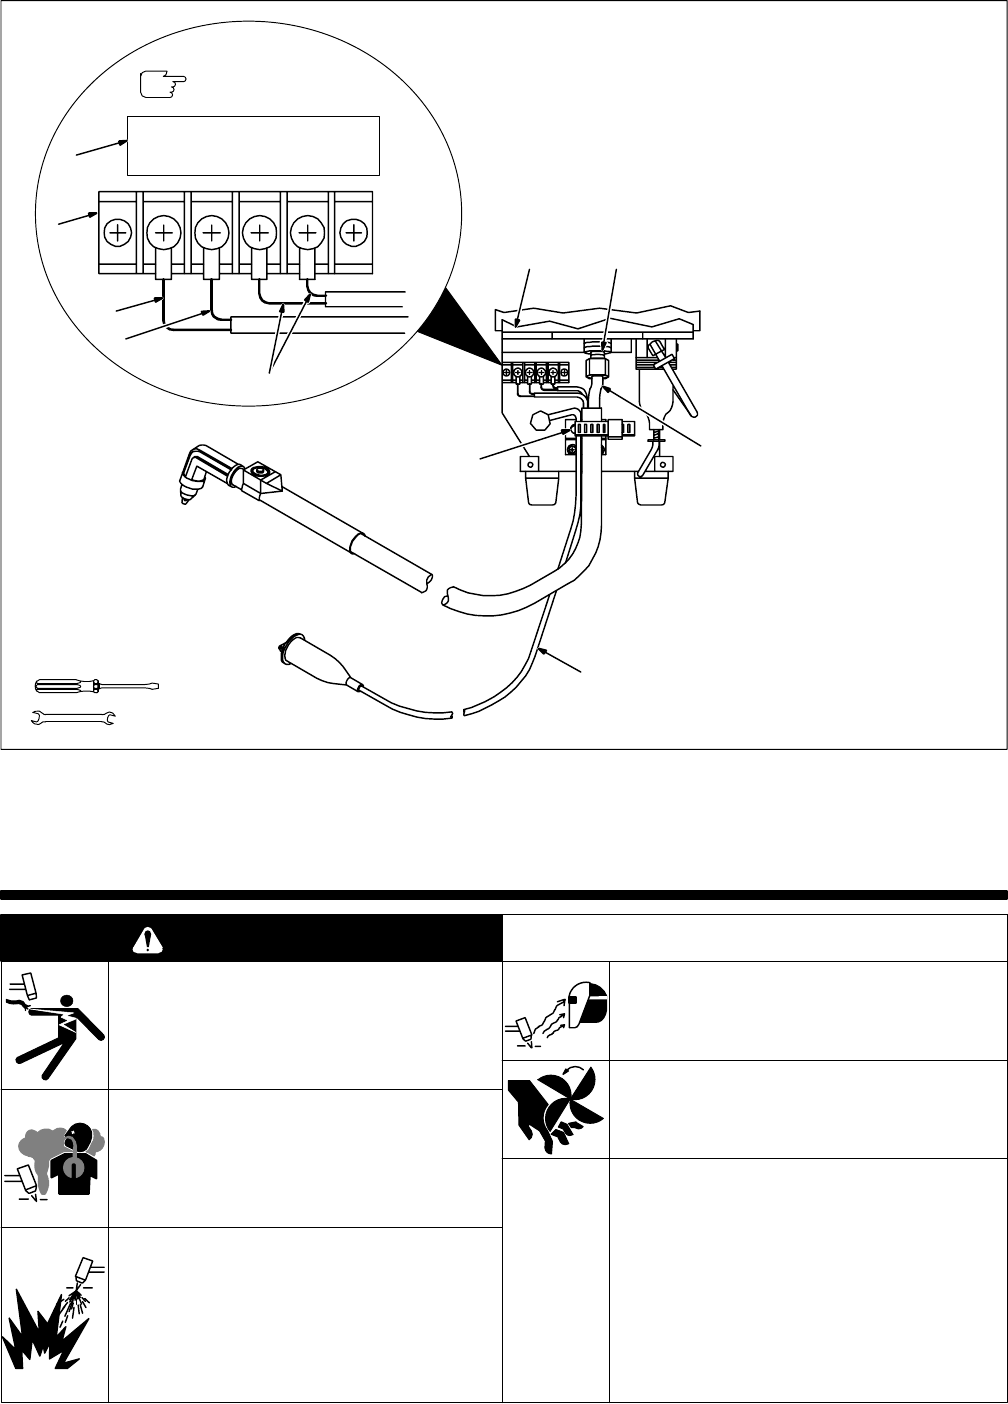
B. Installing Torch In Inverter Power Source
ST-128 701-C
1234
S-137 691
Label is located under
terminal strip.
7
8
9
6
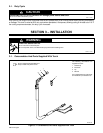
Turn Off power source, and
disconnect input power plug. Open
lower front access door.
1 Access Door
2 Strain Relief Clamp
3 Torch Cable
4 Torch (–) And Air/Gas Output
Connector
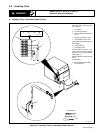
Connect torch cable as shown.
5 Terminal Strip1T
6 Connection Label
7 Pilot Arc/Shield Cup Detector
Lead 1
8 Shield Cup Detector Lead 2
9 Torch Switch Leads 3 And 4
Refer to label and connect leads as
shown.
Install strain relief clamp, and close
access door.
10 Work Cable (Supplied With
Power Source)
5/8 in
Tools Needed:
1
5
3
4
2
10
Figure 3-3. Installing Torch In Inverter Power Source
SECTION 4 – OPERATING THE TORCH
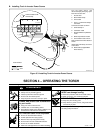
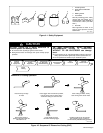
ELECTRIC SHOCK can kill.
• Always wear dry insulating gloves.
• Insulate yourself from work and ground.
• Do not touch live electrical parts.
• Keep all panels and covers securely in place.
FUMES AND GASES can be hazardous
to your health.
• Keep your head out of the fumes.
• Ventilate area, or use breathing device.
• Read Material Safety Data Sheets (MSDSs) and
manufacturer’s instructions for material cut.
CUTTING can cause fire or explosion.
• Do not cut near flammable material.
• Provide protection from flying sparks.
• Watch for fire; keep extinguisher nearby.
• Do not locate unit over combustible surfaces.
• Do not cut on closed containers.
• Allow work and equipment to cool before handling.
ARC RAYS can burn eyes and skin;
NOISE can damage hearing.
• Wear face protection with correct shade of filter.
• Wear correct eye, ear, and body protection.
MOVING PARTS can cause injury.
• Keep away from moving parts.
• Keep all doors, panels, covers, and guards closed
and securely in place.
See Safety Precautions at beginning of manual for ba-
sic cutting safety information.
WARNING
swarn6.1* 10/91