


OM-1572 Page 3
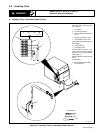
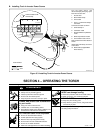
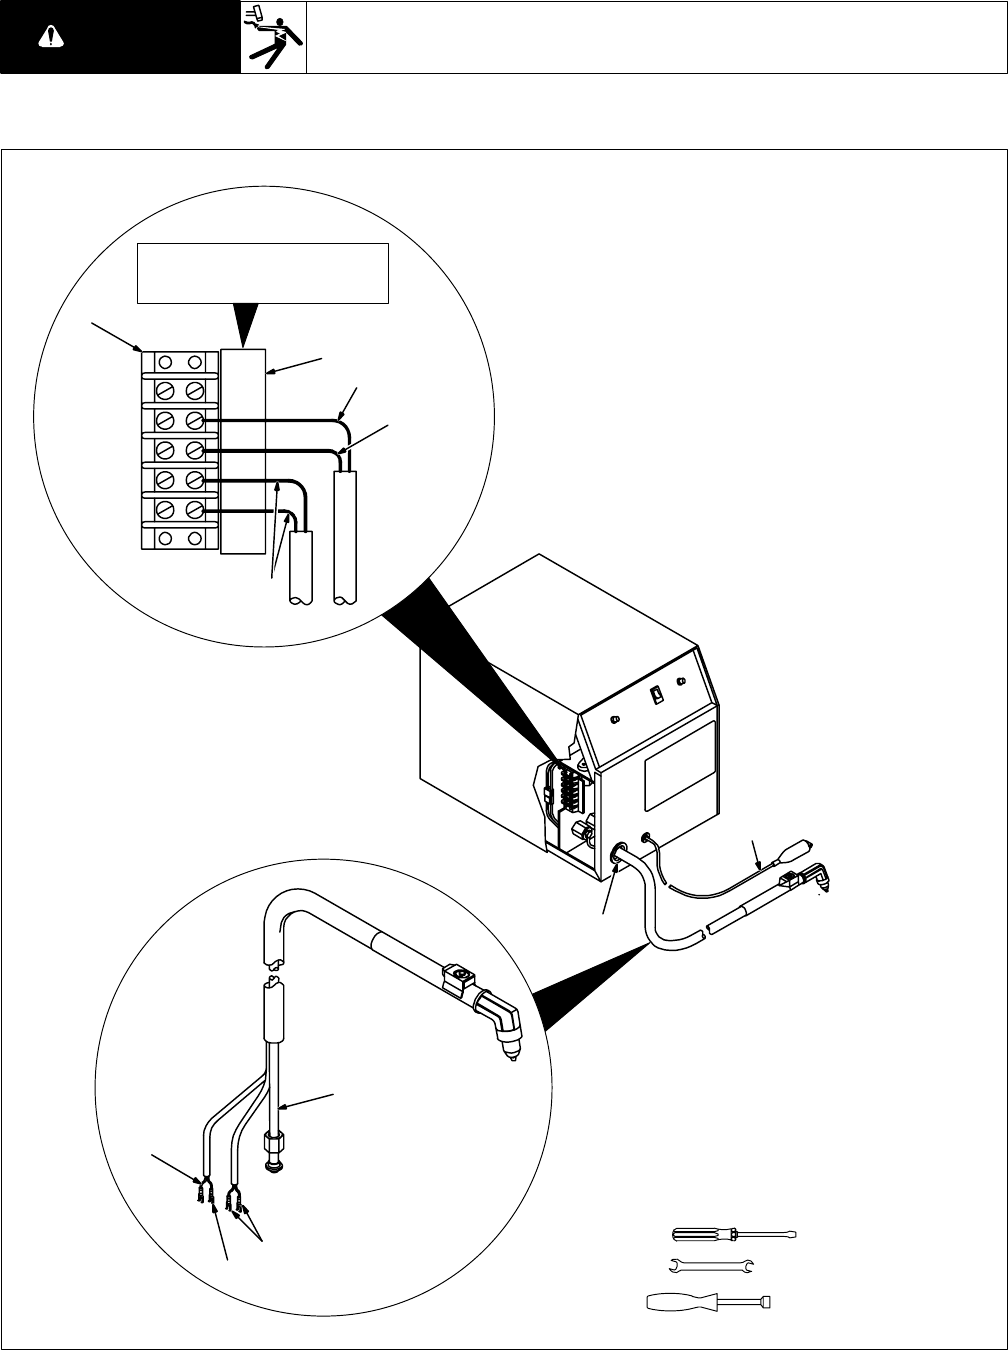
3-2. Installing Torch
READ SAFETY BLOCK at start of
Section 3 before proceeding.
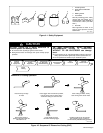
WARNING
A. Installing Torch In Standard Power Source
ST-128 701-C
Turn Off power source, and
disconnect input power plug. Re-
move wrapper.
1 Torch Cable
2 Front Panel Opening
3 Pilot Arc/Shield Cup Detector
Lead 1
4 Shield Cup Detector Lead 2
5 Torch Switch Leads 3 and 4
Route cable and leads through front
panel opening.
6 Terminal Strip 1T
7 Connection Label
Connect cable to air/torch (–) out-
put connector which is not visible in
Figure 3-2, but is located behind
terminal strip 1T.
Refer to label and connect leads as
shown.
Install wrapper.
8 Work Cable (Supplied With
Power Source)
5/8 in
Tools Needed:
1/4 in
1 234
1
2
3
4
5
6
7
8
3
4
5
S-137 691
Figure 3-2. Installing Torch In Standard Power Source