


OM-699 Page 3
SECTION 3 − ASSEMBLY
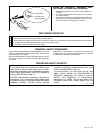
All directions are given as facing the towing vehicle. The word “front” means the
hitch end of the trailer.
NOTE
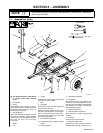
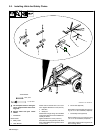
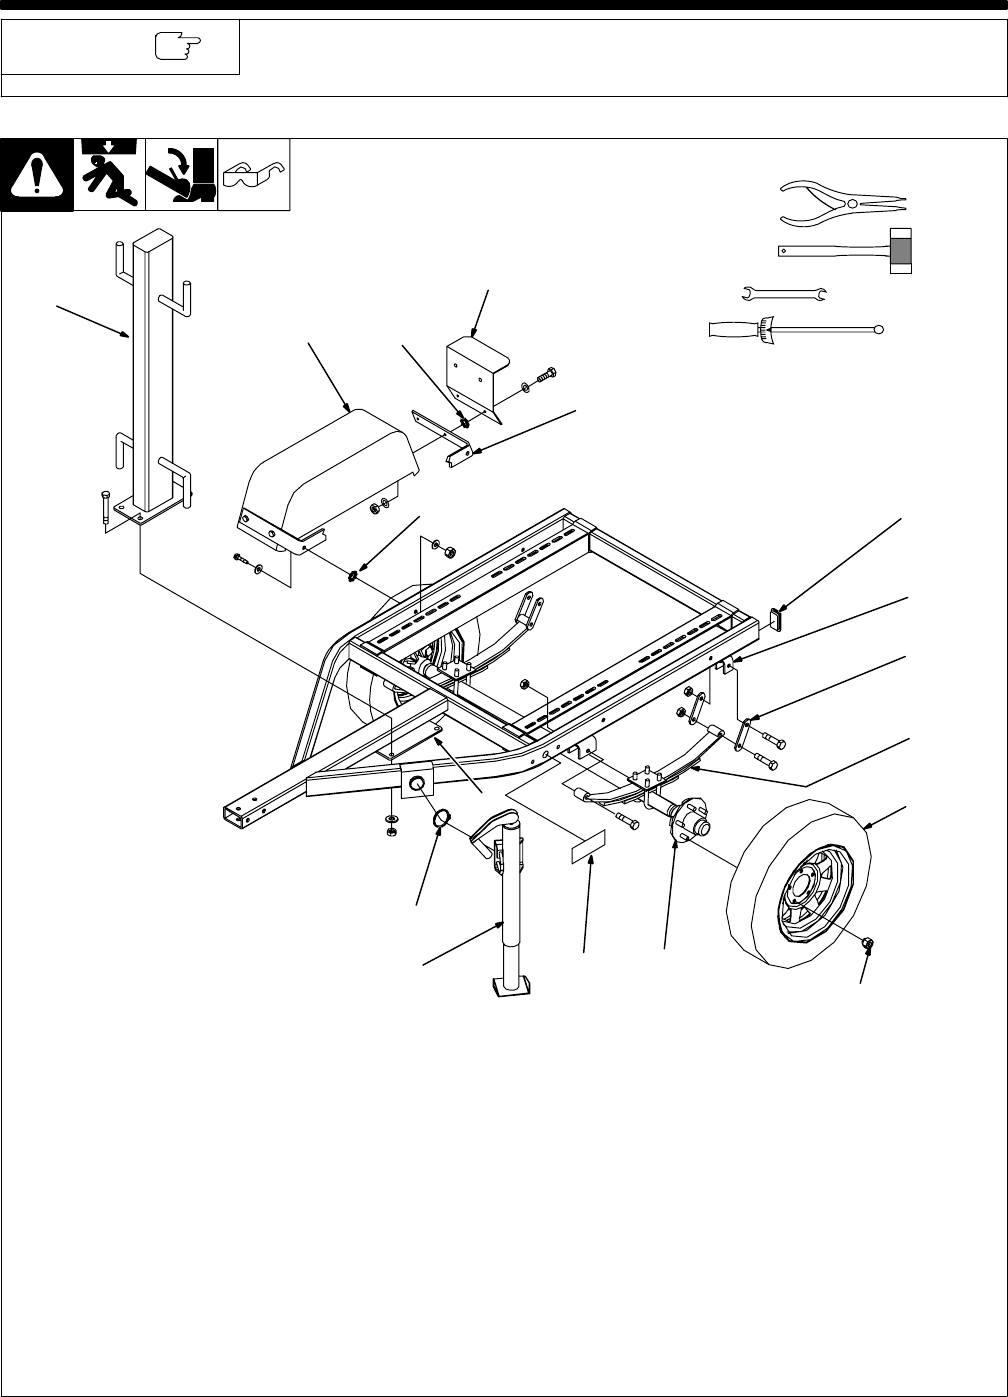
3-1. Assembling Trailer
ST-802 073
Y Use adequate blocks or lifting device
to support frame while installing
parts.
1 Shackle Arm
2 Spring
Attach shackle arms to springs using 9/16
inch hardware. Tighten until bolt and nut are
tight against arms, then loosen nut 1/8 to 1/4
turn so spring moves freely.
3 Shackle Bracket
Attach axle assembly to brackets on frame
using 9/16 inch hardware. Tighten hardware
until bolt and nut are tight against brackets,
then loosen nut 1/8 to 1/4 turn so spring
moves freely.
4 Wheel
5 Hub
6 Lug Nut
Install wheels on hubs. Tighten lug nuts to 60
ft lbs (81 N
.
m). Block wheels.
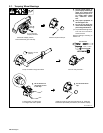
7 Jack
8 Snap Ring
Slide jack over collar. Use snap ring pliers to
secure jack with snap ring.
Rotate jack to down position. Pull pin and ro-
tate jack to vertical position. Pin locks jack in
place. Turn handle to raise or lower trailer.
When jack is not needed, pull pin and rotate
jack to horizontal position.
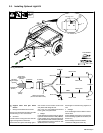
9 Fender Bracket (Optional)
. Install bracket with top angling in (toward
fender).
10 Fender (Optional)
11 Light Bracket (Optional)
12 Star Washer
Mount fender brackets, light brackets, and
fenders on trailer using supplied 3/8 in hard-
ware. Be sure to install star washers between
light brackets and fenders, and between
fender brackets and frame.
13 Cable Tree (Optional)
14 Cable Tree Mounting Bracket
Mount cable tree on trailer using supplied
hardware.
15 End Caps
Install end caps in end of frame.
16 Reflective Amber Label
Apply labels to frame. Labels not required if
installing optional light kit (see Section 3-3).
Tools Needed:
3/8, 7/16 in
9/16, 7/8 in
1
2
3
4
5
6
7
9
10
11
13
14
8
12
12
15
16