


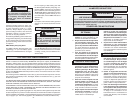

6 7
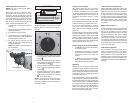
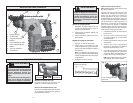
Fig. 3
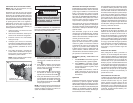
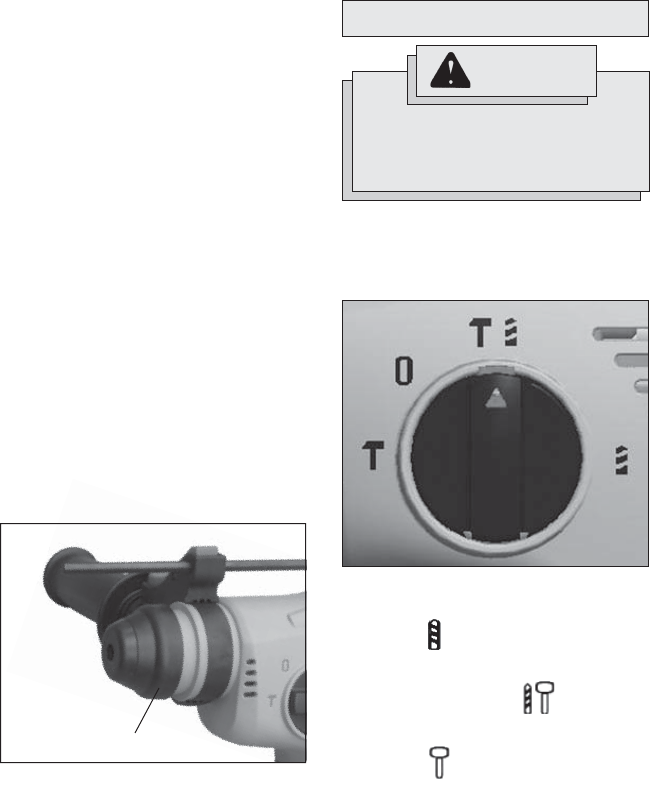
Release collar
Installing Drill Bits and Chisels
NOTE: Only use accessories with SDS or
SDS Plus shanks.
Be sure that the shank of the bit is clean.
Dirt particles may cause the bit to line up
improperly. Do not use bits larger than the
maximum recommended capacity of the drill
because gear damage or motor overloading
may result. For best performance, be sure
that the bit is properly sharpened and the
shank is lightly greased before use.
1. Insert the bit or chisel into the nose of
the tool.
2. Rotate bit slowly until it aligns with the
locking mechanism.
3. Push bit into tool until it locks.
4. Check that the bit is locked properly; it
should be possible to pull the bit back
and forth slightly (about 1/4”).
5. To remove bits and chisels, pull bit
holder release collar toward the rear of
tool and remove bit.
NOTE: Use caution when handling hot
bits and chisels.
WARNING
To reduce the risk of injury, keep
hands away from the bit and all mov-
ing parts. Always wear safety goggles
or glasses with side shields.
OPERATION
Starting, Stopping and Controlling Speed
1. To start the tool, grasp the handle fi rmly
and pull the trigger.
2. To vary the speed, increase or decrease
the pressure on the trigger. The further
the trigger is pulled, the greater the
speed.
3. To stop the tool, release the trigger.
Make sure the tool comes to a complete
stop before laying the tool down.
Operating
Position the tool, grasp the handles fi rmly
and pull the trigger. Always hold the tool se-
curely using both handles to maintain control.
This tool has been designed to achieve top
performance with only moderate pressure.
Let the tool do the work.
If the speed begins to drop off when drilling
large or deep holes, pull the bit partially out of
the hole while the tool is running to help clear
dust. Do not use water to settle the dust since
it will clog the bit fl utes and tend to make the
bit bind in the hole. If the bit should bind, a
built-in, non-adjustable slip clutch prevents
the bit from turning. If this occurs, stop the
tool, free the bit and begin again.
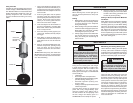
1. For drilling, turn the selector lever so the
arrow on the lever points to the twist drill
symbol .
2. For rotary hammering, turn the selector
lever so the arrow points to the hammer
and twist drill symbol .
3. For hammering only, turn the selector
lever so the arrow points to the hammer
symbol .
4. To freely rotate the bit to the desired
angle for chiseling only, turn the selector
lever so the arrow points to the symbol
. Then, follow step 3.
NOTE: To engage the hammering mecha-
nism, maintain pressure on the bit. When
pressure on the bit is released, the hammer-
ing action will stop.
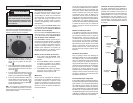
Selecting Action
MILWAUKEE Rotary Hammers have three
settings: drill only, rotary hammer, and ham-
mer only.
O
Fig. 4
Using the Control Switch
The control switch may be set to three
positions: forward, reverse and lock. Due
to a lockout mechanism, the control switch
can only be adjusted when the trigger is not
pulled. Always allow the motor to come to
a complete stop before using the control
switch.
For forward (clockwise) rotation, push in the
control switch from the left side of the tool.
Check the direction of rotation before use.
For reverse (counterclockwise) rotation,
push in the control switch from the right
side of the tool. Check direction of rotation
before use.
To lock the trigger, push the control switch to
the center position. The trigger will not work
while the control switch is in the center locked
position. Always lock the trigger or remove
the battery pack before performing mainte-
nance, changing accessories, storing the tool
and any time the tool is not in use.
V28™ Lithium-Ion Battery Pack
Unlike other battery pack types, Lithium-Ion
battery packs deliver fade-free power for their
entire run time. The tool will not experience
a slow, gradual loss of power as you work.
To signal to you that the V28 battery pack
is at the end of its run time and needs to be
charged, power to the tool will drop quickly.
When this happens, remove the tool from
the workpiece and charge the battery pack
as needed.
Battery Pack Protection
To protect itself from damage and extend its
life, the V28 battery pack's intelligent circuit
will turn off the battery pack if its internal
temperature becomes too high. This could
happen in extremely high torque, binding
and stalling situations. The pack must be
placed on the charger to turn it back on.
The charger's light indicator will fl ash red,
indicating that the pack is too hot. Once the
light is continuously red, the pack has cooled
and can be used again.
Cold Weather Operation
The V28 Lithium-Ion battery pack can be
used in temperatures down to -4°F. When
the battery pack is very cold, it may pulse for
the fi rst minute of use to warm itself up. Put
the battery pack on a tool and use the tool in
a light application. After about a minute, the
pack will have warmed itself up and operate
normally.