


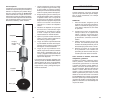
8 9
Using Core Bits
Core bits are useful for drilling large holes for
conduit and pipe. MILWAUKEE Heavy-Duty
Thin Wall Core Bits have heat treated steel
bodies with durable carbide tips. They are
specially designed for fast, accurate drill-
ing with combined hammering and rotary
action.
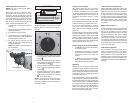
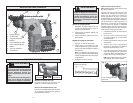
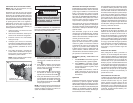
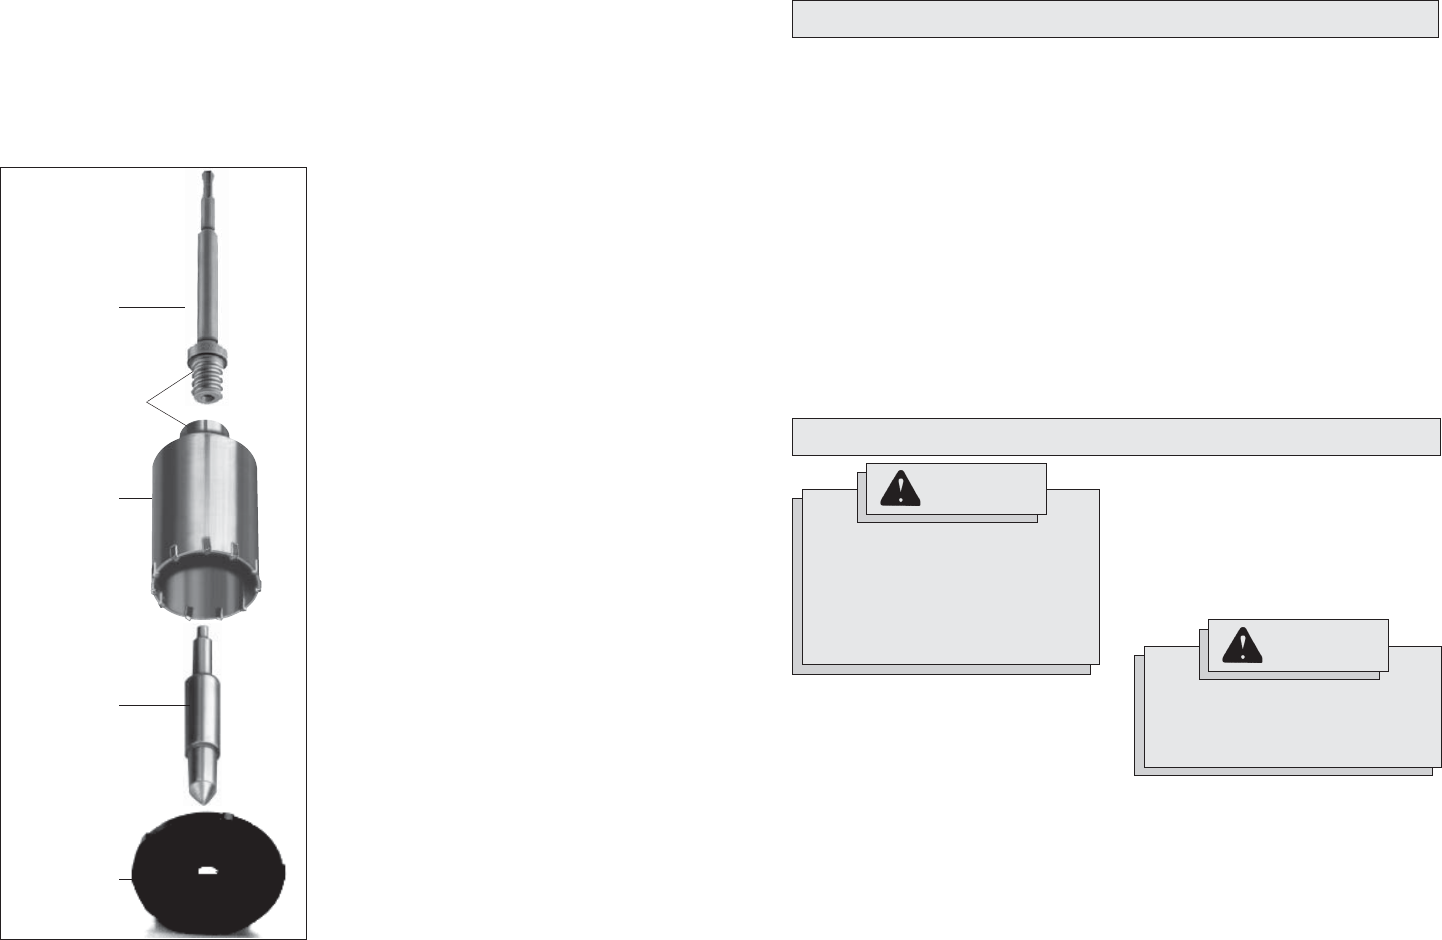
Adapter
Core Bit
Center Pin
Guide Plate
Clean and
lubricate
threads
Fig. 5
Selecting Bits
When selecting a bit, use the right type for
your job. For best performance, always use
sharp bits.
Drilling
1. Before drilling, be sure the workpiece is
clamped securely. Use backing material
to prevent damage to the workpiece
during breakthrough.
2. When starting a hole, place the drill bit on
the work surface and apply fi rm pressure.
Begin drilling at a slow speed, gradually
increasing the speed as you drill.
3. Always apply pressure in line with the bit.
Use enough pressure to keep the drill
biting, but do not push hard enough to
stall the motor.
APPLICATIONS
1. Clean and lubricate the threads on the
adapter and core bit as indicated (Fig. 5)
to make later removal easier. Screw the
threaded end of the adapter into the rear
of the core bit.
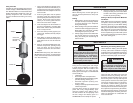
2. Push the guide plate onto the pointed
end of the center pin. Insert the center
pin with guide plate a ssembly into to the
core bit. Be sure the small end of the
center pin is securely placed into the
hole in the center of the adapter.
3. Insert the adapter into the bit holder of
the tool as described in “Inserting Drill
Bit or Chisel”. Set the rotary hammer/drill
lever to rotary hammer.
4. Press the center pin fi rmly against your
center mark, hold the tool fi rmly and pull
the trigger.
5. After drilling to about the depth of the
core bit teeth, remove the center pin and
guide plate from the core bit. Resume
drilling.
6. After you have fi nished drilling the hole,
hold the tool upwards, pointing it away
from your body, and run it briefly in
forward to loosen the core bit from the
adapter.
MILWAUKEE Heavy-Duty Thin Wall Core
Bits drill holes up to 3" deep. To make deeper
holes, remove the bit, break and remove the
core. Resume drilling.
4. Reduce pressure and ease the bit
through the last part of the hole. While
the tool is still running, pull the bit out of
the hole to prevent jamming.
Drilling in Wood, Composition Materials
and Plastic
When drilling in wood, composition materials
and plastic, start the drill slowly, gradually
increasing speed as you drill. When drilling
into wood, use wood augers or twist drill bits.
Always use sharp bits. When using twist drill
bits, pull the bit out of the hole frequently to
clear chips from the bit fl utes. To reduce the
chance of splintering, back work with a piece
of scrap wood. Select low speeds for plastics
with a low melting point.
Maintaining Tool
Keep your tool, battery pack and charger
in good repair by adopting a regular main-
tenance program. After six months to one
year, depending on use, return the tool,
battery pack and charger to a MILWAUKEE
service facility for:
• Lubrication
• Brush inspection and replacement
• Mechanical inspection and cleaning (gears,
spindles, bearings, housing, etc.)
• Electrical inspection (battery pack,
charger, motor)
• Testing to assure proper mechanical and
electrical operation
If the tool does not start or operate at full
power with a fully charged battery pack,
clean the contacts on the battery pack. If
the tool still does not work properly, return
the tool, charger and battery pack to a
MILWAUKEE service facility for repairs.
MAINTENANCE
WARNING
To reduce the risk of personal injury,
always unplug the charger and remove
the battery pack from the charger or tool
before performing any maintenance.
Never disassemble the tool, battery
pack or charger. Contact a MILWAUKEE
service facility for ALL repairs.
Maintaining and Storing Battery Pack
V28™ Lithium-Ion battery packs will operate
for many years and/or hundreds of charging
cycles when they are maintained and used cor-
rectly. Refer to your battery pack and charger
operator's manual for proper care and use.
WARNING
To reduce the risk of personal in-
jury and damage, never immerse your
tool, battery pack or charger in liquid
or allow a liquid to fl ow inside them.
Cleaning
Clean out dust and debris from vents and
electrical contacts by blowing with com-
pressed air. Keep tool handles clean, dry and
free of oil or grease. Use only mild soap and
a damp cloth to clean the tool, battery pack
and charger, keeping away from all electri-
cal contacts. Certain cleaning agents and
solvents are harmful to plastics and other
insulated parts. Some of these include gaso-
line, turpentine, lacquer thinner, paint thinner,
chlorinated cleaning solvents, ammonia and
household detergents containing ammonia.
Never use fl ammable or combustible sol-
vents around tools.