


8 9
WARNING
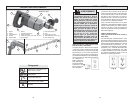
TOOL ASSEMBLY
To reduce the risk of injury,
always unplug tool before attaching
or removing accessories or making
adjustments. Use only specifi cally
recommended accessories. Others
may be hazardous.
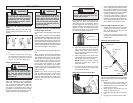
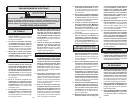
Removing and Replacing Quik-Lok
®
Cords
MILWAUKEE's exclusive Quik-Lok
®
Cords
provide instant fi eld replacement or sub-
stitution.
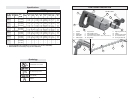
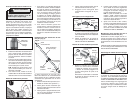
Fig. 1
1. To remove the Quik-Lok
®
Cord, turn the
cord nut 1/4 turn to the left and pull it
out.
2. To replace the Quik-Lok
®
Cord, align
the connector keyways and push the
connector in as far as it will go. Turn the
cord nut 1/4 turn to the right to lock.
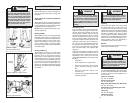
Installing Side Handle
Ring Clamp, Extension, and Side Handle
for Right Angle Drive Unit
For D-handle drill with Right Angle Drive
Unit:
A ring clamp, extension, and side handle
are supplied with the Right Angle Drive Unit.
When using a right angle drive unit, attach
the side handle to the ring clamp. Do not use
the extension when using the ring clamp. The
ring clamp with attached side handle clamps
onto the right angle drive unit and can swivel
360° and locked tight in any position.
For D-handle drill without Right Angle Drive
Unit:
When using the D-handle drill without the
right angle drive unit, remove the ring clamp
with attached side handle, then remove the
side handle from the ring clamp. Attach
the side handle to the extension. The side
handle can be installed on either side of the
tool for right or left handed use. To install
the extension with attached side handle,
thread it into the socket on the desired side
of the tool (for right or left-handed use) and
tighten securely.
NOTE: If you have an extra ring clamp
with attached side handle and extension
with attached side handle, do not use the
extension with attached side handle when
using the right angle drive unit. Remove it
from the tool.
WARNING
To reduce the risk of injury, always
use a side handle when using this
tool. This tool operates with high
torque. Always brace or hold the
tool securely.
WARNING
When using the D-handle drill with-
out the right angle drive unit, do not
clamp the ring clamp with attached
side handle to the front of the gear
case; use the side handle instead.
Do not use the extension when us-
ing the ring clamp.
MILWAUKEE D-Handle Drills are supplied
with a side handle that can be installed on
either side of the tool for right or left handed
use. To install the side handle, attach the
side handle to the extension. Thread it into
the socket on the desired side of the tool
and tighten it securely. Because of the high
torque of this drill, the side handle must al-
ways be used when operating the drill.
Be sure that the shank of the bit and the
chuck jaws are clean. Dirt particles may
cause the bit to line up improperly. Do not
use bits larger than the maximum recom-
mended capacity of the drill because gear
damage or motor overloading may result.
For best performance, be sure that the bits
are properly sharpened before use.
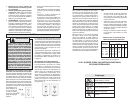
1. Unplug the tool.
2. Open the chuck jaws wide enough to
insert a bit. Allow the bit to strike the
bottom of the chuck. Center the bit in
the chuck jaws and tighten the jaws by
hand to align the bit.
3. Place the chuck key into each of the
three holes in the chuck, turning it clock-
wise to tighten the chuck securely.
NOTE: Never use a wrench or means
other than a chuck key to tighten or
loosen the chuck.
4. To remove the bit, insert the chuck key
into one of the holes in the chuck and
turn it counterclockwise.
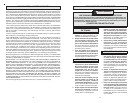
Removing the Chuck from the Drill
1. To remove the left-hand screw inside the
chuck, unplug the tool and open the chuck
jaws. Insert a T-handle hex key into the
screw inside the chuck. Turn the T-handle
hex key and remove the screw. Save the
screw for installing your new chuck.
2. To remove chuck; tighten a large hex
key into the chuck. Place the chuck on a
workbench as shown. Strike the hex key
with a soft-headed mallet to loosen the
chuck. Remove the chuck by hand.
Attaching Right Angle Drive to Drill
1. Remove the chuck from the drill (see
“Removing the Chuck From the Drill”).
Slip the double hex coupling over the
hex on the drill spindle.
Loosen the clamping screws on the
clamping sleeve and slip the sleeve onto
the drill collar.
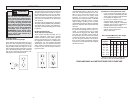
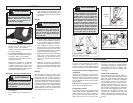
Fig. 3
Chuck jaws
Fig. 2
Chuck key hole
Installing Bits into Keyed Chucks
WARNING
To prevent personal injury, always
remove the chuck key from the
chuck after each use.
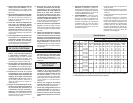
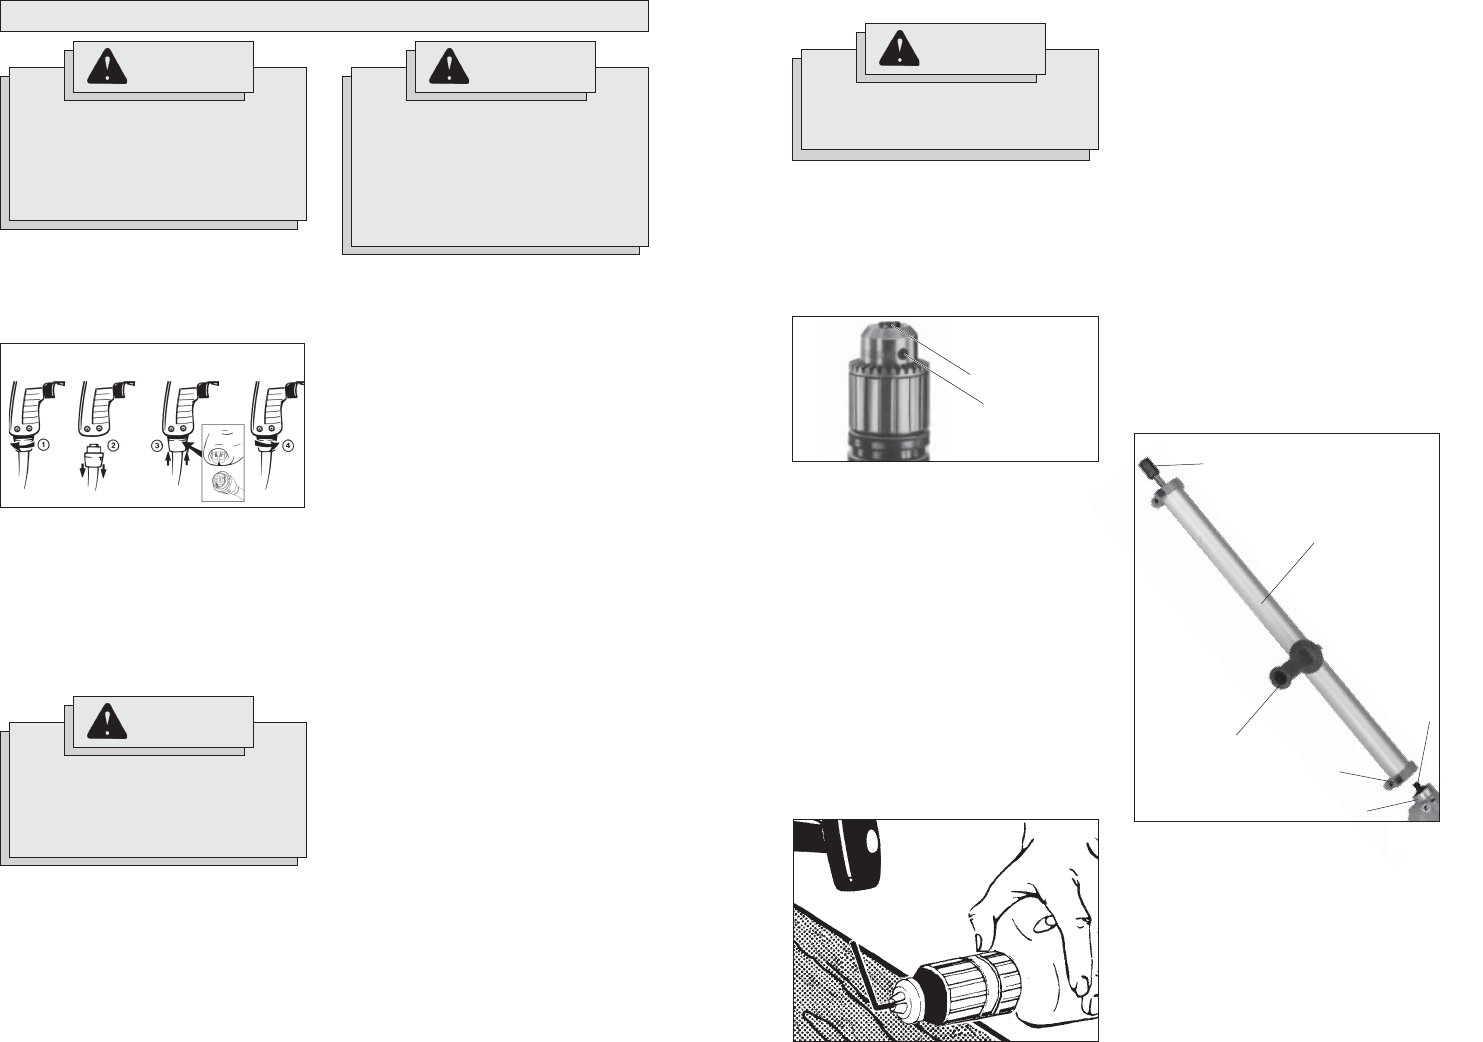
Installing 30"Extension Tube
Fig. 4
Auxiliary side
handle
30" Extension
tube
Clamp
Collar
Hex
drive
Drive shaft
The 30" extension tube MUST be used when
attaching the 33° Angle Drive. The extension
tube can optionally be used with the Right
Angle Drive.
1. Remove the chuck from the drill (see
“Removing the Chuck From the Drill”).
2. Slide extension tube over drill collar and
tighten clamp securely.
3. Slide auxiliary side handle onto 30"
extension tube and secure.
4. Insert drive shaft through 30" extension
tube.
5. Engage hex nut with hex drive on drill.