6 7
Cleaning
Clean dust and debris from charger and tool
vents. Keep tool handles clean, dry and free
of oil or grease. Use only mild soap and a
damp cloth to clean the tool, battery pack
and charger since certain cleaning agents
and solvents are harmful to plastics and other
insulated parts. Some of these include gaso-
line, turpentine, lacquer thinner, paint thinner,
chlorinated cleaning solvents, ammonia and
household detergents containing ammonia.
Never use fl ammable or combustible sol-
vents around tools.
WARNING
To reduce the risk of injury,
always unplug the charger and
remove the battery pack from
the charger or tool before
performing any maintenance.
Never disassemble the tool,
battery pack or charger. Contact a
MILWAUKEE service facility for ALL
repairs.
Keep your tool, battery pack and char-
ger in good repair by adopting a regular
maintenance program. After six months
to one year, depending on use, return the
tool, battery pack and charger to a
MILWAUKEE service facility for:
• Lubrication
• Mechanical inspection and cleaning
(gears, spindles, bearings, housing,
etc.)
• Electrical inspection (battery pack,
charger, motor)
• Testing to assure proper mechanical and
electrical operation
Maintaining Tool
If the tool does not start or operate at full pow-
er with a fully charged battery pack, clean
the contacts on the battery pack. If the tool
still does not work properly, return the tool,
charger and battery pack, to a MILWAUKEE
service facility for repairs.
MAINTENANCE
WARNING
To reduce the risk of personal injury
and damage, never immerse your
tool, battery pack or charger in liquid
or allow a liquid to fl ow inside them.
Repairs
For repairs, return the tool, battery pack and
charger to the nearest service center listed on
the back cover of this operator's manual.
ACCESSORIES
Always remove battery pack before
changing or removing accessories.
Only use accessories specifi cally
recommended for this tool. Others
may be hazardous.
WARNING
For a complete listing of accessories refer to
your MILWAUKEE Electric Tool catalog or go
on-line to www.milwaukeetool.com. To obtain
a catalog, contact your local distributor or a
service center listed on the back cover of this
operator’s manual.
3' Extension Cable
Cat. No. 48-53-0110
WARNING
To reduce the risk of explosion,
electric shock and property damage,
always check the work area before
begining a job. Do not allow cable to
contact electrical, chemical, or mov-
ing hazards.
Behind walls: Shut off circuit break-
ers to the entire area.
Inside Pipes: Ensure there is no
electrical charge to the pipes before
beginning inspection. Do not allow
liquid to fl ow down cable and into
tool.
Auto use: Turn off the engine and al-
low to cool before beginning inspec-
tion. Do not allow the visual inspec-
tion camera or cable to contact oil,
gas, or other corosive materials.
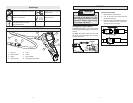
Using the Visual Inspection Camera
1. Adjust the cable to best fi t the open-
ing.
2. After checking the workspace for haz-
ards, insert the cable and adjust the
zoom and lighting as necessary.
Turning On/Off
Press the On/Off button to turn the tool on
and off.
The tool will shut off automatically if unused
for 5 minutes.
OPERATION
WARNING
To reduce the risk of injury, wear
safety goggles or glasses with side
shields. Always remove battery
pack before changing accessories
or making adjustments.
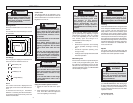
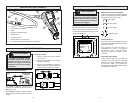
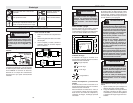
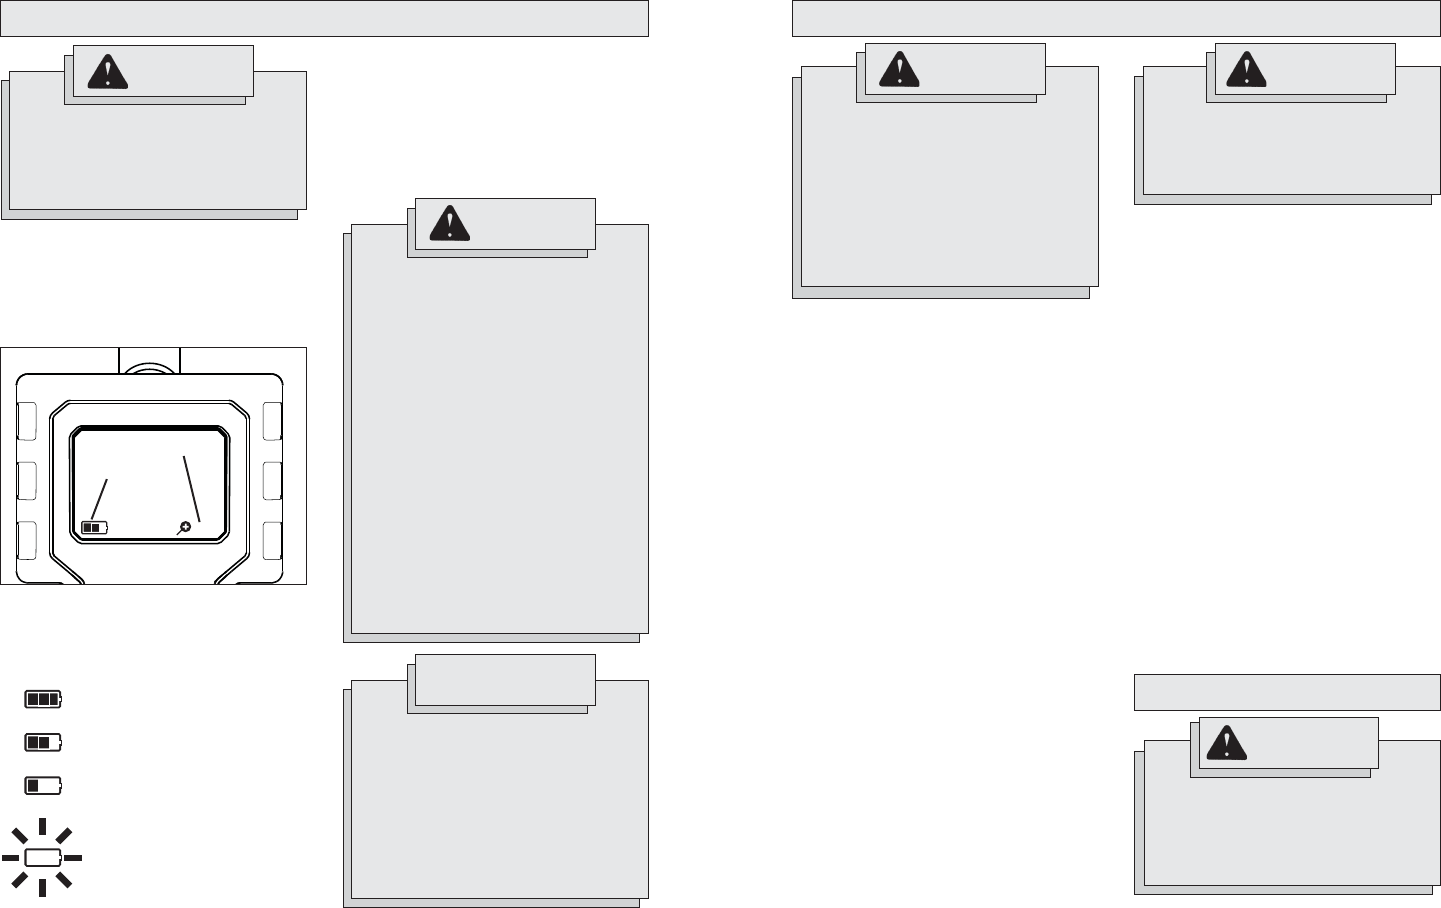
1.0x
Fig. 3
Fuel Gauge
Zoom
Camera LED
The camera LED can be adjusted to 3 lev-
els of brightness and turned off. Press the
camera LED button to increase the level of
brightness or turn it off.
CAUTION
To reduce the risk of damage to the
tool, do not use excesssive force or
"kink" the cable. Do not use in areas
where visual inspection camera and
cable will contact corrosive or oily
substances.
Do not use the cable to clear clogs
or move obstructions. This is not a
drain cleaner!
Fuel Gauge
The fuel gauge is displayed in the lower left
corner of the LCD while the tool is on.
Full Battery Life
2/3 Battery Life
1/3 Battery Life
Charge Battery
Zoom
The current zoom level is displayed in the
lower right corner of the LCD while the tool
is on.
To increase the zoom by 0.1 increments
between 1.0 and 2.0, press the zoom button.
To scroll through the zoom levels, press and
hold the zoom button.