page 12
Equipment
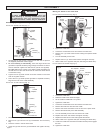
• Make sure machinery is in good operating condition. The column,
carriage, motor connection and base should all be firmly connected
and should not vibrate during coring.
• Motors should be of proper size (amperage and RPM) for the diam-
eter of the core bit used. Consult motor guide in catalog.
• Always make sure the Dymorig is rigidly mounted with an anchor or
vacuum; any movement or vibration will shorten the life of the core
bit. Standing on the rig's base as a form of anchoring is dangerous
and does not provide the necessary rigidity.
Diamond Core Bits
• For the first 2 or 3 holes, use light feed pressure, so the new
diamond gradually breaks in.
• Lower the bit very slowly onto the work surface. Use light feed
pressure until the bit crown has penetrated or "seated" into the
material.
• If the core bit encounters embedded steel, slow down the feed
pressure and let the bit core at its own pace. Don't force the bit.
Typically the water around the bit will clear when embedded steel is
encountered. Do not allow any vibration whatsoever or severe dia-
mond breakage or pullout will occur.
• Keep bits sharp.
Bit Glazing & Diamond Core Motor Shear Pins
Bit binding is caused by one of two things: a dull (glazed) bit or a poorly
stabilized rig.
Causes of bit glazing:
• Wrong RPM for bit diameter
• High feed pressure
• Low feed pressure
• High steel content in work surface
• Large, hard aggregate
• Too much water
• Low motor power
A sharp bit typically has good diamond exposure and will cut/grind al-
most anything in its path, including embedded steel.
Sharpening Procedure for Core Bits
To work efficiently, diamond core bits must maintain good diamond expo-
sure. Many factors work together to provide the "controlled erosion"
cycle of the tool's segment to occur. When this "controlled erosion" cycle
is altered, the bit can become dull or "glazed." Glazing becomes notice-
able when the coring feed rate slows dramatically or the bit does not cut.
Examine the bit immediately. If the diamonds are flush with the metal, they
are underexposed or "glazed."
The following steps will often correct the problem:
1. Reduce water flow until it becomes very muddy. Continue using as
little water as possible until penetration increases.
2. If the bit does not open up, remove from hole. Pour into the kerf a
thick (1/4") layer of silica sand (the coarser the better).
3. Resume drilling for approximately 3 to 5 minutes with very little wa-
ter and at a lower RPM if possible.
4. Gradually increase water flow to flush sand from kerf.
5. Repeat as needed.
The Effects of Steel in Coring
• To self-sharpen, diamond-impregnated core bits require interaction
with an abrasive material. This abrasive material wears away the
metal composition in the segment's matrix. As this is done, sharp
diamonds are exposed and the grinding action created by the dia-
monds continues.
• Embedded metal (rebar) is not an abrasive material. It does not
provide the degree of abrasiveness required for matrix wear to
occur and expose sharp diamonds embedded in the segment's ma-
trix.
• A high degree of exposure to embedded metal by the bit's segments
creates glazing. Glazing prevents the bit from cutting and coring.
Water
Water provides two main benefits during coring:
1. Water acts as a coolant, eliminating the heat caused by the friction
of the coring action. This preserves the integrity of the diamonds,
the bond matrix, the segment solder, and core tube. Without a cool-
ant, the heat buildup during coring can cause all of these compo-
nents to fail.
2. Water flushes loose, abrasive particles created during coring. These
particles consist of aggregate, sand, diamond particles and various
metals from embedded steel and the core bit matrix. The hole must
be free of debris to allow the core bit to work. If loose particles are
not properly flushed from the hole, an unnecessary drag will occur
along the side of the core barrel. This can contribute to bit glazing
through lack of power as well as motor damage through amperage
increases due to bit resistance. In addition, loose particles tend to
wear the bit tube, which can eventually result in the loss of seg-
ments.
Monitor water flow. Water volume should be adjusted until water return
is a muddy, solid color. Clear water or clear streaks indicate too much
water volume. Excess water is a leading cause of bit glazing and failure.
Other factors contribute to glazing, but water adjustment is one of the
most easily controlled by the operator. Excessive water prevents ad-
equate segment/material contact. When the bit segments do not properly
contact the work surface, the desired "controlled erosion" effect which
maintains bit sharpness does not occur and the bit begins to glaze. This
happens especially with smaller diameter bits. Adequate water volume
varies according to the bit diameter. Use only enough water during cor-
ing to flush the cuttings from the work surface.


