


10 11
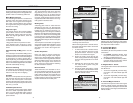
To start the drill:
1. Push the magnet button to activate the
magnet.
2. Make sure the red indicator light is on.
If the light is fl ashing, check for the fol-
lowing:
• Low voltage at plug
• Loose motor connection
• Mag panel buttons are jammed or
stuck
If fl ashing light still occurs, take en-
tire unit to an authorized service
center.
3. Push a drill button for forward or re-
verse.
If a loss of line voltage occurs while the
drill is running, the drill will stop.
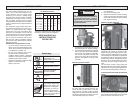
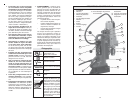
Gear Shift Lever
Fig. 8
1. Turn the drill motor off.
2. Position the magnetic base so that the
drill bit is near the desired hole location
and push the magnet button. The red
indicator light will turn on.
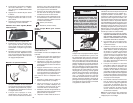
3. Loosen the adjusting handle located at
the back of the housing base. Move the
housing to position the drill bit over the
center of the hole. Tighten the adjusting
handle securely.
Keyed Chuck (Select Models)
1. Open the chuck jaws wide enough to
insert the bit. Be sure the shank and the
chuck jaws are clean. Dirt particles may
prevent the bit from lining up properly.
These drills are supplied with a No. 3 Morse
Taper Socket.
To insert a bit or adapter into the socket:
1. Make sure the taper is clean and lightly
oiled. Foreign material can cause mis-
alignment.
2. Insert the taper into the socket and rotate
the taper until the bit tang slides into the
slot at the top of the socket.
3. Press the taper fi rmly into the socket,
or use the feed handle to press the bit
against a piece of wood.
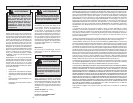
To remove a bit or adapter from the socket:
1. Unscrew the knurled collar and remove
the entire Morse Taper Socket.
2. Strike the bit tang fi rmly with a soft metal
mallet or strike the bit tang fi rmly on a
wood or soft metal surface.
3. Replace the Morse Taper Socket by
aligning the notches with tabs on the
drill.
4. Replace the knurled collar and tighten.
Fig. 10
Fig. 9
Cat. Nos. 4292-1 and 4297-1 operate in
either high or low speed. Use low speed for
large diameter bits and high speed for small
diameter bits (see “Specifi cations” chart).
To change speeds, turn the drill off and rotate
the lever up or down while the drill is coast-
ing to a stop.
NOTE: To avoid damage to the gearbox, do
not shift at full speed, when the tool is under
load, or when the tool has stopped.
The gear shift on the motor is labeled:
L - for low speed
H - for high speed
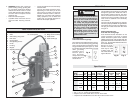
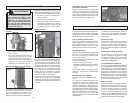
Typical Operation
1. Insert the bit into the chuck or socket
(see “Keyed Chuck" or "Morse Taper
Socket” and “Using Twist Drills" and
"Using MILWAUKEE STEEL HAWG™
Cutters”).
2. Place the magnetic drill press on a
prepared surface.
Fig. 7
3. Position the unit so that the tip of the drill
bit is directly over the center of the hole
to be drilled.
4. Push the magnet button. The red indica-
tor light will turn on.
5. Attach the safety chain if drilling over-
head or on a vertical surface.
6. Check the gear speed setting and
change if required.
7. Push the forward or reverse button as
required.
8. Drill hole (see “Using Twist Drills" and
"Using MILWAUKEE STEEL HAWG™
Cutters”).
9. Push the “Drill Off” button.
10. Remove the chain (if drilling overhead
or on a vertical surface).
11. Push the magnet button. The red indica-
tor light will turn off.
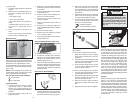
Using the Adjustable Base (4203 only)
2. When using drill bits, insert the bit into
the chuck. Center the bit in the chuck
jaws and lift it about 1/32" off of the bot-
tom. Tighten the chuck jaws by hand to
align the bit.
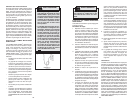
3. Place the chuck key in each of the three
holes in the chuck, turning it clockwise
as shown below. Tighten securely.
4. To remove the bit, insert the chuck key
into one of the three holes in the chuck
and turn it counterclockwise.
- Clockwise (Tighten)
- Counterclockwise (Loosen)
Morse Taper Socket (Select Models)
APPLICATIONS
Drilling
When preparing to drill, align the bit with the
spot to be drilled. When proper alignment
is established, energize the magnet and
start the drill motor. A pilot hole is recom-
mended for drilling holes larger than 1/2”
in diameter. When drilling, apply only enough
force to produce a curled chip. Applying too
little force will result in small broken chips
and increased drilling time. Applying too
much force will cause overheating of the
bit resulting in short bit life. Overheating
of the bit can be noticed when drill bit and
chips turn brown or blue. Excessive force
can cause the drill to slow down to a point
where drilling time will increase. The use of
cutting lubricants will reduce drilling heat and
increase drill bit life.
Tapping
Select the proper tap and drill combination.
Refer to the “Maximum Recommended
Capacity” chart. On two-speed drill motors,
use the low speed shift setting. Drill the hole
as described above. If possible, tap the hole
before moving the base to another position.
This eliminates the need to align the tap with
the hole. Always use a quality tapping wax
or oil for smooth cutting and avoid damage
to the tap or workpiece. Pipe taps are not
recommended
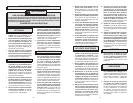
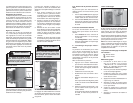
Fig. 11
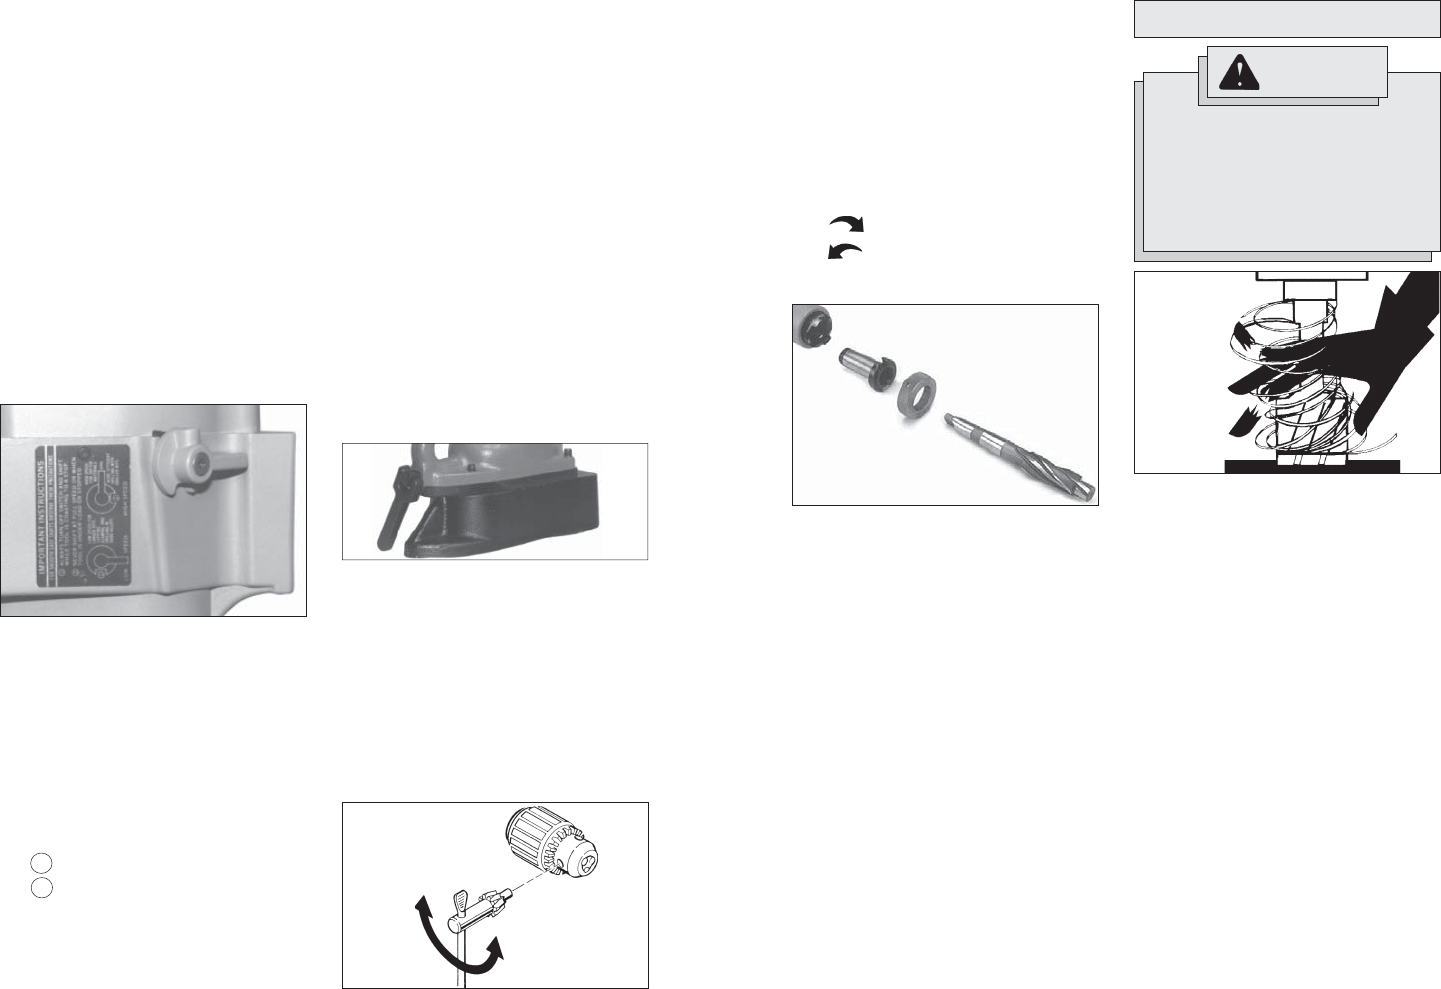
DANGER
To reduce the risk of injury, always
keep hands, rags, clothing, etc. away
from moving parts and chips. Do not
try to remove chips while the cutter
is rotating. Chips are sharp and can
pull objects into moving parts (See
Fig. 11).