


8 9
Installing the Bit
It is not necessary to remove the motor
from the base to install a collet assembly
or a bit. If removal of the base is desired,
see previous section. Always wipe wood
chips, dust or other foreign materials from
the collet shaft and collet assembly before
assembling.
Insert the collet assembly into the collet
shaft. Insert the bit shank into the collet as
follows:
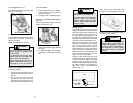
Placing Motor into Base (Fig. 6)
1. Unplug tool. Make sure locking lever is
fully open.
2. Align depth screw on the motor with
hole on base.
3. Press and hold motor release button
and lower motor into base to desired
depth.
4. Release motor release button and
push-in locking lever to fully closed
position.
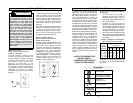
WARNING!
To reduce the risk of injury, wear
safety goggles or glasses with
side shields.
To reduce the risk of injury,
always unplug tool before attach-
ing or removing accessories or
making adjustments.
Use only specifically recom-
mended accessories. Others may
be hazardous.
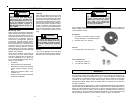
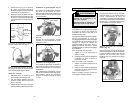
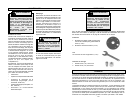
1. Insert the bit shank into the collet as
far as it will go.
2. Back the bit shank out slightly to avoid
bottoming out.
3. Be sure there is a minimum of 1/16"
between the bottom of the collet as-
sembly and the radius to the cutting
portion of the bit (Fig. 7).
4. Be sure that the collet is not clamped
to a fluted section on the bit shank.
The collet should be clamped to a solid
part on the bit shank.
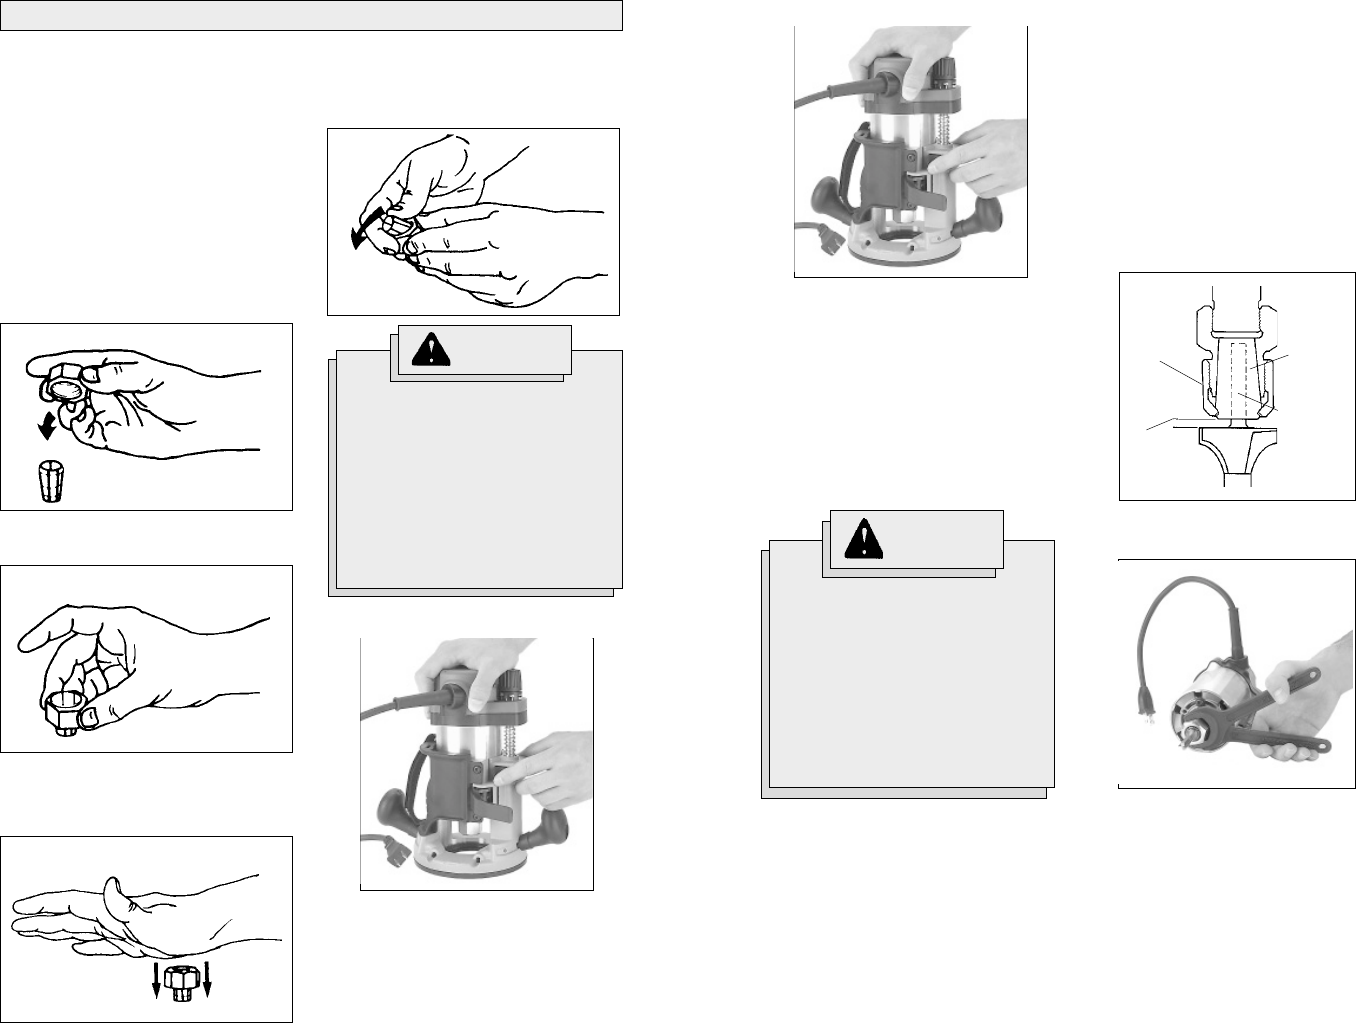
To tighten the bit in the collet assembly, use
two wrenches (Fig. 8).
NOTE: Never tighten a collet assembly with-
out inserting a bit shank of the proper size.
This may damage the collet.
Removing the Bit
1. Loosen the collet nut from the collet
shaft using two wrenches.
2. Once loose, unscrew the collet nut by
hand until it feels tight again.
3. Return to using the wrenches until the
bit shank can be pulled out.
Fig. 7
Minimum
1/16"
Bit shank
Collet
Collet nut
FPO
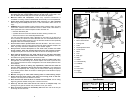
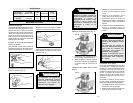
TOOL ASSEMBLY
To remove collet from nut, hold nut firmly
with one hand and press the collet to one
side with the other hand (Fig. 4).
Collets
The collet must be attached to the collet
nut before it is put into the collet shaft. Be
sure that the size of the collet matches the
size of the bit shank being used. If the
wrong size bit shank is used, the collet
may break. For attaching or detaching the
collet nut to the collet, follow the illustrated
instructions on this page.
Attaching Collet to Collet Nut
To assemble, place the narrow end of the
collet on an even surface. Take the nut
and place it over the collet (Fig. 1).
Position nut squarely over collet with the
smaller opening of the nut facing up (Fig. 2).
Snap nut and collet together by firmly ap-
plying downward pressure into assembly
with palm of hand (Fig. 3).
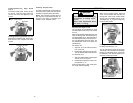
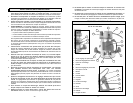
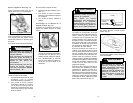
Removing Motor from Base (Fig. 5)
WARNING!
To reduce the risk of injury,
always unplug tool before attach-
ing or removing accessories
or making adjustments.
If hand is not securely on motor,
pressing the motor release but-
ton will cause the motor housing
to drop down, which may cause
personal injury or damage to the
tool or workpiece.
1. Unplug tool. Release locking lever to
fully open position.
2. Firmly grasp motor. Press and hold
motor release button and pull out
motor from base.
Fig. 8
Fig. 5
Fig. 1
Fig. 2
Fig. 3
Fig. 4
Fig. 6