


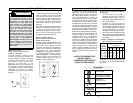

12 13
WARNING!
To reduce the risk of injury,
always wear eye protection.
To reduce the risk of explosion,
electric shock and property
damage, always check the work
area for hidden pipes and wires
before routing.
WARNING!
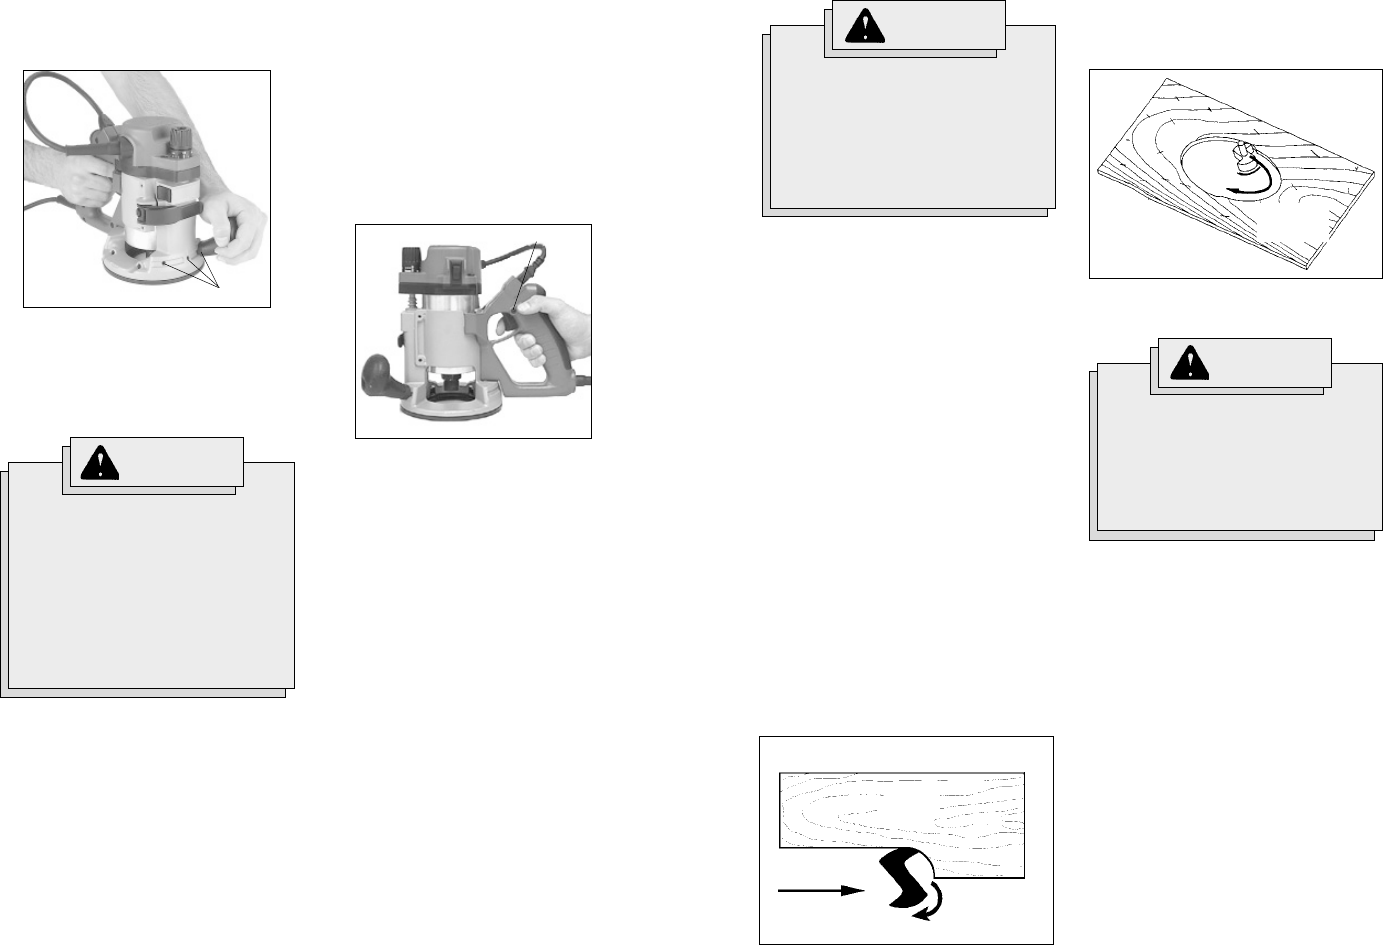
To reduce the risk of injury, avoid
"climb cutting." Climb cutting in-
creases the potential for loss of
control of the tool and damage to
the workpiece. If climb cutting
can not be avoided, use extreme
caution.
Making the Cut
The speed and depth of cut will depend
largely on the type of material being worked.
Keep the cutting pressure constant but do
not use excessive force on the router so
the motor speed slows excessively. It may
be necessary on exceptionally hard woods
or problem materials to make more than
one pass to get the desired depth of cut.
Before beginning the cut on the actual
workpiece, it is advisable to take a sample
cut on a scrap piece of lumber. This will
show you exactly how the cut will look as
well as enable you to check dimensions.
Always be sure the workpiece is secure
before routing. When routing edges, the
router should be held firmly down and
against the work using handles.
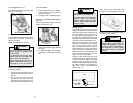
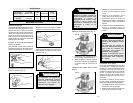
Since the cutter rotates clockwise, more
efficient cutting will be obtained if the router
is moved from left to right as you stand
facing the work. The arrows on the base
of the tool indicate the direction of bit rota-
tion. When working on the outside of an
edge, move router in a counterclockwise
direction (Fig. 15).
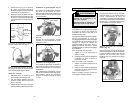
1.To lock the trigger, hold-in the lock
button while pulling the trigger. Release
the trigger.
2. To unlock the trigger, pull the trigger
and release. The lock button will pop
out.
When working on an inside edge, move
the router in a clockwise direction (Fig. 16).
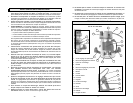
Starting and Stopping Router Motor
For Body Grip Base:
1. To start the motor, grasp the tool firmly
and push the On/Off switch to the "I"
position.
2. To stop the motor, push the on/off
switch to the "O" position and place
the router so the bit is away from you.
Hold the tool until the bit stops turning.
Fig. 16
Direction
of feed
WARNING!
To reduce the risk of injury, wear
safety goggles or glasses with
side shields.
To reduce the risk of injury, keep
hands, body and cord away from
the bit and all moving parts.
Before plugging the tool into a
power outlet, make sure the on/
off switch is in the "O" position.
For D-handle Base:
1. Push the On/Off switch to the "I" position.
2. To start the motor, grasp the tool firmly
and pull the trigger.
3. To stop the motor, release the trigger.
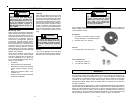
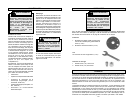
Locking the D-handle Base Trigger
(Fig. 14)
The lock button holds the trigger in the ON
position for continuous use.
Moving the router in the opposite direction
is known as "climb cutting."
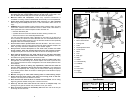
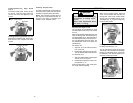
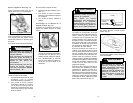
For D-handle Base (Fig. 13):
Grip the D-handle with one hand and place
the other on the handle.
For both bases:
One handle on both bases may be adjusted
to three different positions for maximum
control and comfort.
NOTE: Use both hands at all times.
Fig. 14
Lock button
Fig. 15
Bit rotation
Router feed
Top view
Work
Fig. 13
Alternate handle positions