


page 10
WARNING!
To reduce the risk of injury, do not rely on the brake as a
safety feature. Always wait until the blade stops completely
before allowing anything near the blade.
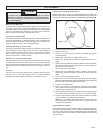
Electric Brake
The electric brake engages when the trigger is released, causing the
blade to stop and allowing you to proceed with your work. Generally the
saw blade stops in four to five seconds. However, there may be a delay
between the time the trigger is released and the time the brake engages.
Occasionally the brake may miss completely. If the brake misses fre-
quently, the saw needs servicing by an authorized MILWAUKEE ser-
vice station. The brake is not a substitute for the guards, so it is essential
to always wait for the blade to stop completely before removing the
blade from the kerf. The correct brush grade must be used for proper
operation of the brake. Use only identical MILWAUKEE replacement
brushes when servicing the tool.
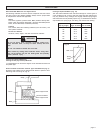
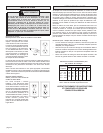
Cutting the Kerf Plate Slot
The tool is shipped with the kerf plate installed; never attempt to make a
cut without the plate installed. The kerf plate is NOT factory-cut, so the
first cut you make with the tool will be to create a kerf slot. The angle of
the kerf slot for compound cuts is different than that for miter cuts.
Therefore, it is necessary to cut new kerf slots for each type of angle.
Generally, it is best to cut a kerf slot before cutting a workpiece.
When cutting a kerf slot, be sure to use the blade you intend to use for
your work since blades have different widths that affect the kerf. When
changing from a thick blade to a thinner one, you may want to purchase
a new kerf plate and cut a new kerf slot. Also, bevel cuts require a
different kerf slot than miter cuts, so always be sure to cut a new slot for
bevel cuts. Cut the kerf slot following the procedure below.
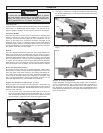
1. Raise the saw head OVER the kerf plate WITHOUT cutting.
2. Start the motor. Wait a few seconds for the blade to reach full
speed.
3. Press down on the saw head. To help prevent damaging the kerf
plate, gently and slowly lower the saw head to the full depth of cut
(the point where the saw head will not lower any further). When the
cut is complete, release the trigger. WAIT FOR THE BLADE TO STOP
COMPLETELY before gently raising the saw head.
4. Push saw through the cut.
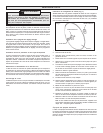
Making a Cut
1. Plug in the tool.
2. Raise the saw head completely.
3. Select the desired angles following the steps in "Adjusting the Miter
Angle" and "Adjusting the Bevel Angle".
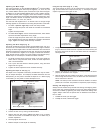
4. Place the workpiece on the turntable and line up the cut.
5. Support the workpiece using any of the methods described in "Sup-
port the Workpiece Properly".
6. Start the motor. Wait a few seconds for the blade to reach full
speed. Then gently lower the saw head into the workpiece all the
way through the cut.
7. Always allow the saw to do the work. Forcing the tool may stall or
overheat the motor.
8. After the cut is complete, release the trigger and wait for the blade
to stop completely. Then gently raise the saw head and remove the
workpiece. Always unplug the tool before retrieving loose cut-off
pieces from inside the guard area.