


PAGE 26 — STX-SERIES • RIDE-ON POWER TROWEL — OPERATION MANUAL — REV. #1 (07/16/04)
)
STX-SERIES — MAINTENANCE
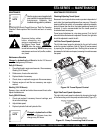
Pitch Pressure Check
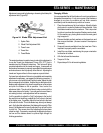
Access the pitch block and pitch pressure test port at the right-
rear of the trowel (Figure 29). Removal of the right-rear seat
frame panel may be necessary. Pitch pressure must be measured
with a pitch switch
activated
. With pitch switches unactivated,
the pitch pressure will be the same as the charge/steering
pressure. Proper pitch pressure is 2300 PSI.
Figure 29. Pitch Block
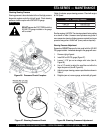
Pitch Pressure Adjustment
If the pitch pressure check is out of specification, check the
following:
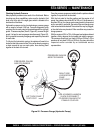
Figure 30. Pitch Pressure Check
1. Correct hydraulic fluid level.
2. Plugged hydraulic oil filter.
3. Loose or leaky fittings
4. Ruptured/damaged hydraulic lines.
5. Faulty hydraulic pump.
6. Pitch pressure Relief Valve no longer at factory setting.
1. Install 3000 PSI range pressure gauge to pitch pressure
test port on pitch block (Figure 30).
2. Activate left pitch switch.
3. Flatten blades (bottom out the pitch cylinders).
4. Continue to hold down pitch switch and record pressure.
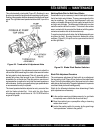
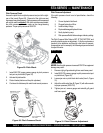
Figure 31. Pitch Pressure Adjustment
A
B
The Pitch Pressure Relief Valve is SET AT THE FACTORY, and
normally should require no adjustment. If all other systems are
found not to be defective and the pitch relief valve is suspect,
(loosened jam nut for example), the following steps can be used
to adjust the valve.
CAUTIONCAUTION
CAUTIONCAUTION
CAUTION
NEVER allow the pitch pressure to exceed 2700 PSI or equipment
damage may result.
1. Remove right grill guard and right rear seat frame panel.
2. Install 3000 PSI pressure gauge to pitch pressure test port
on pitch block (Figure 30).
3. Loosen jam nut on pitch block relief valve (Item A, Figure
31).
4. Adjust the relief valve (Item B, Figure 31) with allen wrench
to proper pressure (2300 PSI)
5. Tighten jam nut, remove gauge and reinstall grill guard
and frame panel.