


TP24X TILE SAW • OPERATION AND PARTS MANUAL — REV. #2 (04/12/12) — PAGE 29
Method 2
This procedure corrects another source of misalignment
that occurs when the table’s orientation is not parallel with
the guide rails.
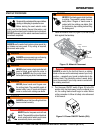
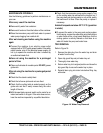
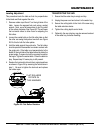
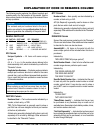
1. Use the universal wrench to loosen (but not remove)
the fasteners from either end of both guide rails. Move
each rail away from the other, so that the horizontal
rollers are clear of the right guide rail. See Figure 25.
Figure 25. Roller Clearance
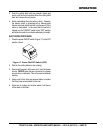
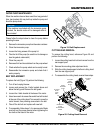
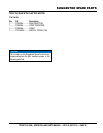
2. Remove rubber cap A on the left side of the table.
Loosen the exposed lock nut using a 13mm socket
wrench. Use a flat screwdriver to turn the shaft of the
roller clockwise to lower it by approximately 3/8 in. (9.5
mm). See Figure 26. Evenly lift up the table to
disengage the guide rollers from the left guide rail.
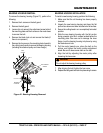
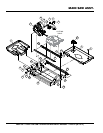
Once the guide rollers are clear, shift the table to the
right to clear the left horizontal roller of the rail. Remove
the table from the guide rails. See Figure 27.
Figure 26. Lowering Roller
HORIZONTAL
ROLLER
CLEARANCE
RIGHT
GUIDE
RAIL
LOOSEN
FASTENERS
FLAT
SCREW
DRIVER
13MM
SOCKET
WRENCH
RUBBER
CAP C
RUBBER
CAP B
RUBBER
CAP A
MAINTENANCE
Figure 27. Remove Table
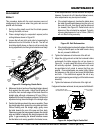
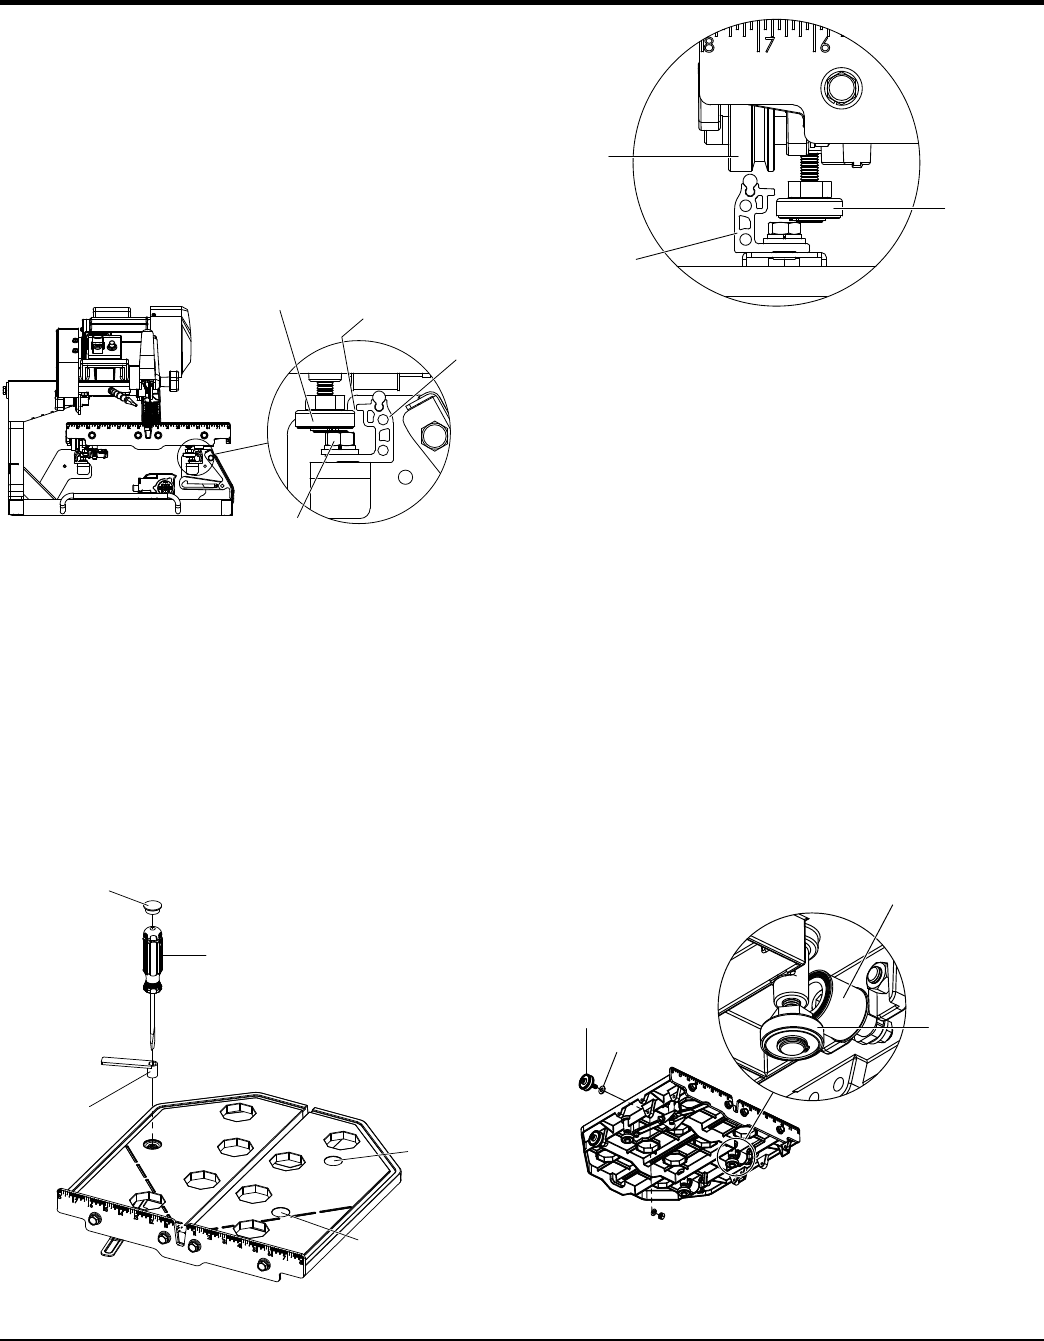
3. If the table shifts to the right as it travels away from
the user, a shim needs to be added to the guide roller
furthest from the ruler guide. On the other hand, if
the table shifts to the left, a shim needs to be added
to the guide roller closest to the ruler guide. Remove
the appropriate guide roller to insert a shim between
the roller and table, then reattach. See Figure 28.
Depending on the severity of the shift, more than one
shim may be required.
4. After adding shim(s), mount the table onto the guide
rails by reversing the instructions in step 2. Move the
rails toward each other to engage the horizontal rollers
to the right guide rail as shown in Figure 24. Realign
the table to the blade using Method 1. Check to see if
any shifting persists. A shift tolerance of 0.2mm (.008
in.) is allowed. A shift in excess of that will require
further adjustment—repeat step 3.
Figure 28. Add Shims
HORIZONTAL
ROLLER
LEFT
GUIDE
RAIL
GUIDE
ROLLER
FLAT
ROLLER
GUIDE
ROLLER
SHIM
HORIZONTAL
ROLLER