


• 9 •
9. MOUNTING INSTRUCTIONS
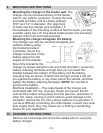
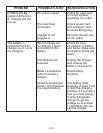
Mounting the charger to the fender well: The
charger can be mounted directly to the fender
well of your vehicle, as shown. If using the nuts
and bolts provided, drill two holes between
3/16" and 1/4" in diameter. (For alignment
of holes use the charger as a template.) If
the backside of the mounting surface is hard to reach, you may
consider using two 1/2" long sheet metal screws (not included)
instead of the nuts and bolts provided.
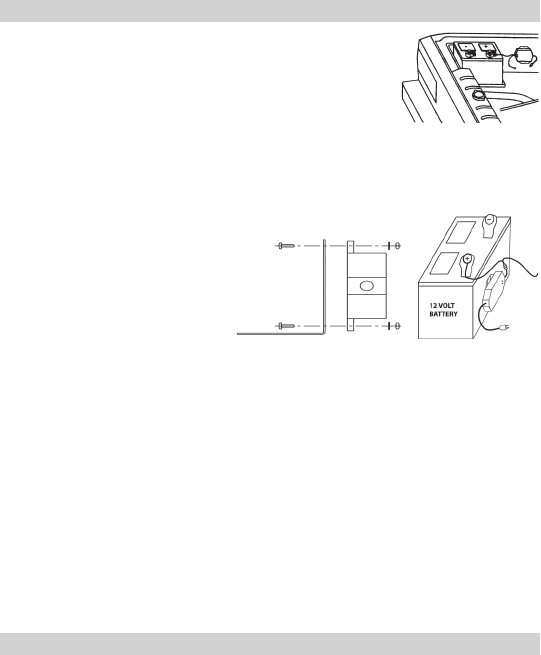
Mounting the charger alongside the battery:
The charger can also be mounted alongside your
vehicle’s battery using
the bracket provided.
If possible, mount the
charger to the side of the
battery away from the
engine and fan blades.
Mount the bracket to the
charger as shown using the nuts and bolts provided. Loosen the
battery retaining hardware enough that you can insert the
bracket between the bottom of the battery and the battery
mounting tray as shown. Position the charger so that it will not
rub against the battery or any other part of the vehicle, and then
tighten the battery retaining hardware. NOTE: Do not drill or
puncture the battery.
Electrical Installation – The output leads of the charger are
terminated with 3/8" dia. ring lugs. Route and secure the AC
cord and the output wiring away from the gas line, carburetor or
other hot, sharp, moving or pinch parts to avoid damage to the
insulation. Secure the AC cord using a cable tie or equivalent. If
you have difculty connecting the output leads, consult your local
auto supply store, they may assist you in nding a connecting
device for your application.
10. ASSEMBLY INSTRUCTIONS
Remove all cord wraps and uncoil the cables prior to using the
battery charger.