


www.norcold.com/cda 67N6XX/N8XX ModelsRefrigerator Service Manual
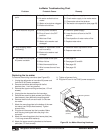
Problem Probable Cause Remedy
n Ice maker will not cycle,
AC power available.
A. Mold heater failed open.
B. Motor failure.
C. Mold thermostat failure.
D. Wire harness thermal fuse
open.
A. See page 68.
B. See pages 68 and 69.
C. See page 68.
D. See page 69.
n Mold dripping water/
overflowing.
A. Water fill adjustment screw
set incorrectly.
B. Water valve washer seal
damaged.
A. Reset the water adjustment screw.
B. Replace water valve
n Ice in mold/no ice yield. A. No AC power available.
B. Shut-off arm in the OFF
position.
C. Mold over filled.
D. Water valve washer seal
damaged.
A. Check AC power supply.
B. Lower the shut-off arm to the ON
position.
C. Check position of water valve orifice.
D. Replace water valve.
n No ice in mold/no ice
yield.
A. No AC power to ice maker
B. No water available to ice
maker.
C. Water valve strainer clogged.
D. Water valve failure.
A. Check AC power supply.
B. Check water supply to ice maker water.
C. Clean water valve inlet strainer.
D. Test water valve operation (see page 69).
Ice Maker Troubleshooting Chart
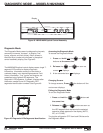
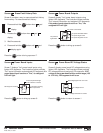
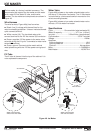
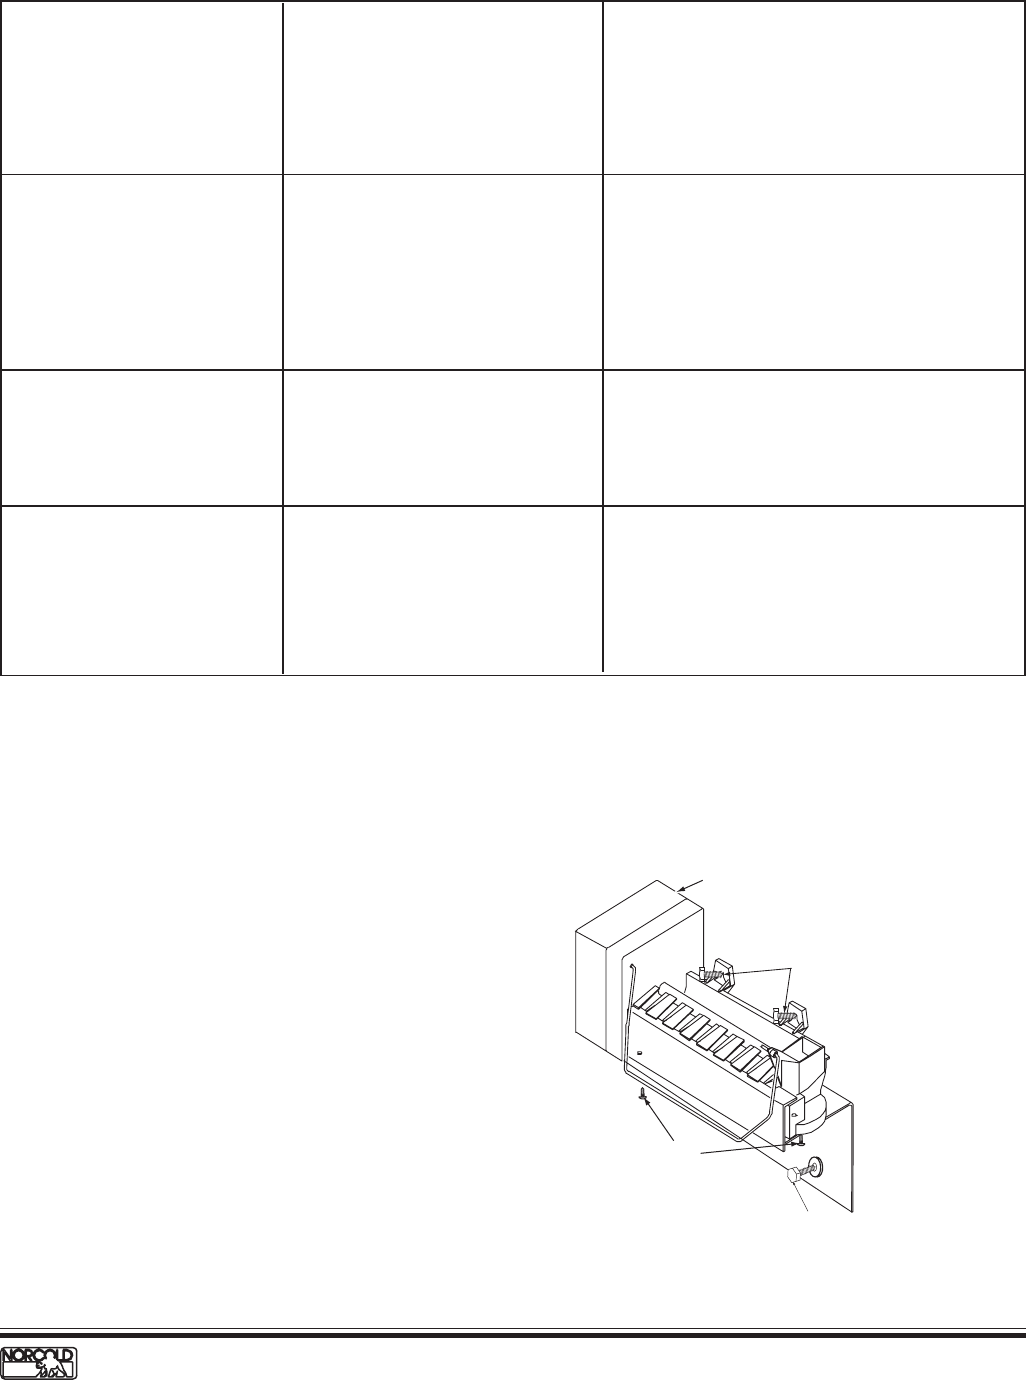
Figure 50. Ice Maker Mounting Hardware.
Replacing the Ice maker
To remove the existing ice maker (see Figure 50):
1. Unplug the refrigerator or ice maker AC power cord
from the RV AC power receptacle.
2. Remove the freezer bolts along with the flat
washers (two, 1 inch long screws).
3. Remove two upper mounting screws (two, 1/2 inch
screws).
4. Unplug the wire harness from the ice maker.
5. Remove two mounting plate screws (two Phillips
head screws), then remove the mounting plate.
6. Remove the shut-off arm and install it in the new
ice maker.
7. Attach the mounting plate to the bottom of the new
ice maker (two Phillips head screws). Tighten
screws firmly.
8. Plug the wire harness into the ice maker. Make
sure the plug locking tab locks the plug in the
connector.
9. Attach the mounting plate to the freezer plate (two,
1 inch long screws with washers)
10. Attach the upper mounting brackets to the freezer
plate (two, 1/2 inch screws).
11. Tighten all screws firmly.
12. Plug the AC cord in the RV AC power receptacle.
Cover
Mounting Screws
Bottom
Mounting Screws
(2 each)
Freezer Plate Screws (2)
(1 in. long with washer)