


-
11
-
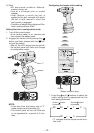
• You can select from 30 torque clutch
settings (1 to 30).
•
Use figures from the Tightening Torque
Chart to guide your selection of torque
clutch setting. (See the following tighten-
ing torque chart)
2
. Press the OK button to accept the select-
ed torque clutch setting.
•
The control panel will stop flashing and
light up.
CAUTION:
•
You must press the OK button in order
for the selected setting to take effect.
•
Be sure to verify the new value after
changing the setting. (See page 11.)
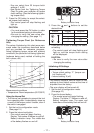
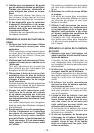
Tightening Torque Chart (for Reference
Use)
The values illustrated on this chart were mea-
sured under the conditions described below
and are provided for reference purposes.
Actual tightening torque varies with ambient
conditions (the particular bolt being tightened,
hardware being used, method of holding the
bolt in place, etc.).
0
10
20
30
40
50
60
EYFLA1 (M6)
EYFLA2 (M6)
EYFLA1 (M8)
EYFLA2 (M8)
EYFLA3 (M8)
EYFLA3 (M10)
N • m
1 2 3 4 5 6 7 8 9 101112131415161718192021222324252627282930
Measurement conditions
• Temperature: Room temperature (20°C/68°F)
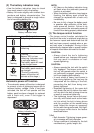
Using the Interval Set
•
The interval set operates to prevent the tool
from operating after it automatically stops as
a result of the torque control function, even if
the switch is engaged.
1.
Set the tool to configuration mode.
(See page 10.)
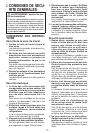
2. Press the interval set button.
• The control panel will begin flashing.
Display: The number 0 ashes on and off.
Battery indication lamp: The middle bar
of the battery ashes on and off.
Display
Battery indication lamp
3. Press the and buttons to set the
desired time.
Buttons Display Seconds
30 3
1 0.1
0 Off
4.
Press the OK button to accept the select-
ed setting.
•
The control panel will stop flashing and
light up, and the torque clutch setting
will be displayed.
CAUTION:
•
Be sure to verify the new value after
changing the setting.
Initializing All Settings
Factory settings
• Torque clutch setting: “F” (torque con-
trol function off)
•
Interval setting: 0 (off)
• This section explains how to revert all tool
settings to their default values at the time of
shipment from the factory.
•
The error display will be turned off.
1. Set the tool to configuration mode.
(See page 10.)
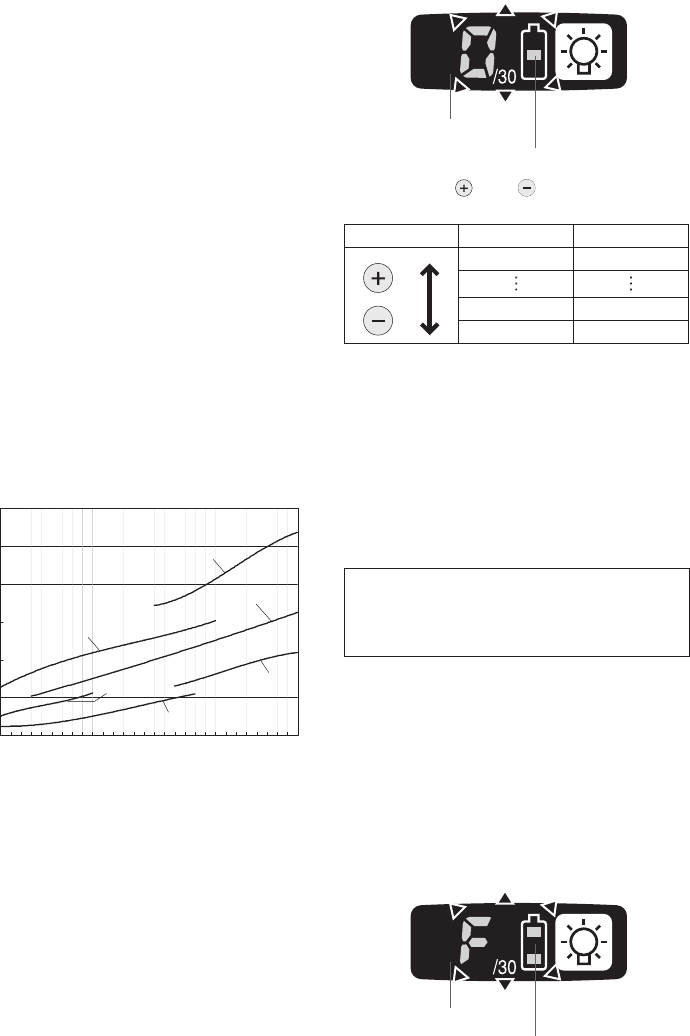
2. Press the format button.
• The control panel will begin flashing.
Display: The letter “F” ashes on and off.
Battery indication lamp: The upper and
lower bars of the battery ash on and off.
Display
Battery indication lamp