


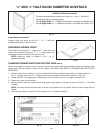

7
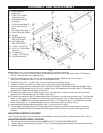
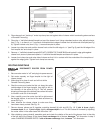
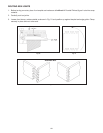
2. Place drawer front “inside up” under top clamp bar and against side of drawer which is extending above surface
of Dovetail Fixture/Jig.
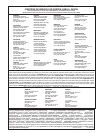
3. Place the
1
/2" half-blind dovetail templet on top of the drawer front. Using a standard scale or ruler, adjust locknuts,
item 7, Fig. 1, so there is
19
/32" from back of templet slots to edge of drawer front at both ends of templet (see Fig.
8). Tighten knurled nuts, item 6, Fig. 1, to secure templet in place.
4. Loosen top clamp bar and position drawer front so that the left edge is
3
/16" (see Fig. 8) past the left edge of the
first templet slot and clamp in place.
5. Remove
1
/2" half-blind dovetail templet (DO NOT LOOSEN TOP CLAMP BAR) and locate #1 edge guide against
drawer front, secure in place and replace
1
/2" half-blind dovetail templet and secure it in place.
6. Loosen front clamp bar and raise side of drawer so that it is in contact with the underside of the templet and
against the edge guide. Tighten front clamp bar securely.
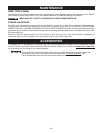
ROUTING DOVETAILS
DISCONNECT ROUTER FROM POWER
SOURCE.
1. Be sure router motor is “off” and plug into power source.
2. Set router squarely on finger templet to the right of
drawer pieces.
3. Make sure bit is clear of work and will not strike
Dovetail Fixture/Jig base.
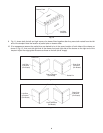
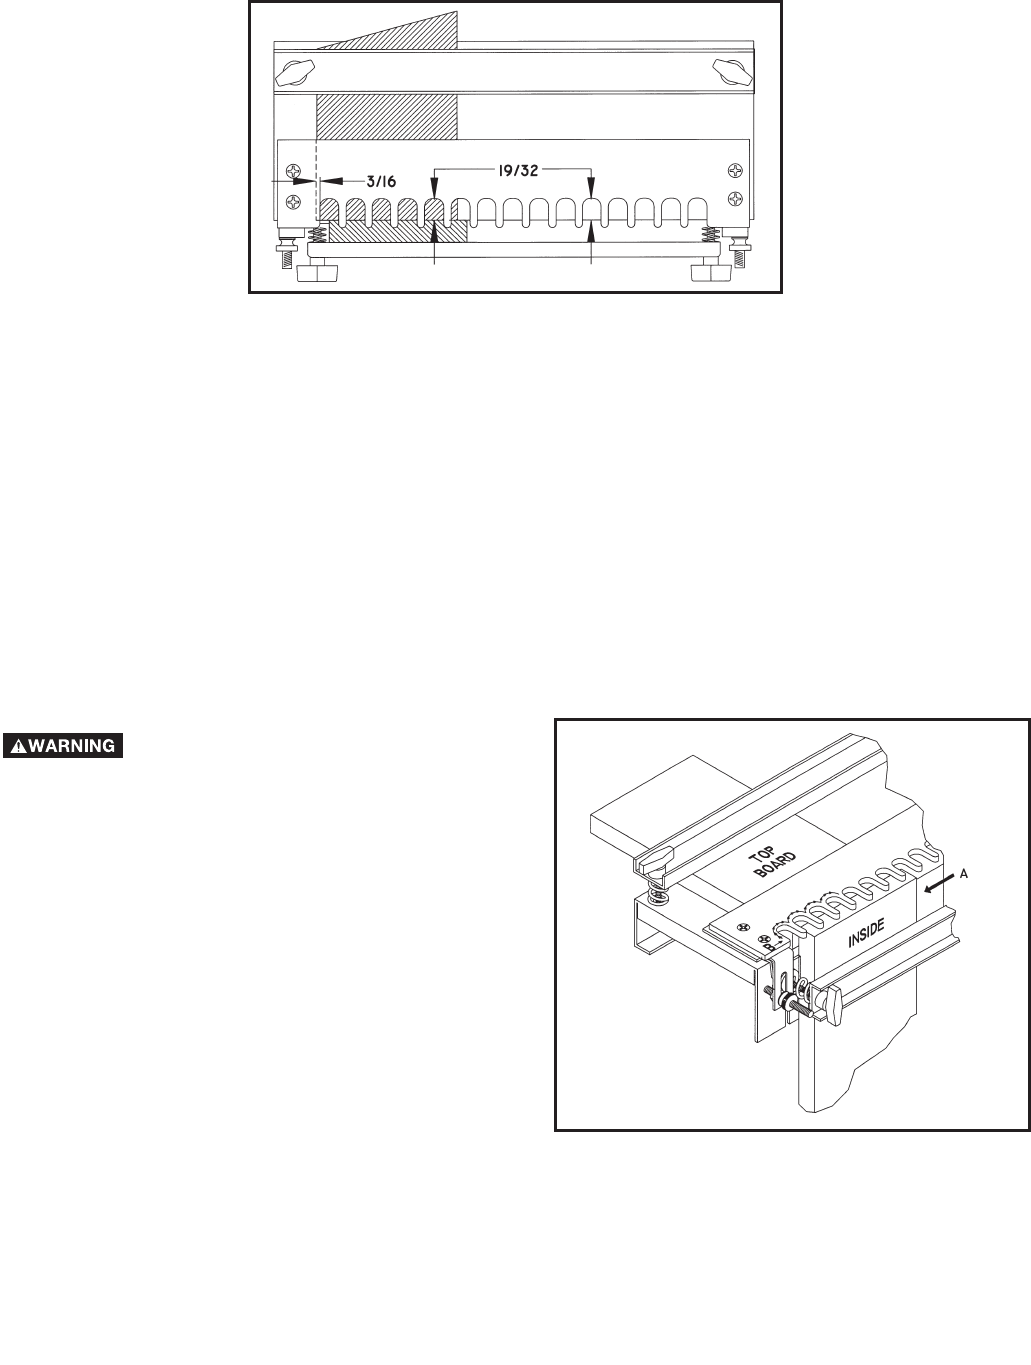
4. Start the motor and make the first cut along the entire
outside edge of the finger templet, from right to left, in
the direction of the arrow (A) Fig. 9. This will prevent
chipping of the edge of the drawer piece when the router
is moved in and out of the templet.
5. Now, carefully move the router from left to right around
the templet outline, in and out of the slots as shown by
arrow (B) Fig. 9.
6. Next, examine the drawer pieces to make sure they
have been cleanly routed. See Fig. 10.
7. Remove drawer pieces and fit together, matching dovetail (A) with slot (B), Fig. 10. If joint is loose, slightly
increase depth of cut. If joint is tight, slightly decrease depth of cut. The bit is raised or lowered by adjusting
the router motor in the router base with the motor “off”.
8. After obtaining a snug dovetail, assemble parts and check the relation of the end of the drawer front to the side
of the left side of the drawer. If the drawer front overhangs side of drawer, decrease
19
/32" dimension in step 3
under CLAMPING DRAWER PARTS. If side of drawer overhangs front, increase
19
/32" dimension.
Fig. 8
Fig. 9