


13
SPECIAL SANDING PROCEDURES
Generally, the operator should sand with a back and forth
motion. Some materials and some types of operations, however,
require a different technique. In rough sanding, use the tool at an angle. In spot
sanding, use the tool with only the front pulley touching the surface (especially
useful in smoothing excess glue from wood joints). On metals, slate, marble, or
plastic materials, sanding can be done in all different directions because of a
lack of grain.
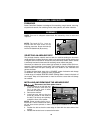
DOORS AND MILL WORK
When sanding doors, cabinet frames, sash, storm windows and screens, take
care to avoid working into the cross grain where one member meets another.
Notice that the right edge of the belt is visible on the sander. Work carefully
along the edge where the rail meets the stile. If the joint is slightly uneven, use a
fine abrasive and very light sanding pressure to smooth it before making
finishing runs.
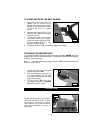
For lengthy work on walls or other vertical surfaces, balance the tool with a
length of sash cord, two small pulleys, a light wood frame, and a weight that is
the same as, or slightly less than, the weight of the sander. The frame consists of
two pieces leaning against a wall with a third piece nailed to their top ends. The
two pulleys are located so that the weight on one end of the cord will be out of
the way, but will balance the sander fastened to the other end. When starting
vertical work, angle the sander so you can see that the belt makes contact with
the material. As the belt touches, level the machine and make the stroke away
and to the left. This movement will offset the tendency to cut heavily into the
work at the start of the stroke.
GOOD SANDING TECHNIQUE
Getting to know the sander is most important in obtaining smooth results with a
minimum of labor. Operators will quickly learn how to start a stroke with a
sweeping motion to produce the best results. Use a long even stroke without
additional pressure on the tool. Overlap each stroke and vary the length of
movement so the results will be even. Always lift the tool from the work before
starting and stopping the motor.
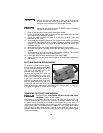
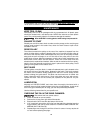
BE CAREFUL when sanding at the end
of a board. Keep the tool level and flat
on the work surface. Don’t let the front
of the tool drop. (Fig. 7). If this happens,
it will round the edge.
Fig. 7
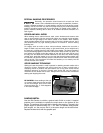
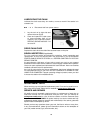
SANDING METAL
Use the Belt Sander to obtain a grained satin finish on metal. A special
graphite pad is available to replace the steel shoe on the bottom of the
sander. The softness of this pad aids in blending the graining. The pad is the
proper length for sanders using a 3" x 24" belt. For sanders using shorter
belt lengths, cut the pad so that it is the same length as the steel shoe.
Replace the steel shoe with the graphite pad.