


9
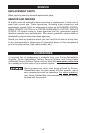
INSTALLING AND REMOVING DRILL BIT
1. DISCONNECT TOOL FROM POWER SOURCE.
2. The three-jaw chuck is designed for self-centering of the drill bit. Open
chuck jaws by turning outer sleeve counterclockwise, when viewing the
chuck from the bit end. Open large enough so that bit shank can be inserted.
3. Clean and insert smooth end of drill bit as far as it will go into the chuck,
then withdraw bit approximately
1
/16", or up to the flutes for small bits.
4. While holding the bit with one hand, turn outer sleeve clockwise until bit
is gripped in the chuck.
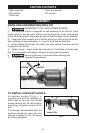
5. Tighten chuck – insert chuck key into each of 3 keyholes in chuck body
(Fig. 1) in succession and tighten securely by turning key clockwise.
6. Be sure chuck key is removed before starting tool.
7. To remove bit, reverse this procedure.
TIGHTEN
LOOSEN
Fig. 1
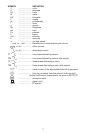
CARTON CONTENTS
ASSEMBLY
* Right angle drill
* Side handle
* Chuck key
* Open end wrench
* Pin wrench
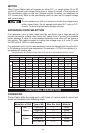
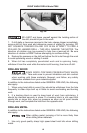
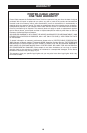
TO INSTALL AUXILIARY HANDLE
An auxiliary handle (C) Fig. 2, is
supplied and can be installed on
either side of the tool. This handle
screws directly into the drill housing
providing complete control of the
drill.
It is strongly recommended that the
auxiliary handle be used and tool
held as illustrated in Fig. 3A during
all drilling operations.
Fig. 2
C
F
E
G A
B
Model 7556