20
Functions of the Digital
Scale (Model 15S only)
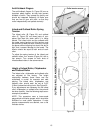
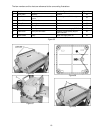
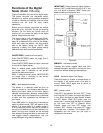
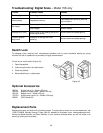
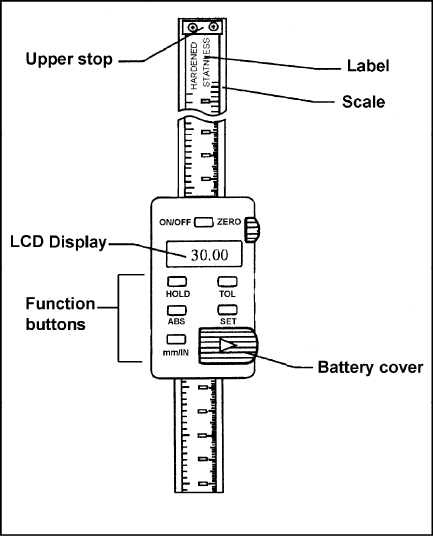
Figure 40 identifies the parts of the digital scale.
The button functions are discussed below,
followed by a section giving practical examples
of how to calibrate your settings, and how these
functions can be used for daily planer
operations.
Before using the device, wipe down the vertical
scale with a dry, soft cloth. Do not use cleaning
solutions. Do not allow any liquids (such as
machine oil) to contact the body of the digital
display. Keep the device clean.
This device uses a 1.55 volt battery cell (SR44).
If it needs replacing (see Troubleshooting on
page 26 to determine this) slide off the battery
cover and insert the battery, with the positive
pole of the battery facing out. NOTE: After
replacing a battery, the digital display setting
defaults to zero and must be recalibrated.
ON/OFF/ZERO – power and zero-setting
Press ON/OFF/ZERO button no longer than 3
seconds to power on.
Press ON/OFF/ZERO button at least 3 seconds
to shut off the digital display.
While in relative mode, press ON/OFF/ZERO
(no longer than 3 seconds) to set current
position as relative zero point.
While in absolute mode, press ON/OFF/ZERO
(no longer than 3 seconds) to set current
position as absolute zero point.
ABS – relative/absolute modes
The device is in absolute mode as soon as
power is turned on, and displays absolute zero.
Moving the planer table up and down begins
absolute measurement. Absolute measurement
is set based upon the distance from cutterhead
to table, and thus represents the thickness of
your board.
Press ABS button (no longer than 3 seconds) to
switch to relative mode. “INC” will appear on the
display. The value shown is in relative mode; it
is an incremental position that can be zeroed at
any point and determines not the thickness of a
board, but how much material will be removed
from a board. Moving the table up and down will
now display relative measurement until you
press ABS again to go back to absolute.
IMPORTANT: Always place the digital display in
relative (“INC”) mode before turning it off. If you
turn it off while in absolute (“ABS”) mode, your
absolute setting will default to zero.
Figure 40
MM/INCH – millimeters/inches
Pressing this button toggles back and forth
between standard and metric, and can be done
at any time without affecting saved settings.
HOLD – maintains data on the display.
Press this button to “freeze” a measurement on
the display; it will remain even if the table is
moved. Press HOLD again and it returns to
normal measurements.
SET – preset a value
Press SET; the indicator will flash “SET”. Press
and hold the SET button and each digit flashes
in turn. When the digit you want flashes, release
the SET button. Press SET button once (no
longer than 1 second) and that digit will increase
by one each time SET is pressed. When
finished, press and hold SET button until
indicator “SET” flashes, then press SET again
(no longer than 1 second). The indicator “SET”
disappears and the value you just input is
displayed on the screen.


