


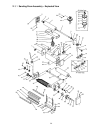
9
Figure 5
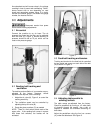
8.5 Feed speed adjustment
The Model 1632 has two speeds that feed the
workpiece at 15 feet per minute (FPM) finished
surface sanding, and 32.5 FPM for faster, lighter
sanding.
To change the feed rate:
1. Disconnect machine from power source.
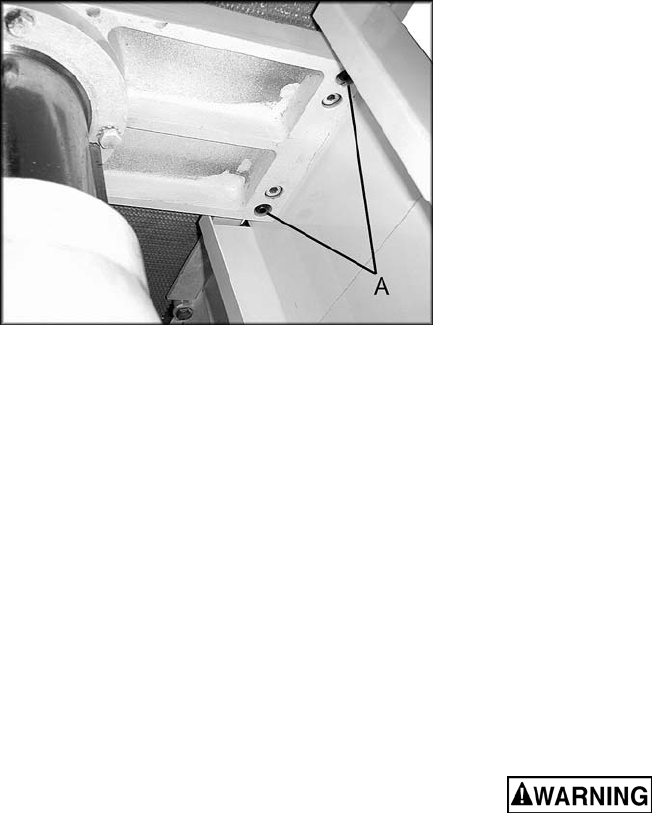
2. Remove cap screw that holds the sprocket
cover at the right rear of the working table.
3. Loosen the four set screws holding the
sprockets in place.
4. Remove the sprockets and chain together and
position according to the required operation.
See Figure 6.
5. Retighten the four set screws, then replace
cover and cap screw.
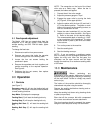
9.0 Operation
9.1 Controls
(see Figure 7):
Emergency stop (A) will stop the feeding belt and
sanding belt. The button must be turned clockwise
to reset sanding functions.
Amp Meter (B) displays the amperage.
Feeding Start (C) will start the feeding belt only.
Feeding Stop (D) will stop the feeding belt only.
Sanding Belt Start (E) will start the sanding belt
only.
Sanding Belt Stop (F) will stop the sanding belt
only.
NOTE: The orange bar on the front of the infeed
roller acts as a safety stop. When the bar is
pressed, the brakes are applied.
1. Connect the air line to the sander.
2. Adjust the pressure gauge to 75 psi.
3. Engage the upper roller by turning the knob
(A), Figure 8, to the upper position.
4. Adjust the platen with the lever (B) and lock it
(C) in the desired position. The platen or main
rubber roller can act as the sanding contact, as
well as a combination of both.
5. Rotate the main handwheel (A), on the lower
cabinet, to raise or lower the table. See Figure
9. Refer to the scale for the desired setting.
The recommended depth of sanding is .0164"
or two revolutions of the handwheel. The table
can be locked in place by the lever at the base
of the column.
6. Turn on the power to the machine.
7. Start the sanding belt.
8. Start the feeding conveyor.
NOTE: If you are sanding a workpiece greater
than 16 inches, pull out the support extension, and
tighten the wing nuts. After the first pass, the
workpiece can be spun around and fed back
through the machine, for a maximum sanding width
of 32 inches.
10.0 Maintenance
Before performing any
maintenance on the sander, disconnect it from the
electrical supply by pulling out the plug or switching
off the main switch. Failure to comply may cause
serious injury.
The interior of the machine should be thoroughly
cleaned each day after using the sander.
Remove the sanding belt before cleaning and re-
install it when finished.
Keep the sanding belt clean using cleaning sticks
or pads (not provided).
Blow dust off the conveyor belt with compressed
air or use a dust collector vacuum attachment.
The drum bearings should be greased (via grease
fittings on each side) after every 150 work hours.