


17
Step 2: Align Guides
Disconnect saw from power
source before aligning the guides.
If the saw does not cut at 90 degrees, the
guides may not be perpendicular to the rollers.
Adjust as follows:
1. Make sure the rollers are aligned.
2. Remove the blade guard and mark a blade
tooth as a reference (NOTE: If the saw has
a high speed steel blade, mark a tooth that
points toward the edge of your test square,
which is still clamped above the rollers.)
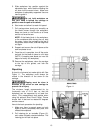
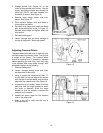
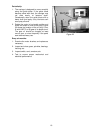
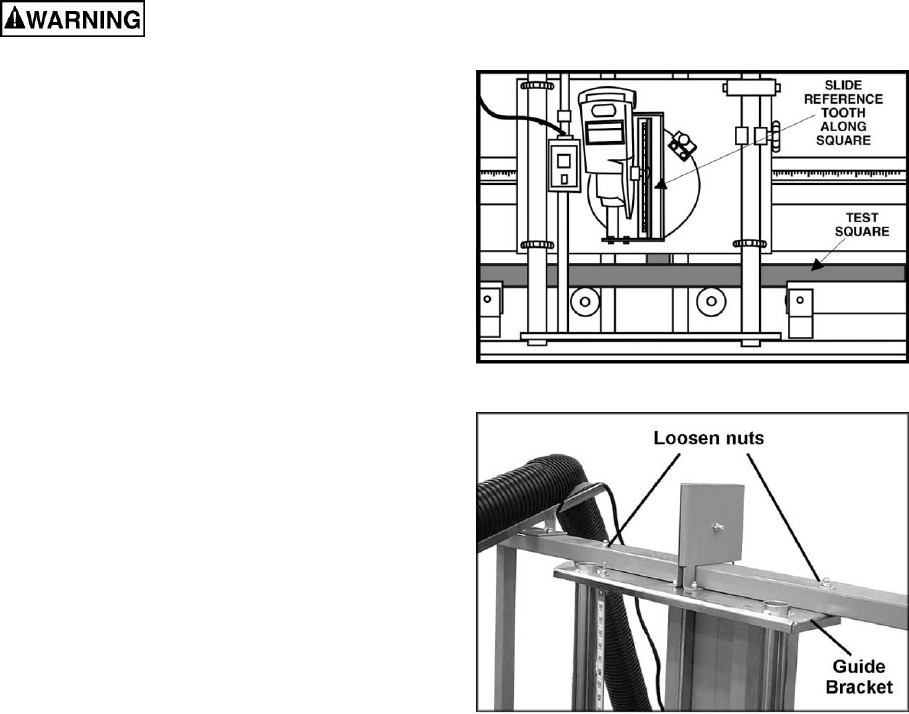
3. Pull the carriage down until the reference
tooth of the blade just touches the vertical
edge of the test square, Figure 19. Continue
pulling the carriage down; if the blade does
not contact the square, or the blade binds
on the square, the guides are not aligned
properly.
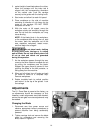
4. Loosen the guide bracket nuts, Figure 20,
but do not remove the bracket. With a dead
blow mallet, strike the bracket on the side in
the direction you want the guides to go. Do
not strike the guides.
5. Confirm the squareness of guides to rollers
as described above. When satisfied, re-
tighten guide bracket nuts.
STEP 3: Align Blade Parallel to Guides
The blade must move parallel to the guides or
tail burning may occur, and the kerf may be
wider than the set of the blade. Always adjust
the rollers and guides before adjusting the
blade. To check for blade alignment:
1. Make sure rollers and guides are aligned
first.
2. If the blade “heels”, or leaves burn marks on
the cut, move the carriage to a crosscut
position and make a test cut. Examine both
sides of the cut to determine which side of
the blade is causing the problem.
3. Disconnect power from the saw.
4. Place your test square on the rollers and
lower the carriage so the test square
overhangs the blade.
5. Place the test square against the blade. The
entire face of the blade should contact the
test square; if it does not, the blade is in
need of alignment.
Figure 19
Figure 20