33
Step 2:
With a power drill, attach the fence bracket to
the vertical cross members with the mounting
screws provided. The mounting screws
provided are self-tapping. (Note: The fence
bracket is pre-drilled for mounting.)
Step 3:
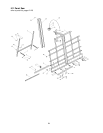
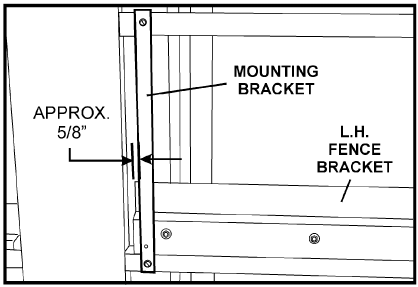
Attach the fence mounting bracket to the back
side of the panel saw frame, as shown in
Figure 26. The edge of the mounting bracket
should be approximately 5/8" from the edge of
the fence bracket. (Note: The center of the
mounting hole on the fence bracket should be
aligned with the center of the mounting
bracket.) Using a power drill, attach one end of
the mounting bracket to the horizontal cross
member on which the fence bracket is sitting,
and attach the other end to the next horizontal
cross member above it.
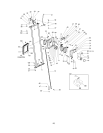
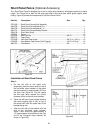
Figure 26
Step 4:
Once the mounting bracket has been secured,
return to the front of the panel saw and secure
the right end of the fence bracket to the
mounting bracket with the mounting screws
provided.
Step 5:
With a tape measure, check the distance from
the blade to the right end of the fence bracket.
The distance should be approximately 4-1/2".
(Note: The scale on the fence bracket starts
with a measurement of 4-1/2".) If necessary,
loosen the three mounting screws on the fence
bracket and adjust it so that the exact distance
from the blade to the right end of the fence
bracket is 4-1/2".
Step 6:
Place the fence shelf between the bracket and
the top of the round bushings with the black
molding showing. If the shelf is not a snug fit,
remove the shelf, loosen the bushing mounting
bolts, press up on the bushing, retighten the
mounting bolts and re-install the shelf.
Step 7:
To check the shelves for squareness, slide the
saw carriage down and place the framing
square on top of the left shelf and slide it over
to the blade. If the shelf is not square to the
blade, loosen the three mounting screws
securing the fence bracket, move the bracket
until the fence shelf is square to the blade and
retighten mounting screws. Make a test cut
using an 18" tall panel. Place the panel on the
shelf and cut the end. Turn the panel around
making sure that the same bottom reference is
used and make a second cut. Measure at the
top and bottom of the panel to make sure the
panel is square. Make adjustments and test
cuts as needed until squareness is achieved.
DO NOT make any adjustments to the panel
saw itself, only adjust the fence brackets
when checking for squareness.
Step 8:
Install the right side fence bracket to the right
side of the panel saw. (Refer to Steps 1 thru
6).
Note: When the Short Panel Fence is not
being used, the shelf can be stored behind the
fence bracket.


