DN1• 18
SETTING UP THE SWITCHES
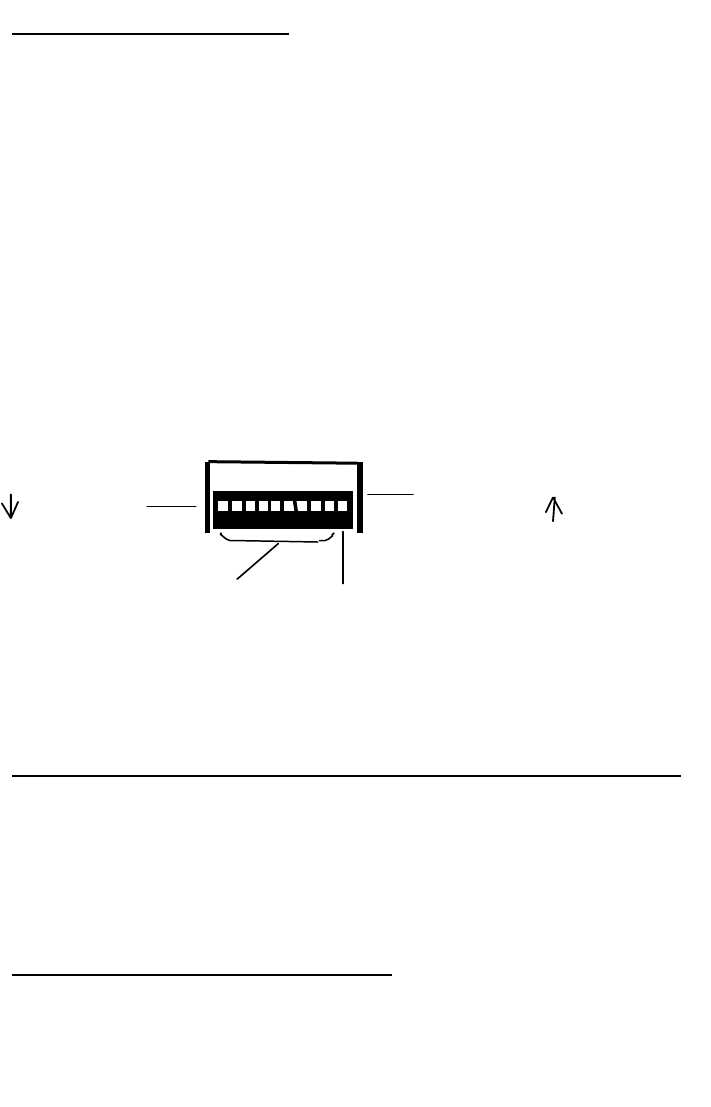
You’ll need to configure the row of DIP switches for your battery pack now.
Since the minimum number of cells is at least one, the conditioner is already
set up for a single battery to begin with.
Switch No. 10 is reserved for the discharging current setup. When it is closed
the Doctor is in low current discharge mode, or about 140 mA drain from your
batteries. When Switch No. 10 is opened the discharging current is increased
to 280 mA, or the high current discharge.
Switches 1 - 9 should be set for the number of cells in the pack minus one
(remember, Dr. NiCad is set up for one cell to start, meaning that the first
resistor in the network is always in the circuit [R24]).
TESTING YOUR DOCTOR NiCad BATTERY CONDITIONER / CHARGER
Well, here it is, the moment of truth. Although you’re probably anxious to get
“charging”, now is the best time to double-check your work. It is far better to
discover a solder bridge, misplaced component, or incorrectly set switch now
before the circuit is energized than risk permanent component damage from
being too hasty! Review your configuration setups also.
DN1 CHARGE STATUS LED INDICATOR
When powered up, Dr. NiCad’s front panel LED is much more than a power
Control
High / Low
Discharge
Ra te
S et to N umbe r
of C ells to Cha rge
minus one
(
i.e . 4 C ell P ack, Sw itches 1 ,2, and 3 U
p
, or "ON
Switch
Switch
1
0
1
Switches
High = Up
Low = Down
Down(OFF)
Up(ON)


