❲
19
❳
8. Maintenance
MA1
every every every
25 50 100
system/compornent procedure before hours hours hours note
use after after after
fuel leaks, fuel spillage wipe out ✔
fuel tank, air filter, fuel filter inspect/clean ✔✔ replace, if necessary
see
■ADJUSTING
replace carburetor
idle adjusting screw ✔
IDLING SPEED (p.17)
if necessary
clean and readjust
GAP: .025in(0.6~0.7mm)
spark plug ✔
plug gap replace, if necessary
cylinder fins, intake air cooling vent clean ✔
muffler, spark arrester, cylinder exhaust port
clean ✔
throttle lever, ignition switch check operation ✔
replace if
cutting parts ✔
something's wrong
debris guard make sure to attach ✔
gear case / cutter case grease ✔
screws/nuts/bolts tighten/replace ✔✔not adjusting screws
E
N
G
I
N
E
S
H
A
F
T
■ MAINTENANCE CHART
■ BLADE MAINTENANCE
Use protective gloves whenever inspecting,
removing, sharpening, and installing the blade.
• Wipe off dust and dirt attached to the blade, and
oil it after every use.
• As the extent of wear differs by each cutter
depending on use conditions, rotate the blade
position at intervals.
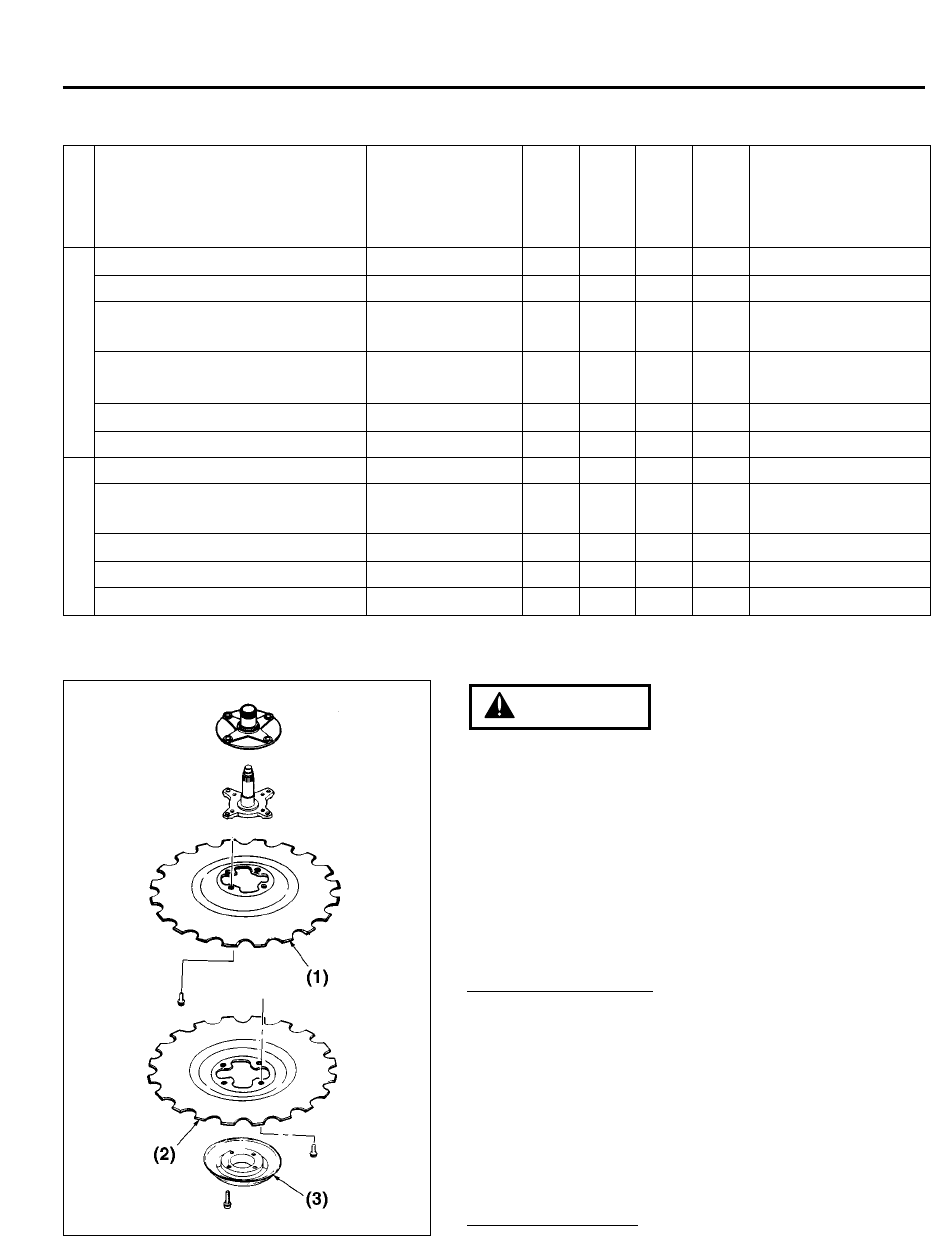
To Remove Blades: (MA1)
1. Turn over the machine and remove the bottom
cover by removing the four cross-slotted screws.
2. Loosen the four socket screws and remove the
lower blade.
3. Loosen the four socket screws and remove the
upper blade.
(1) Upper blade (2) Lower blade (3) Bottom cover
To Install Blades:
The upper and lower blades are interchangeable.
When fastening the blade mounting screws, torque
them uniformly (Torque: 100 to 130 in-lbs)(Torque:
11.3 ~ 14.8 N.m.).
WARNING


