


32
33
EXTENSION CORDS
The use of any extension cord will cause some loss of power.
To keep the loss to a minimum and to prevent tool overheat-
ing, use an extension cord that is heavy enough to carry the
current the tool will draw.
A wire gage size (A.W.G.) of at least 14 is recommended for
an extension cord 25 feet or less in length. When working
outdoors, use an extension cord that is suitable for outdoor
use. The cord's jacket will be marked WA.
WARNING:
Keep extension cords away from the cutting area
and position the cord so that it will not get caught
on lumber, tools, etc., during cutting operation.
Failure to heed this warning may result in serious
personal injury.
CAUTION:
Check extension cords before each use. If dam-
aged, replace immediately. Never use tool with a
damaged cord since touching the damaged area
could cause electrical shock resulting in serious
injury.
WARNING:
Always wear safety goggles or safety glasses with
side shields during power tool operation or when
blowing dust. If operation is dusty, also wear a dust
mask.
WARNING:
To ensure safety and reliability, all repairs should
be performed by a qualified service technician at a
Authorized Service Center to avoid risk of personal
injury.
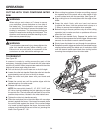
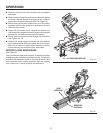
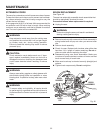
BRUSH REPLACEMENT
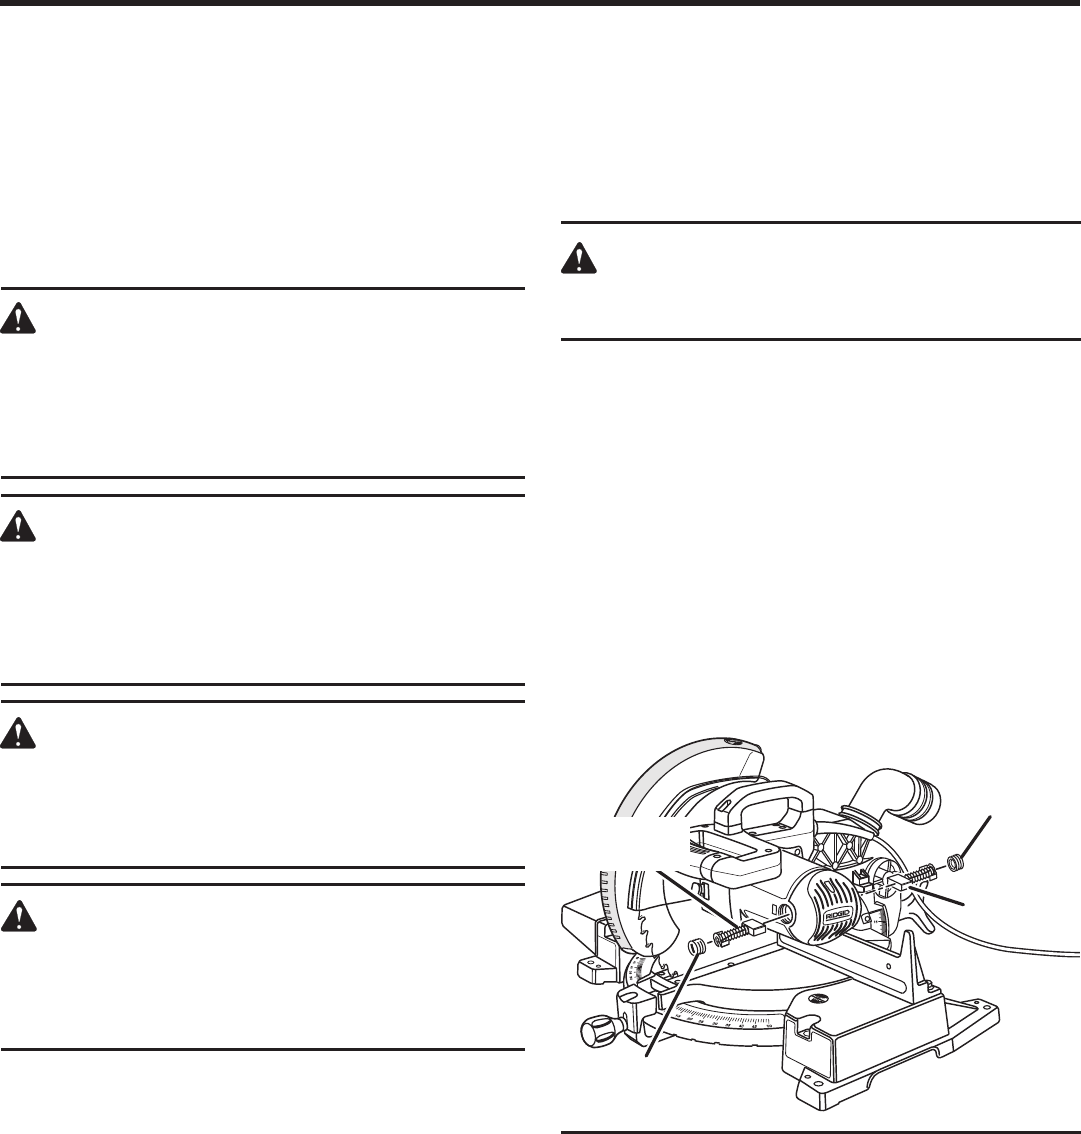
See Figure 40.
The saw has externally accessible brush assemblies that
should be periodically checked for wear.
Proceed as follows when replacement is required:
n Unplug the saw.
WARNING:
Failure to unplug the saw could result in accidental
starting causing serious injury.
n Remove brush cap with a screwdriver. Brush assembly is
spring loaded and will pop out when you remove brush
cap.
n Remove brush assembly.
n Check for wear. Replace both brushes when either has
less than 1/4 in. length of carbon remaining. Do not re-
place one side without replacing the other.
n Reassemble using new brush assemblies. Make sure
curvature of brush matches curvature of motor and that
brush moves freely in brush tube.
n Make sure brush cap is oriented correctly (straight) and
replace.
n Tighten brush cap securely. Do not overtighten.
MAINTENANCE
�
BRUSH
CAP
Fig. 40
BRUSH
CAP
BRUSH
ASSEMBLY
BRUSH
ASSEMBLY