


36
®
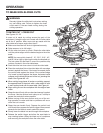
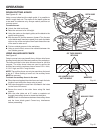
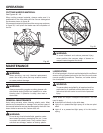
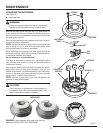
BRUSH REPLACEMENT
See Figure 50.
The saw has externally accessible brush assemblies that
should be periodically checked for wear.
Proceed as follows when replacement is required:
Unplug the saw.
WARNING:
Failure to unplug the saw could result in accidental
starting causing serious injury.
Remove brush cap with a screwdriver. Brush assembly is
spring loaded and will pop out when you remove brush
cap.
Remove brush assembly.
Check for wear. Replace both brushes when either has less
than 1/4 in. length of carbon remaining. Do not replace
one side without replacing the other.
Reassemble using new brush assemblies. Make sure
curvature of brush matches curvature of motor and that
brush moves freely in brush tube.
Make sure brush cap is oriented correctly (straight) and
replace.
Tighten brush cap securely. Do not overtighten.
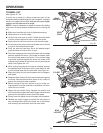
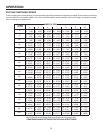
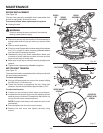
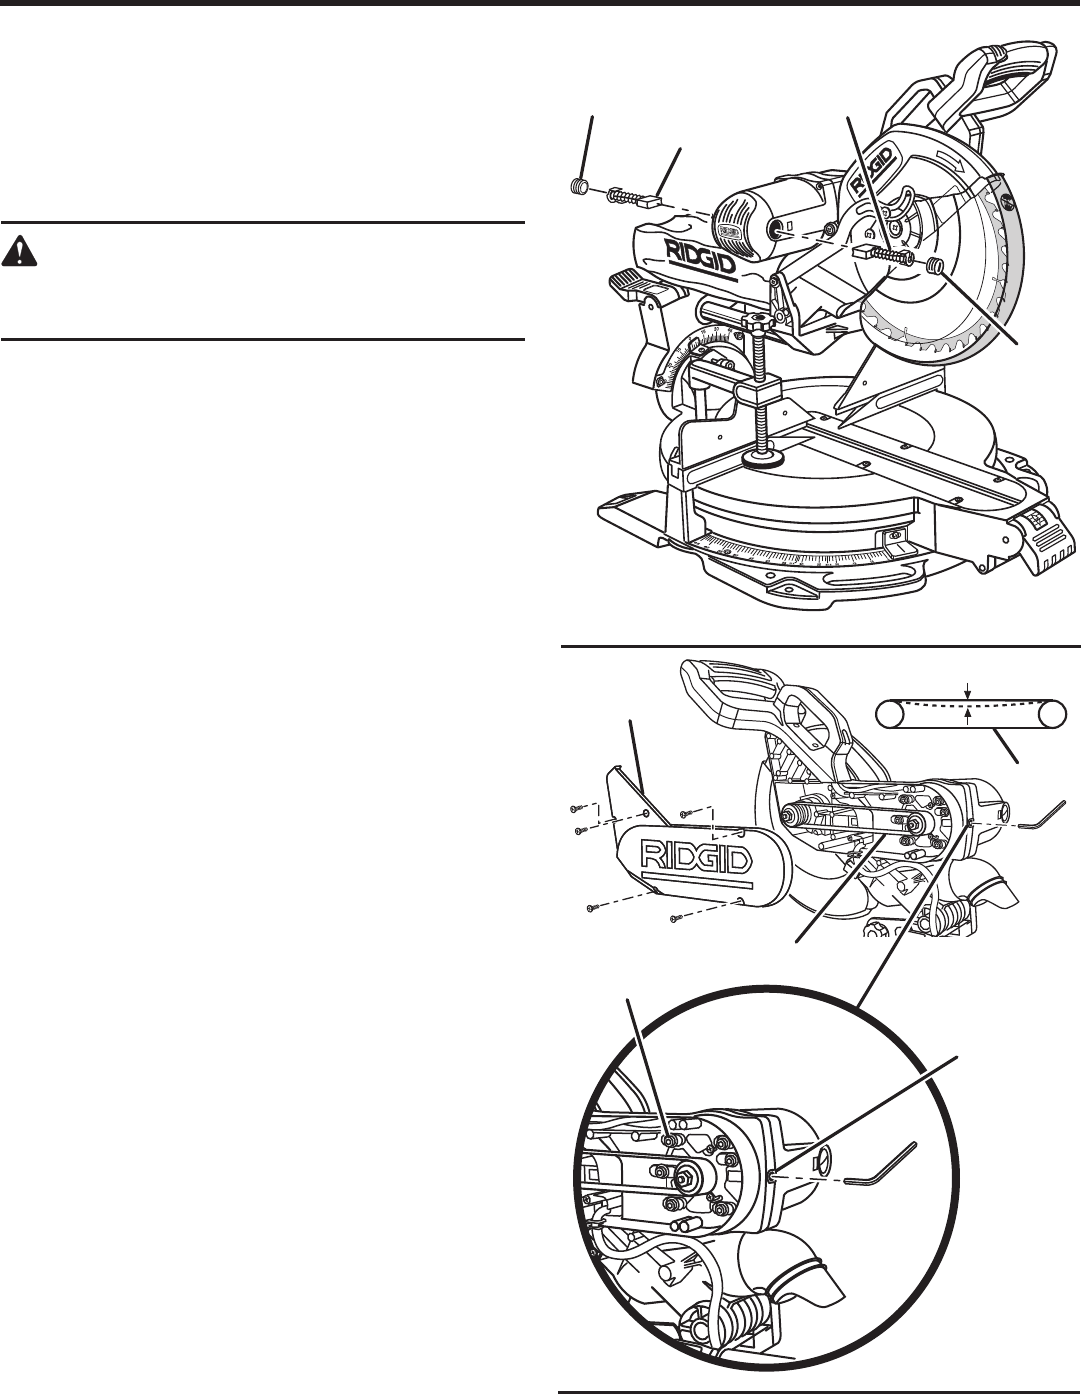
MOTOR BELT TENSION
See Figure 51.
The motor belt tension was adjusted at the factory but should
still be checked periodically.
To check belt tension:
Using a phillips screwdriver, remove the screws holding
the belt cover. Lift off the cover.
Check belt tension by squeezing the belt. Using light
pressure, the belt should deflect approximately 1/4 in.
To adjust belt tension:
Loosen, but don’t remove, the six motor mount screws.
Increase the belt tension by turning the adjusting socket
head set screw clockwise. Decrease the belt tension by
turning the set screw counterclockwise.
NOTE: Excessive belt tension will cause the motor to fail
prematurely.
Securely tighten the six motor mount screws.
Replace the belt cover and tighten securely using
screws.
MAINTENANCE
BRUSH
CAP
Fig. 50
BRUSH
CAP
BRUSH
ASSEMBLY
BRUSH
ASSEMBLY
Fig. 51
ADJUSTING
SOCKET HEAD
SCREW
BELT COVER
MOTOR MOUNT
SCREWS
BELT
1/4 in.
BELT