


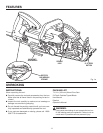
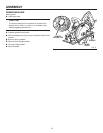
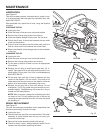


23
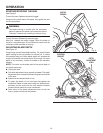
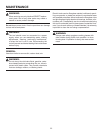
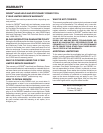
Fig. 22
LUBRICATION
See Figure 22.
This tool has been properly lubricated and is ready to use.
It is recommended that the gears be lubricated only with
Mobil SHC 636 Oil.
After extended use, check the oil level, using the dipstick
provided.
CHECKING THE OIL
Unplug the tool.
Place the base of the saw on a horizontal surface.
Remove the oil plug using a 6mm hex wrench.
�Insert the dipstick straight into the tool. Do not force.
�Check the oil level. It should be between the two white
marks on the dipstick.
If the oil level is not above the first white mark, add oil a
little at a time until the oil reaches the correct level.
Return the dipstick to the storage area on the underside
of the tool.
CHANGING THE OIL
Unplug the tool.
Place the base of the saw on a horizontal surface.
Remove the oil plug using a 6mm hex wrench.
Tip the saw up and let oil drain out into an appropriate
oil container.
Replace the oil using a small funnel (less than 1/4 in.
spout). Take care to let air out while putting new oil in to
avoid spilling. Fill only with .5 oz. (15cc, or one tablespoon)
Mobil SHC 636 Oil.
Fill the gear case until the oil level is between the two
marks on the dipstick. Do not overfill. If the level of oil
raises above the second mark on the dipstick while the
base is on a level surface, overheating may occur.
Replace the oil plug with a 6mm hex wrench. Do not
overtighten. The O-ring under the head should be com-
pressed slightly. Overtightening will cause the o-ring to
unseat and not seal properly.
NOTE: With a new saw, change the oil following the first
ten hours of use. This will prolong the life of the tool by
removing the gear particles from the oil when the gears
are breaking in.
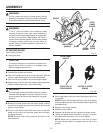
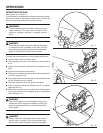
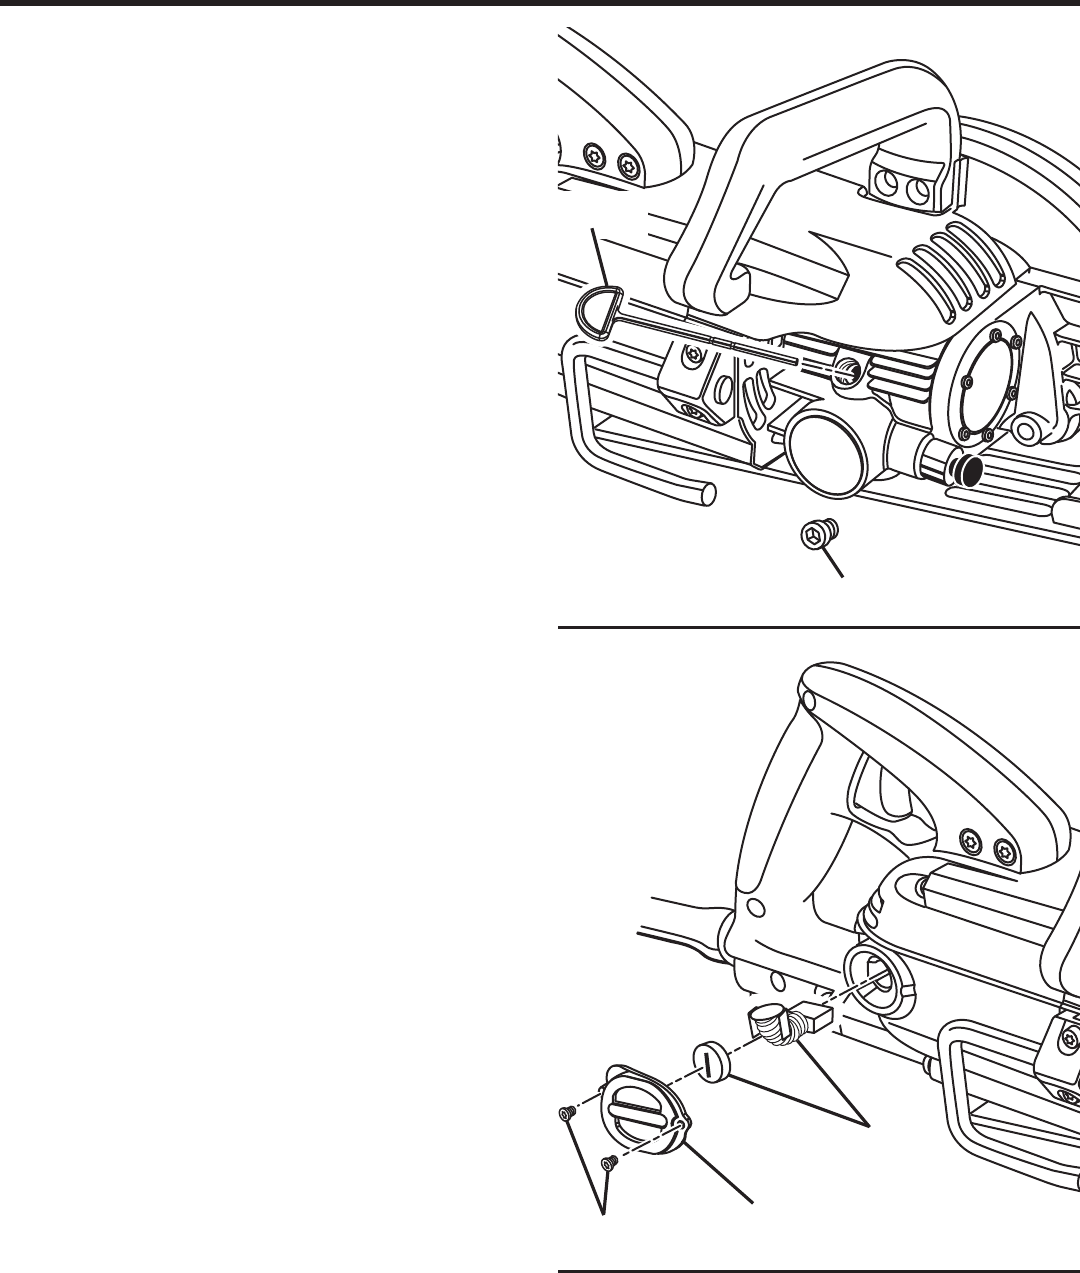
BRUSH REPLACEMENT
See Figure 23.
The tool has externally accessible brush assemblies that
should be periodically checked for wear.
Unplug the tool.
Remove the brush cap with a torx screwdriver. The brush
assembly is spring loaded and will pop out when you
remove the brush cap.
Remove the brush assembly (brush and spring).
Check for wear. If worn, always replace in pairs. Do not
replace one side without replacing the other.
MAINTENANCE
Fig. 23
BRUSH
ASSEMBLY
BRUSH
CAP
SCREWS
OIL PLUG
DIPSTICK