12 13
OPERATION
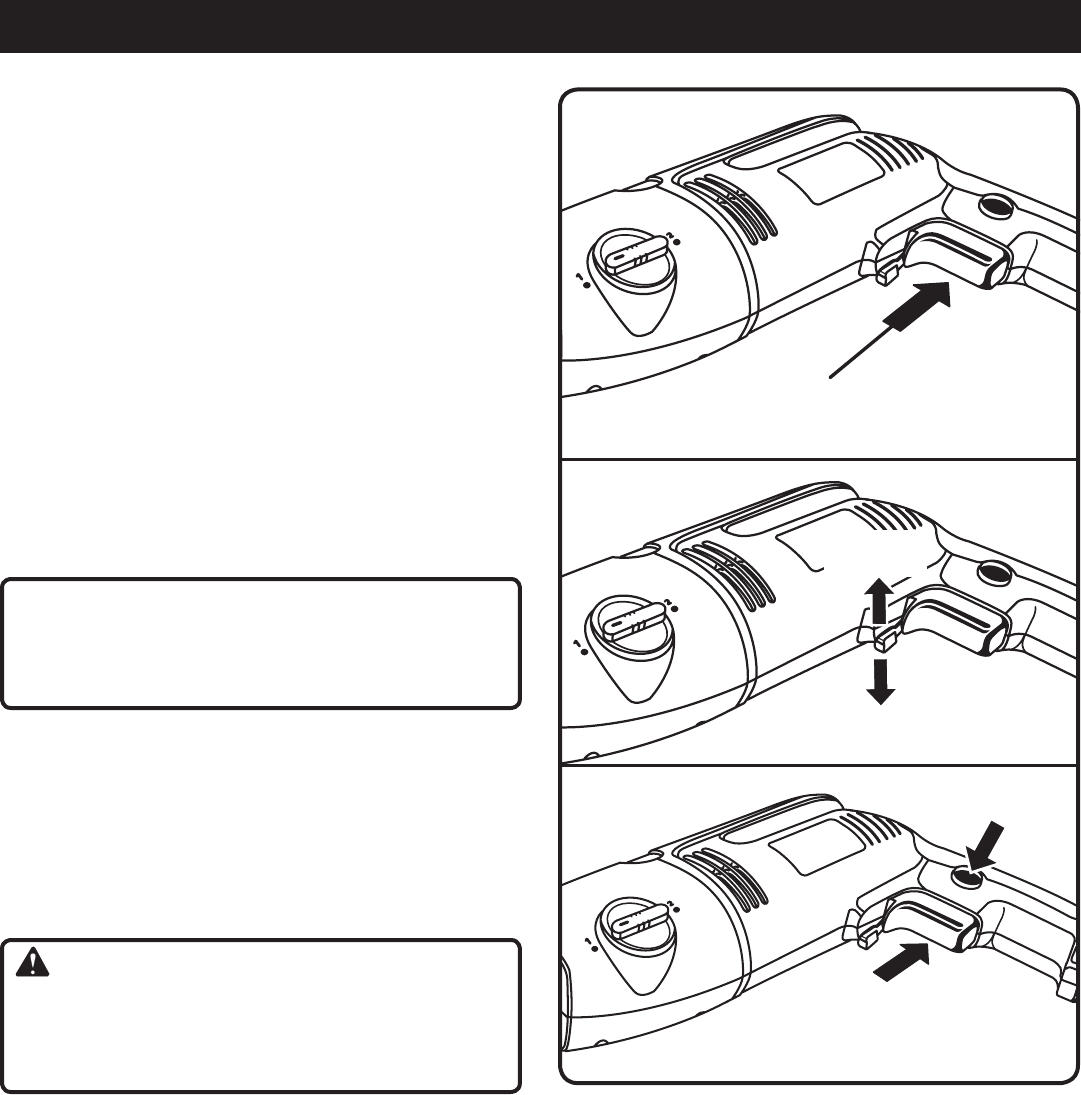
TURNING THE HAMMER DRILL ON/OFF
See Figure 8.
To turn the hammer drill on and off.
n To turn the drill on: depress the switch trigger.
n To turn the drill off: release the switch trigger.
CHANGING THE ROTATION
See Figure 9.
The direction of the chuck is controlled by the lever located
above the switch trigger.
NOTE: The design of the switch will not permit changing
the direction of rotation while the drill is running. Release
the switch trigger and allow the drill to stop before chang-
ing its direction.
n For forward rotation: Move the lever to the left.
n For reverse rotation: Move the lever to the right.
NOTE: The hammer drill will not run unless the lever is
pushed fully to the left or right.
CAUTION:
The hammer drill is not designed for reverse hammer-
ing. Failure to heed this caution may result in damage
to the drill.
LOCKING ON
See Figure 10.
The lock-on feature allows you to lock the drill on when
you operate it continuously for extended periods of time. If
you have the “lock-on” feature engaged during use and the
drill is disconnected from the power supply, disengage the
“lock-on” feature immediately. Also, do not lock the trigger
switch if you might need to suddenly stop the drill.
WARNING:
Before connecting the hammer drill to a power supply,
make sure it is not in the “locked-on” position. Failure to
do so could result in accidental starting of the drill result-
ing in possible serious injury.
To lock on:
n Depress the switch trigger.
n Push in the lock-on button.
n Release the switch trigger.
n Release the lock-on button.
NOTE: To release the lock, depress the switch trigger.
DEPRESS SWITCH TRIGGER TO
TURN HAMMER DRILL ON
REVERSE
ROTATION
FORWARD
ROTATION
SWITCH
TRIGGER
LOCK-ON
BUTTON
Fig. 10
Fig. 8
Fig. 9


