14 15
MAINTENANCE
Electric tools used on fiberglass material, wallboard, spackling
compounds, or plaster are subject to accelerated wear and
possible premature failure because the fiberglass chips and
grindings are highly abrasive to bearings, brushes, commu-
tators, etc. Consequently, we do not recommended using this
tool for extended work on these types of materials. However,
if you do work with any of these materials, it is extremely
important to clean the tool using compressed air.
LUBRICATION
All of the bearings in this tool are lubricated with a sufficient
amount of high grade lubricant for the life of the unit under
normal operating conditions. Therefore, no further lubrica-
tion is required.
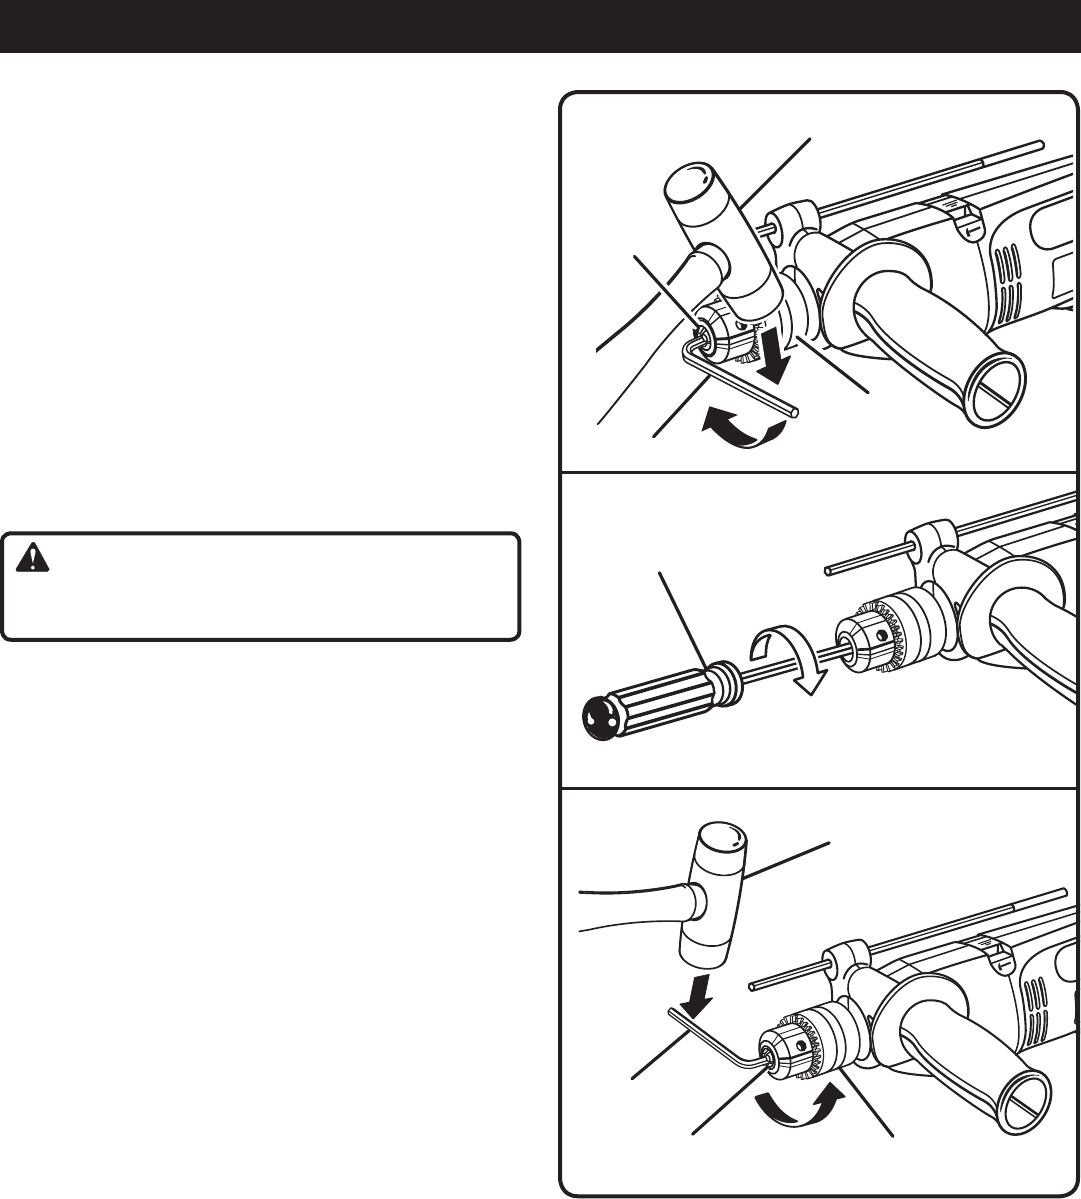
REMOVING THE CHUCK
See Figures 12 - 14.
n Unplug the hammer drill.
WARNING:
Failure to unplug the tool could result in accidental start-
ing causing possible serious injury.
n Open the chuck jaws by turning the chuck collar coun-
terclockwise.
n Insert a 5/16 in. or larger hex key into the chuck.
n Tighten the chuck jaws using the chuck key provided.
n Loosen the chuck screw by tapping the hex key sharply
with a mallet in a clockwise direction.
n Open the chuck jaws and remove the hex key.
�n Remove the chuck screw by turning it in a clockwise
direction with a screwdriver.
NOTE: The screw has left hand threads.
n Reinsert the hex key into the chuck.
n Tighten chuck jaws securely using chuck key provided.
n Loosen the chuck by tapping the hex key sharply with a
mallet in a counterclockwise direction.
n Unscrew the chuck by hand.
TIGHTENING A LOOSE CHUCK
See Figures 12 - 13.
The chuck may become loose on the spindle and begin
to shake when using the drill. Also, the chuck screw may
become loose, causing the chuck jaws to bind and prevent
them from closing. To tighten the chuck:
�n Unplug the hammer drill.
n Open the chuck jaws by turning the chuck collar coun-
terclockwise.
n Insert a 5/16 in. or larger hex key into the chuck.
n Tighten the chuck jaws using the chuck key provided.
n Tap the hex key sharply with a mallet in a clockwise
direction to tighten the chuck on the spindle.
n Open the chuck jaws and remove the hex key.
n Tighten the chuck screw by turning it in a counterclock-
wise direction with a screwdriver.
NOTE: The screw has left hand threads.
Fig. 12
Fig. 13
Fig. 14
MALLET
CHUCK
JAWS
CHUCK
HEX KEY
SCREWDRIVER
MALLET
HEX KEY
CHUCK JAWS
CHUCK


