


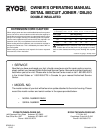
Page 17
3
2
3
2
MAINTENANCE
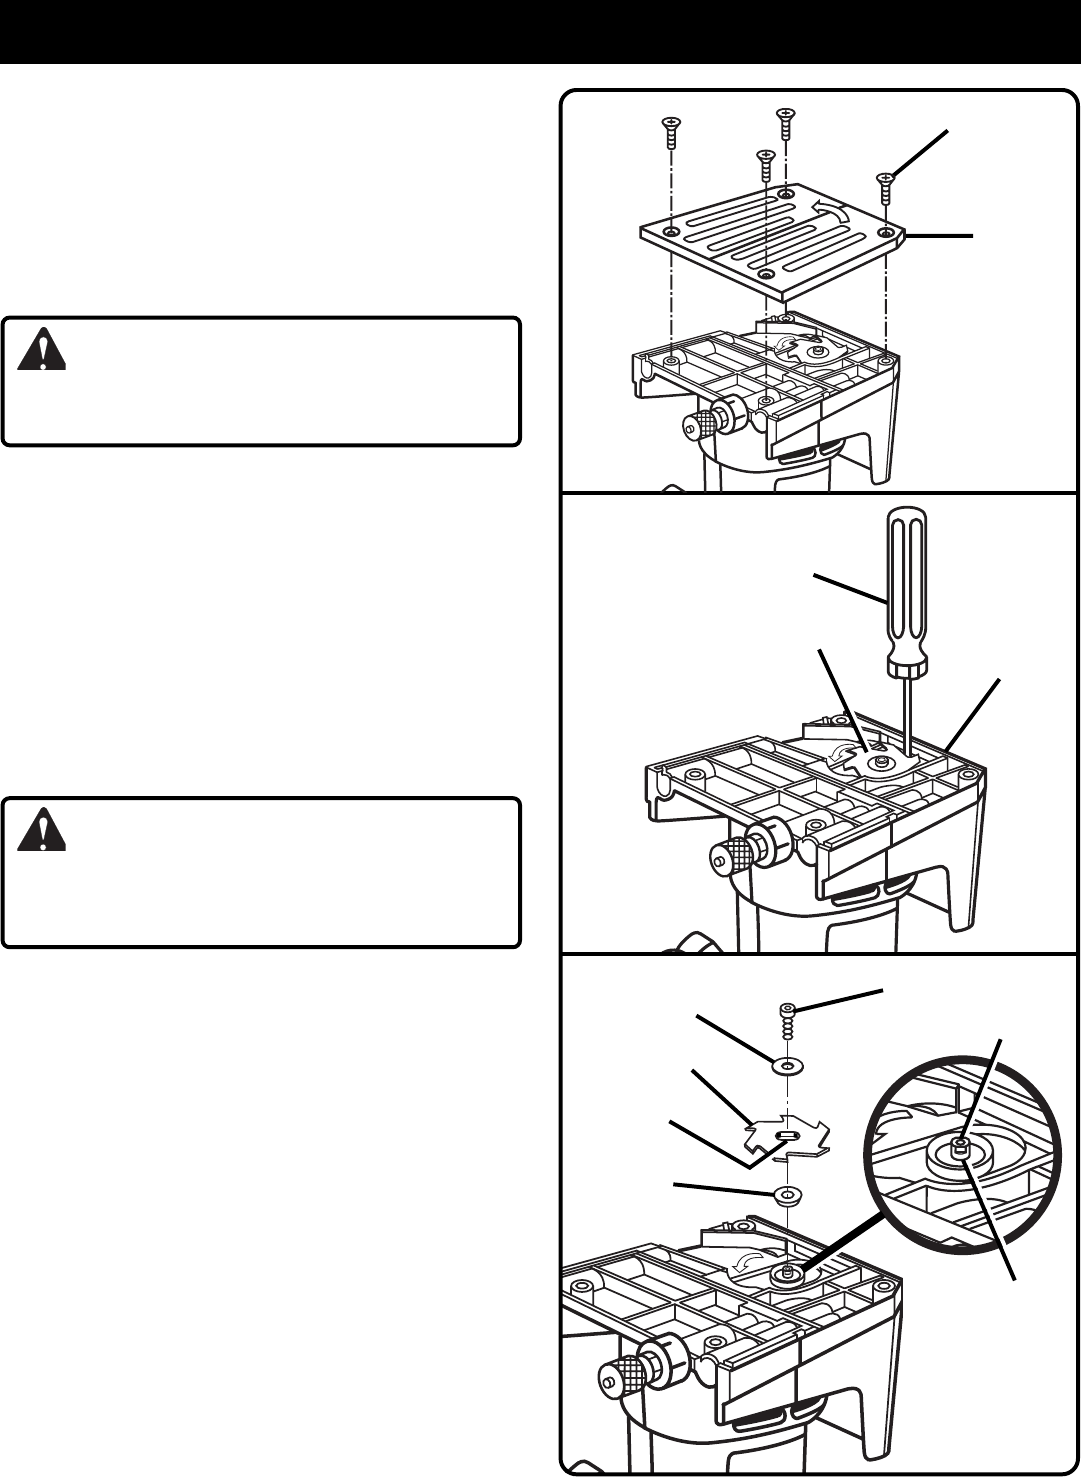
Fig. 20
Fig. 21
Fig. 22
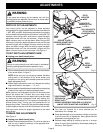
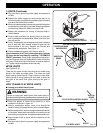
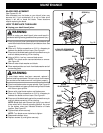
FRONT BASE
BLADE
SCREWS (4)
BOTTOM
SHOE
3
2
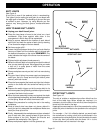
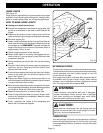
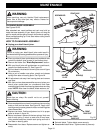
BLADE SCREW
BLADE
INNER
BLADE
WASHER
BLADE
FLATS
OUTER
BLADE WASHER
GEAR
SPINDLE
FLATS
GEAR
SPINDLE
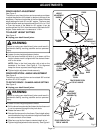
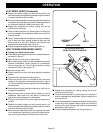
#1 PHILLIPS SCREWDRIVER
OR 3/16 in. DIAMETER PIN
BLADE REPLACEMENT
See Figures 20– 22.
After extended use, the blade on your biscuit joiner may
become dull. If you accidentally hit a nail or other blunt
object, it will dull or break the blade. These situations
require replacing the blade.
HOW TO REPLACE THE BLADE
■ Unplug your detail biscuit joiner.
WARNING:
Failure to unplug your detail biscuit joiner could result in
accidental starting causing possible serious personal injury.
■ Place your biscuit joiner upside down on a workbench and
remove the bottom shoe screws (4) and bottom shoe.
See
Figure 20.
■ Place a #1 Phillips screwdriver or 3/16 in. diameter pin
between the blade and front base.
See Figure 21.
■ Place one of the blade teeth against the screwdriver or pin
and lock blade preventing it from rotating.
■ Using a 9/64 in. hex key, remove blade screw.
NOTE: Turn blade screw counterclockwise to remove.
See Figure 22.
■ Remove outer blade washer and blade.
■ Clean wood particles and resin from blade washer and all
surrounding parts.
WARNING:
If inner blade washer has been removed, replace it
before installing new blade. Failure to do so could cause
an accident since blade screw will not tighten properly.
■ Place inner blade washer on gear spindle.
See Figure 22.
■ Place new blade onto gear spindle and align flats on blade
with flats on gear spindle.
■ Secure with outer blade washer and blade screw.
■ Place a #1 Phillips screwdriver or 3/16 in. diameter pin
between the blade and front base.
See Figure 21.
■ Place one of the blade teeth against the screwdriver or pin
and lock blade preventing it from rotating.
NOTE: Blade teeth point toward the right of your biscuit
joiner when held in normal operating position. An arrow
on the bottom shoe also indicates direction of blade
rotation.
See Figure 20.
■ Tighten blade screw securely.
NOTE: Turn blade screw clockwise to tighten.
■ Reassemble bottom shoe.
■ Replace screws (4) and tighten securely.