


Page 12
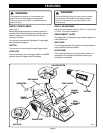
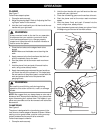
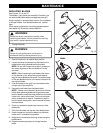
Fig. 9
Fig. 10
OPERATION
PLANING EDGES AND MAKING RABBET
CUTS
The planer comes with an adjustable edge guide for
precision edge planing and rabbet cutting. Attach the
edge guide to either side of the planer for planing edges
and attach the edge guide to the left side for making
rabbet cuts.
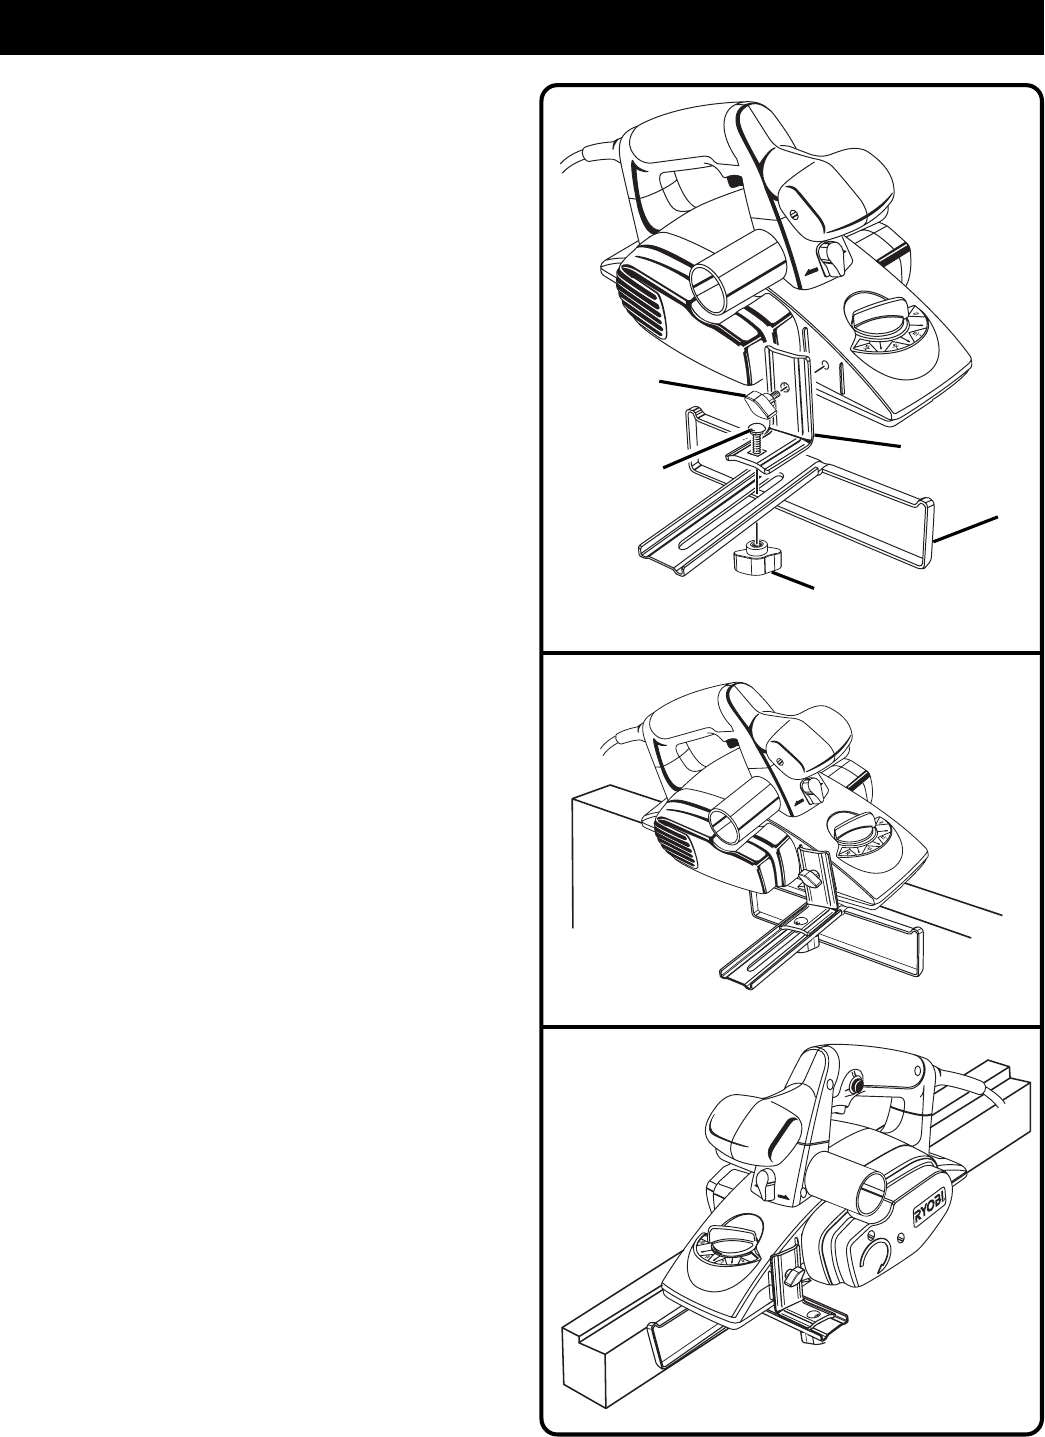
TO ATTACH THE EDGE GUIDE FOR PLANING
EDGES
See Figure 9 and 10.
Follow these steps to attach the edge guide for planing
edges.
1. Unplug the planer.
2. Attach the bracket to the desired side of the planer
using the knob bolt.
3. Attach the edge guide to the bracket using the knob
nut and the carriage head bolt.
4. Tighten the retaining knob securely.
TO PLANE EDGES
See Figure 10.
Follow the directions in the “Planing” section earlier in
this manual. Hold the edge guide firmly against the edge
of the work surface.
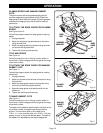
TO ATTACH THE EDGE GUIDE FOR MAKING
RABBET CUTS
See Figure 11.
Follow these steps to attach the edge guide for making
rabbet cuts.
1. Unplug the planer.
2. Attach the bracket to the left side of the planer using
the knob bolt.
3. Attach the edge guide loosely to the bracket using
the knob nut and the carriage head bolt.
4. Adjust the edge guide to the desired width for the
rabbet cut.
5. Tighten the retaining knob securely.
TO MAKE RABBET CUTS
See Figure 11.
Follow the directions in the “Planing” section earlier in
this manual. Hold the edge guide firmly against the edge
of the work surface.
The depth of the rabbet is determined by the depth of the
cut and the number of passes made along the work
surface. The maximum depth of the rabbet cut is
7/16 in. (11.1 mm) and has to be cut in 3/32 in. (2.4 mm)
passes, or less, to reach the desired depth. The width of
the rabbet cut is adjustable by moving the edge guide.
Fig. 11
PLANING
EDGES
MAKING
RABBET
CUTS
BRACKET
KNOB
BOLT
EDGE
GUIDE
KNOB NUT
CARRIAGE
HEAD BOLT