


17
OPERATION
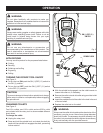
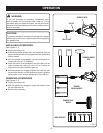
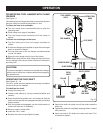
TELESCOPING TOOL HANGER WITH CLAMP
ON BASE
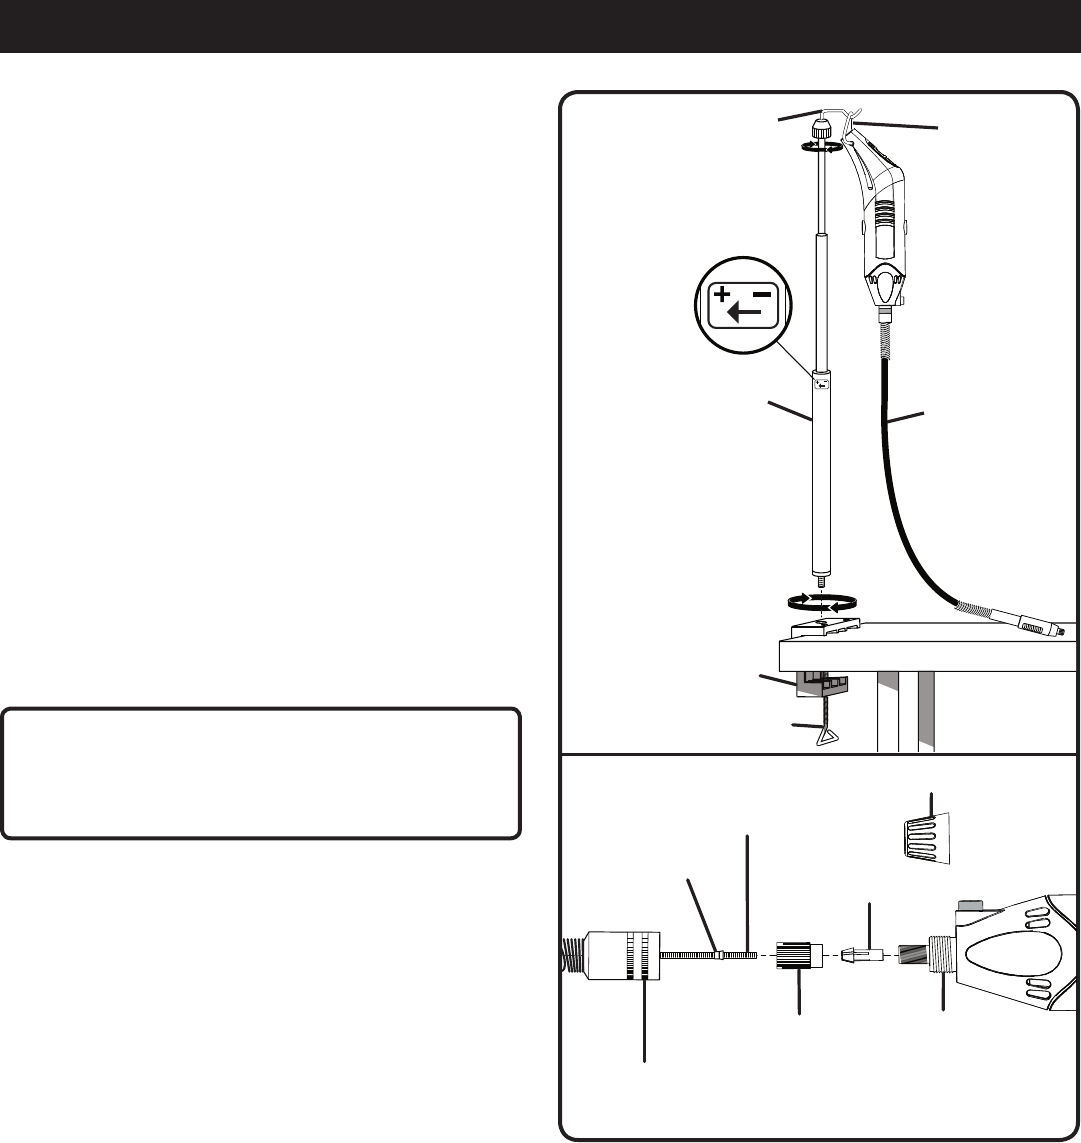
See Figure 11.
The telescoping tool hanger provides a convenient place to
hang the rotary tool while the flex shaft is in use.
To clamp the base to a worktable:
Turn the clamp screw counterclockwise to open the
clamping area.
Place clamp over edge of worktable.
Turn the clamp screw clockwise until the clamp is
secure.
To attach the tool hanger to the base:
Turn the lower part of the tool hanger clockwise to
unlock.
Pull the tool hanger up to lengthen or push the tool hanger
down to shorten its height.
Turn the lower part of the tool hanger counterclockwise
to lock into place.
Screw the tool hanger into the top of the clamp.
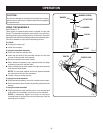
NOTE: When using the flex shaft, hang the rotary tool from
the tool hanger hook using the hook located on the back of
the rotary tool.
CAUTION:
To prevent damage to the spindle or spindle lock, always
allow motor to come to a complete stop before engaging
the spindle lock.
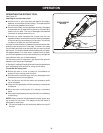
OPERATING THE FLEX SHAFT
See Figures 12 - 14.
The 1/8 in. collet must be inserted into the rotary tool before
the flex shaft can be installed.
To install the flex shaft:
Unplug the rotary tool.
Loosen collet sleeve by turning counterclockwise and
remove.
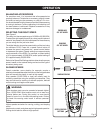
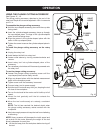
Press and hold the spindle lock, and rotate the shaft by
hand until the spindle lock engages the shaft, preventing
further rotation.
With the spindle lock engaged, use the collet wrench to
loosen the collet nut, if necessary.
Remove collet nut and collet.
Insert the 1/8 in. collet.
Replace the collet nut and tighten loosely.
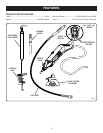
Fig. 12
Fig. 11
CUP END OF
FLEX SHAFT
COLLET SLEEVE
CLAMP SCREW
CLAMP-ON BASE
TOOL HANGER
FLEX SHAFT
ROTARY TOOL
HOOK
TOOL HANGER
HOOK
COLLET
NUT
DRIVE
SHAFT
1/8 in.
COLLET
ROTARY
TOOL HEAD
COLLAR
Insert drive shaft into collet nut until the collar meets the
collet nut.
Tighten the collet nut completely, keeping collar in contact
with collet nut.
Insert cup end of flex shaft onto rotary tool head. Turn
clockwise to tighten.