


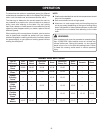


19
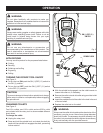
OPERATION
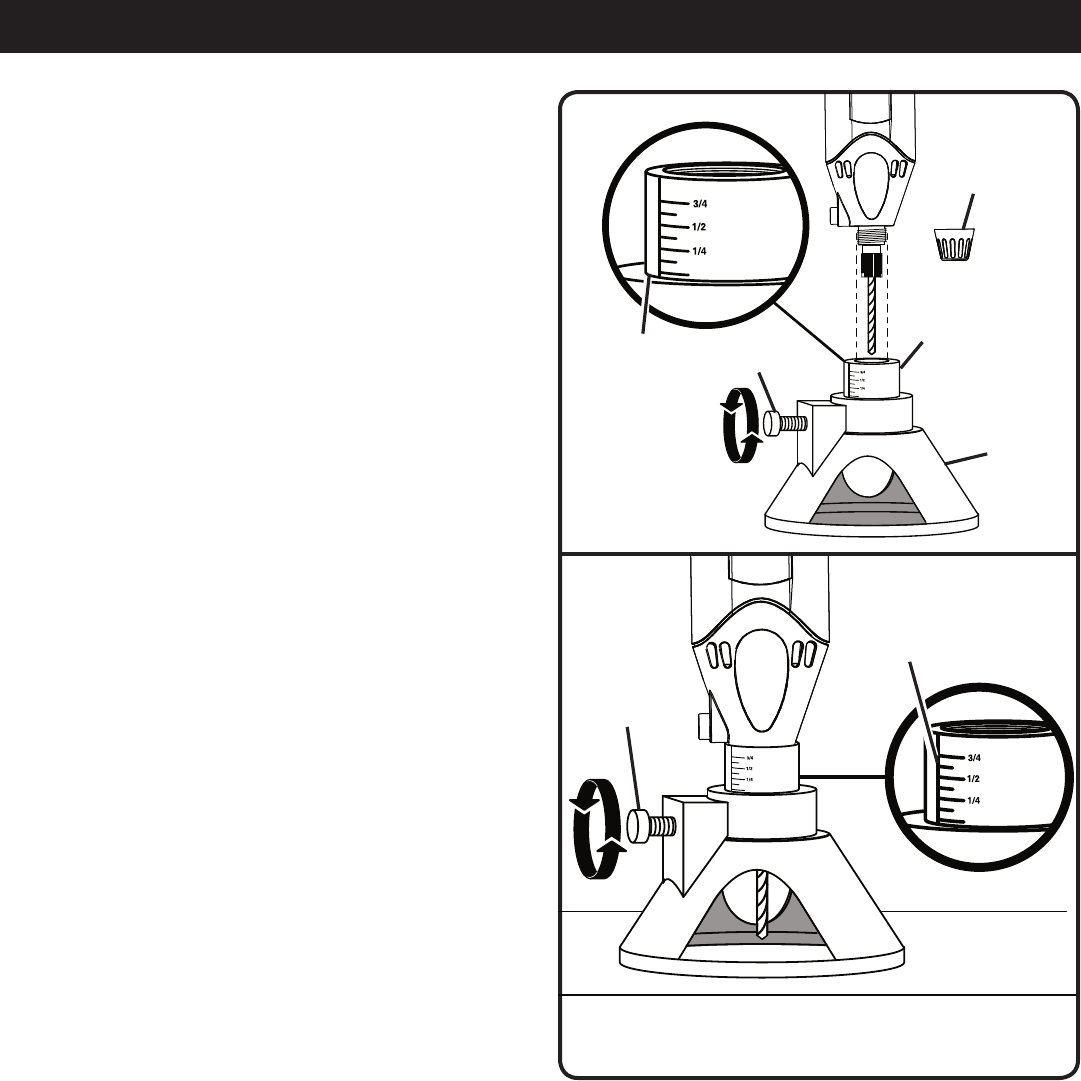
USING THE PLUNGE CUTTING ACCESSORY
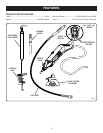
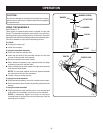
See Figures 15 - 16.
The plunge cutting accessory attaches to the end of the
rotary tool. Depth of cut can be adjusted in 1/8 in. increments
up to 1 in.
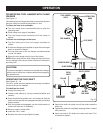
To assemble the plunge cutting accessory:
Hold the cup-shaped accessory piece with the cup side
facing down.
Insert the cylinder-shaped accessory piece up through
the cup-shaped piece. The legs of the cylinder-shaped
piece should be facing down.
Align the groove in the cylinder-shaped piece with the
screw in the cup-shaped piece.
Tighten the screw to secure the cylinder-shaped piece in
place.
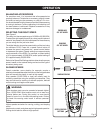
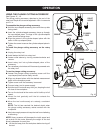
To install the plunge cutting accessory on the rotary
tool:
Unplug the rotary tool.
Install desired drill bit into rotary tool.
Loosen collet sleeve by turning counterclockwise and
remove.
Insert rotary tool into cylinder-shaped piece of the
accessory.
Turn accessory clockwise until it is securely screwed onto
the rotary tool.
To use the plunge cutting accessory:
Loosen the plunge cutting accessory screw until the
cup-shaped piece can be easily moved.
Align cup-shaped piece with the desired measurement
depth on the accessory scale.
Tighten screw until the accessory is secured.
Connect rotary tool to power supply.
Hold the tool in front and away from you, keeping the tool
bit clear of the workpiece.
Turn on the tool and let the motor and bit build up to full
speed.
Lower the tool gradually until the bit contacts the
workpiece.
Move the tool continuously at a steady, consistent
pace.
NOTE: The bit has reached the desired depth when
the plunge cutting accessory makes contact with the
workpiece.
Use just enough pressure to keep the tool from chattering
or bouncing.
NOTE: Heavy pressure will decrease the tool’s speed and
put a strain on the motor. Normally the weight of the tool
alone is adequate for most jobs.
Lift the tool away from the workpiece before turning off
the tool.
Fig. 16
Fig. 15
GROOVE
CYLINDER
PIECE
SCREW
CUP
PIECE
COLLET
SLEEVE
SCREW
SCALE