Page 9
ASSEMBLY
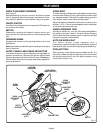
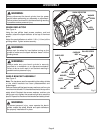
SPARK DEFLECTOR
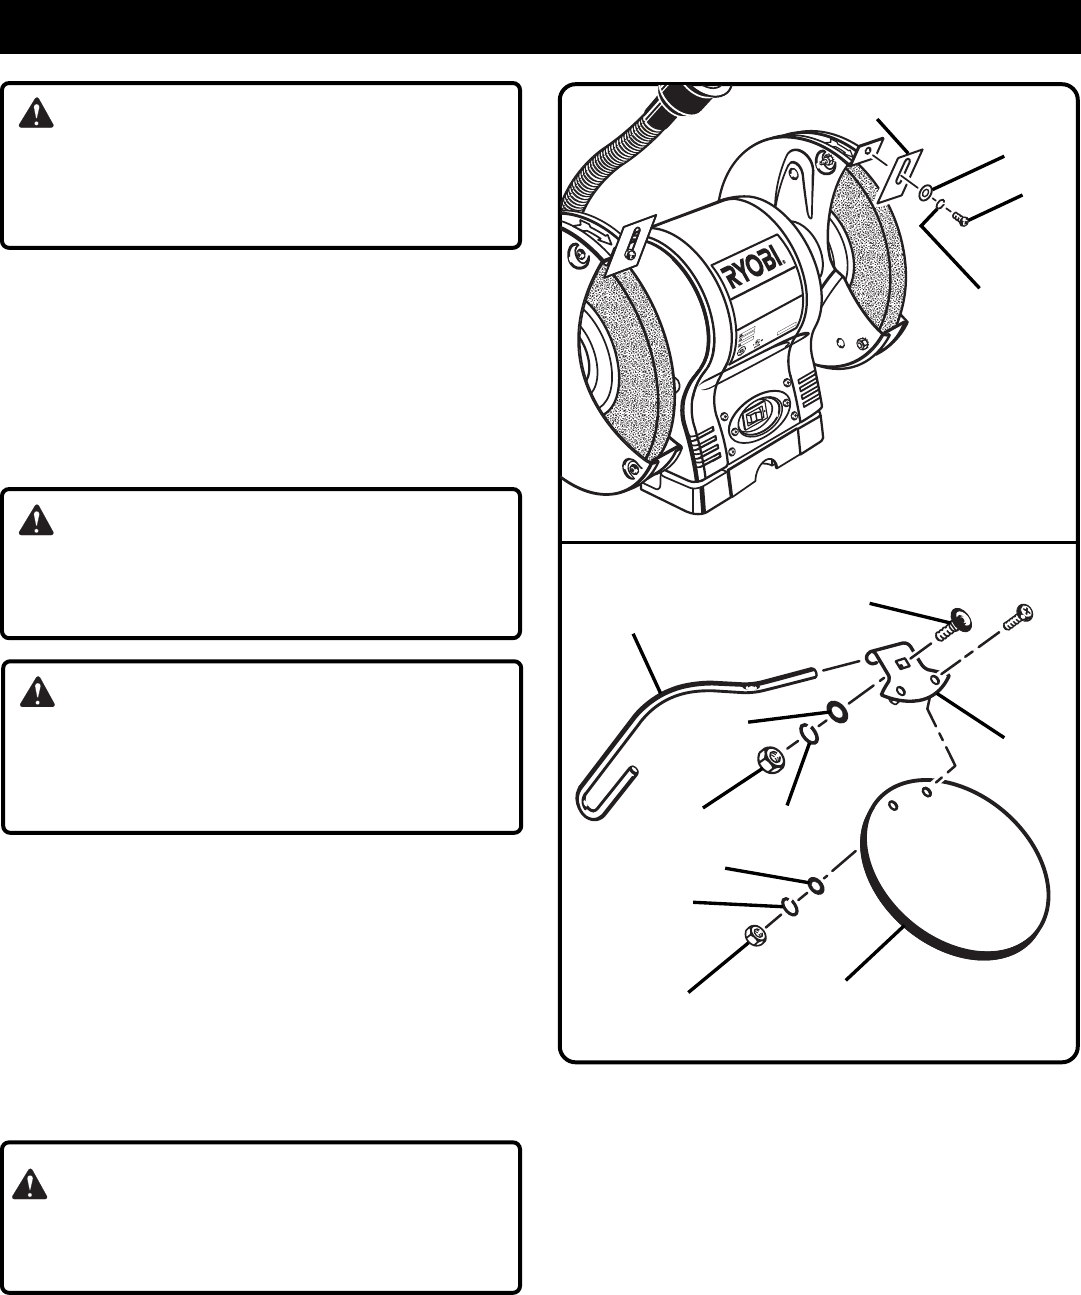
See Figure 4.
Using the two phillips head screws, washers, and lock
washers, attach the spark deflector to the top of the wheel
guard.
Adjust the spark deflectors to within 1/16 in. (1.6 mm) of the
grinding wheel. Tighten screws securely.
WARNING:
Always disconnect the bench grinder from the power
source before performing any assembly or adjustment.
Failure to do so could result in accidental starting resulting
in possible serious personal injury.
WARNING:
Always spin the wheel by hand before turning on the
grinder to make sure the spark deflector doesn’t hit the
grinding wheel.
WARNING:
Always make sure your bench grinder is securely
mounted to a workbench or an approved workstand.
Failure to do so could result in an accident resulting in
possible serious personal injury.
Fig. 4
C
O
O
L
A
N
T
T
R
A
Y
0FF
0
N
8
”
B
e
n
c
h
G
rin
d
e
r
RYOBI TE
CHNOLOGIES, INC.
Anderson, SC 29625
1-800-525-2579
SER. No.
BGH615 120V AC 60Hz 2.1A 3600 RP
M/TR/MN 1/2” Arbor
Por razones de seguridad, leer atentamente el Manual del Usuario antes de poner el
uso la máquina. Usar protección de seguridad para los ojos y discos de amolar aptos
para la velocidad de la máquina.
MADE IN CHINA
F
ABRIQUE AUX CHINA
FABRICADO EN CHINA
For Safe Operation, Read and Understand Operator's Manual Before Using Tool.
Wear Eye Protection. Always use Guards and use grinding wheels suitable for speed of grinder.
Avant utilisation, il faut lire et comprendre le
manuel d’utilisation pour utiliser l’outil d’une
manière sûre. Il faut porter des lunettes de sécurité. Il faut toujours utiliser les carters
de protection et utiliser des meules appropriées pour le régime de la meuleuse.
A
D
V
E
R
T
E
N
C
I
A
W
A
R
N
I
N
G
A
V
E
R
T
I
S
S
E
M
E
N
T
E
48467
43F1
SPARK DEFLECTOR
LOCK
WASHER
SCREW
WASHER
SHIELD BRACKET ASSEMBLY
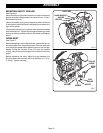
See Figure 5.
Note: The hardware used for assembling the safety shields
to the shield brackets has been preassembled and
prepackaged.
Remove the two phillips head screws, washers, and hex nuts
from the shield bracket. Fit the shield bracket to the top of the
safety shield. Reattach the screws, washers, and hex nuts
taking care not to tighten the screws so tight as to crack the
plastic. Repeat for the other shield bracket and safety shield.
WARNING:
To prevent personal injury, never operate the bench
grinder unless the safety shields and spark deflectors
are properly installed and in place.
Fig. 5
SHIELD ROD
CARRIAGE
BOLT
PHILLIPS SCREW
SHIELD
BRACKET
HEX NUT
WASHER
WASHER
HEX NUT
SAFETY
SHIELD
LOCK
WASHER
LOCK
WASHER


