


4
Sch590
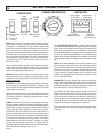
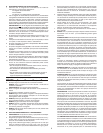
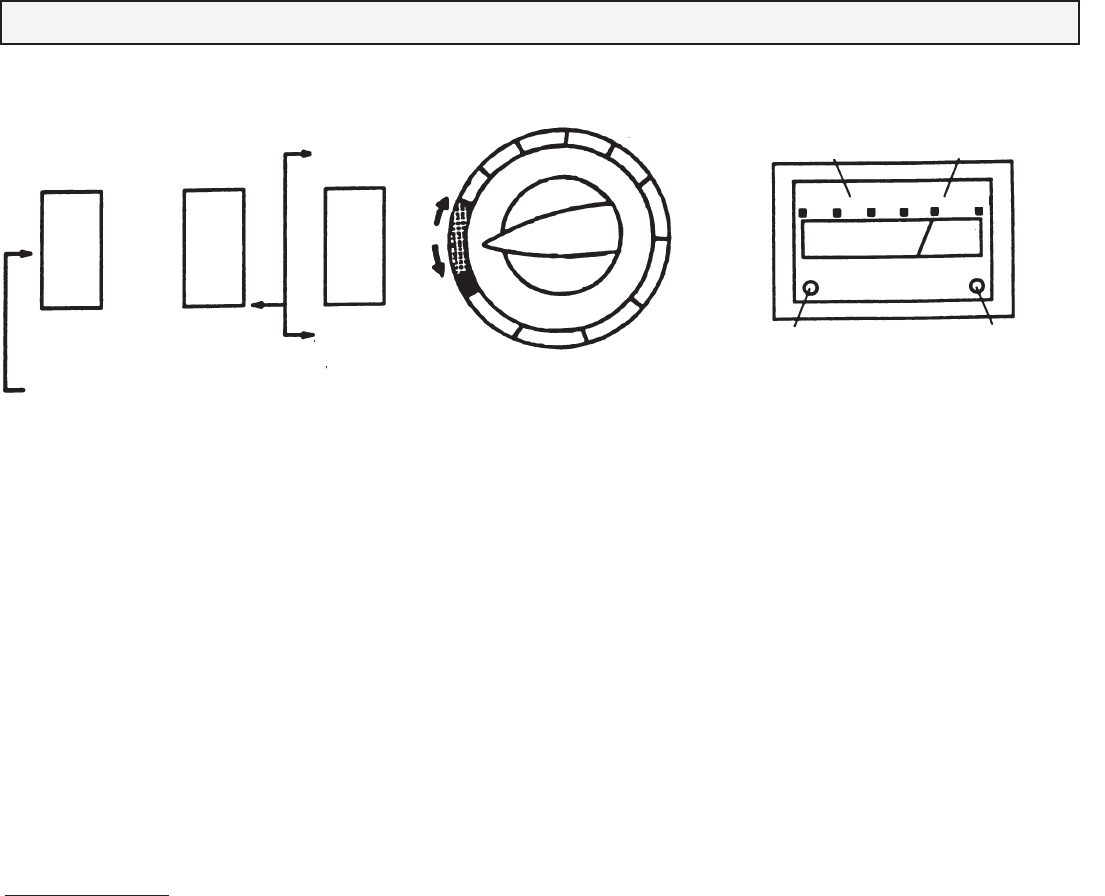
BATTERY CHARGER CONTROLS
G
SWlTCH # 1: Allows you to choose between manual or auto-
matic mode of operation. Automatic offers a selection between
conventional or maintenance-free type batteries. When using
either of the automatic positions set the timer to the hold posi-
tion. If you are not sure which type of battery you have, first
select the conventional position, when the charge complete in-
dicator turns on you may then select the maintenance free posi-
tion. If a maintenance-free battery, the charge complete indica-
tor should turn on, typically within 1 hour, if not you should dis-
continue charging. As an extra measure of safety you may set
the timer for 1 hour.
When charging a battery using the manual mode of operation
use the timer to limit the period of charge. The timer knob will
rotate counter clockwise indicating the remaining time left in the
charge period then automatically turn off.
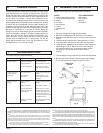
SWlTCH # 2: The 2 Amp charge rate is recommended for use
with small batteries only. If used as a trickle charger for large
batteries limit the charge period to a few days at a time. This is a
Manual Charge Only.
SWITCH #3: The 40 Amp charge rate may be used for fast charg-
ing of all types of larger lead acid batteries. If a battery is less
than half the size of the average automotive battery you should
avoid using the 40 amp rate.
Use the 200 Amp position for crank starting automobiles and
light trucks. Use only in combination with a battery in the vehicle
to reduce the chance of damaging sensitive electronic equip-
ment in the vehicle.
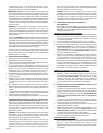
TIMER: The main function of the timer is to prevent over charg-
ing while allowing a battery time to obtain a satisfactory charge.
To properly set the timer you must know the size of the battery in
ampere hours or reserve capacity in minutes and the state of
charge. Often the state of charge is not known, this is one rea-
sons why the timer was limited to 2.5 hours. with the aid of a
battery load tester the state of charge can be obtained within a
few seconds. For example, the average size automotive battery
at a 50% state of charge will require 1 to 1.5 hours of charging at
the 40 amp rate to reach the full charge state. For the same
battery with the timer set to it’s maximum, 2.5 hours, over charg-
ing will occur, but not likely cause harm to a battery that was
other wise in good condition. When the charge state is not known,
start out with a timer setting of 1 hour or less.
The CHARGE INDICATOR LIGHT is located within the meter
dial. When a battery reaches full charge the light will turn bright
green. while in the automatic mode of charging the light will turn
on at the appropriate point for a conventional or maintenance
free type battery. While in the manual mode of charging the light
turns on only at the appropriate point for a conventional type
battery. When charging a Maintenance Free battery in the manual
mode of operation, allow an additional 15 to 20 minutes of charg-
ing.
HOLD: This position defeats the timer function, allowing for con-
tinuous operation. Use when charging in the automatic mode to
insure that the automatic function has the time required to bring
a battery to full charge. For a battery of questionable condition
the timer can be used in combination with the automatic mode
to guard against a potential problem. When using the 2 Amp
charge rate, most applications will require more time than the
2¼ hours the timer allows.
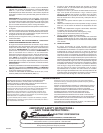
AMP METER: The meter indicates the amount of current mea-
sured in amperes that is being drawn by a battery. In the 40 Amp
charge rate a typical discharged battery will initially draw ap-
proximately 40 Amps. As the battery continues to charge, cur-
rent should taper to 15 to 20 Amps at full charge.
The START area of the meter indicates a high rate of current
being drawn from the charger. When cranking an engine the
starter motor draws up-wards to 200 Amps, the meter pointer
will be at the extreme right side of the start area. Some times a
battery for the first few minutes of it’s initial charge will draw
more than 40 Amps, in this case the pointer may be within but,
usually not to the extreme right side of the start area.
When using the 2 Amp rate the meter may indicate some activ-
ity but doesn’t have the resolution to display the battery’s state
of charge.
#1 #2
#3
MANUAL
2 AMP
MANUAL
CHARGE
40/200 AMP
SELECT
200 AMP
START
AUTOMATIC
MAINTENANCE-FREE
BATTERY
CONVENTIONAL
BATTERY
40 AMP
AUTOMATIC
CHARGE
OFF
HOLD
15
30
30
120
135
60
CHARGING
FULL CHARGE
40 AMP RATE
DISCHARGED
40 AMP RATE
FULL CHARGE
(GREEN INDICATOR)
REVERSE
CONNECTION
(RED INDICATOR)
CHARGE RATE
CHARGE TIME/MINUTES AMP METER
START
0 10 20 30 40 200