


• 8 •
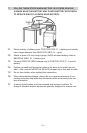
FEATURES9.
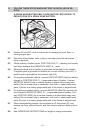
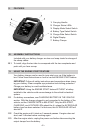
ASSEMBLY INSTRUCTIONS10.
Included with your battery charger are two cord wrap cleats for storage of
the clamp cables.
To install, align the two tabs to correspond with the two receptacles and 10.1
push until you hear a snap.
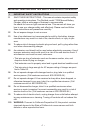
USING THE ENGINE START FEATURE11.
Your battery charger can be used to jump start your car if the battery is
low. Follow these instructions on how to use the ENGINE START feature.
IMPORTANT: Follow all safety instructions and precautions when charg-
ing your battery. Wear complete eye protection and clothing protection.
Charge your battery in a well-ventilated area.
IMPORTANT: Using the ENGINE START feature WITHOUT a battery
installed in the vehicle could cause damage to the vehicle’s electrical
system.
For battery connections, see CHARGING BATTERY IN THE VEHICLE 11.1
section. With the charger plugged in and connected to the battery of the
vehicle, set the CHARGE RATE to 80A START. Only the 80A START,
CHARGING, and VOLTAGE LEDs should be lit, unless the 6V REGULAR
battery type has been selected. In that case, the 6V REGULAR LED will
also be lit.
Crank the engine until it starts or 5 seconds passes. If engine does not 11.2
start, wait 3 minutes before cranking again.
After the engine starts, unplug the power cord before disconnecting the 11.3
output clamps from the battery.
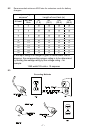
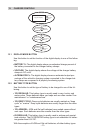
Carrying Handle1.
Charger Status LEDs2.
Display Mode Select Switch3.
Battery Type Select Switch4.
Charge Rate Select Switch5.
Digital Display6.
Battery Clamps7.