


5
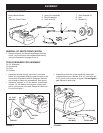
FIGURE 4
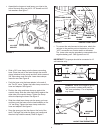
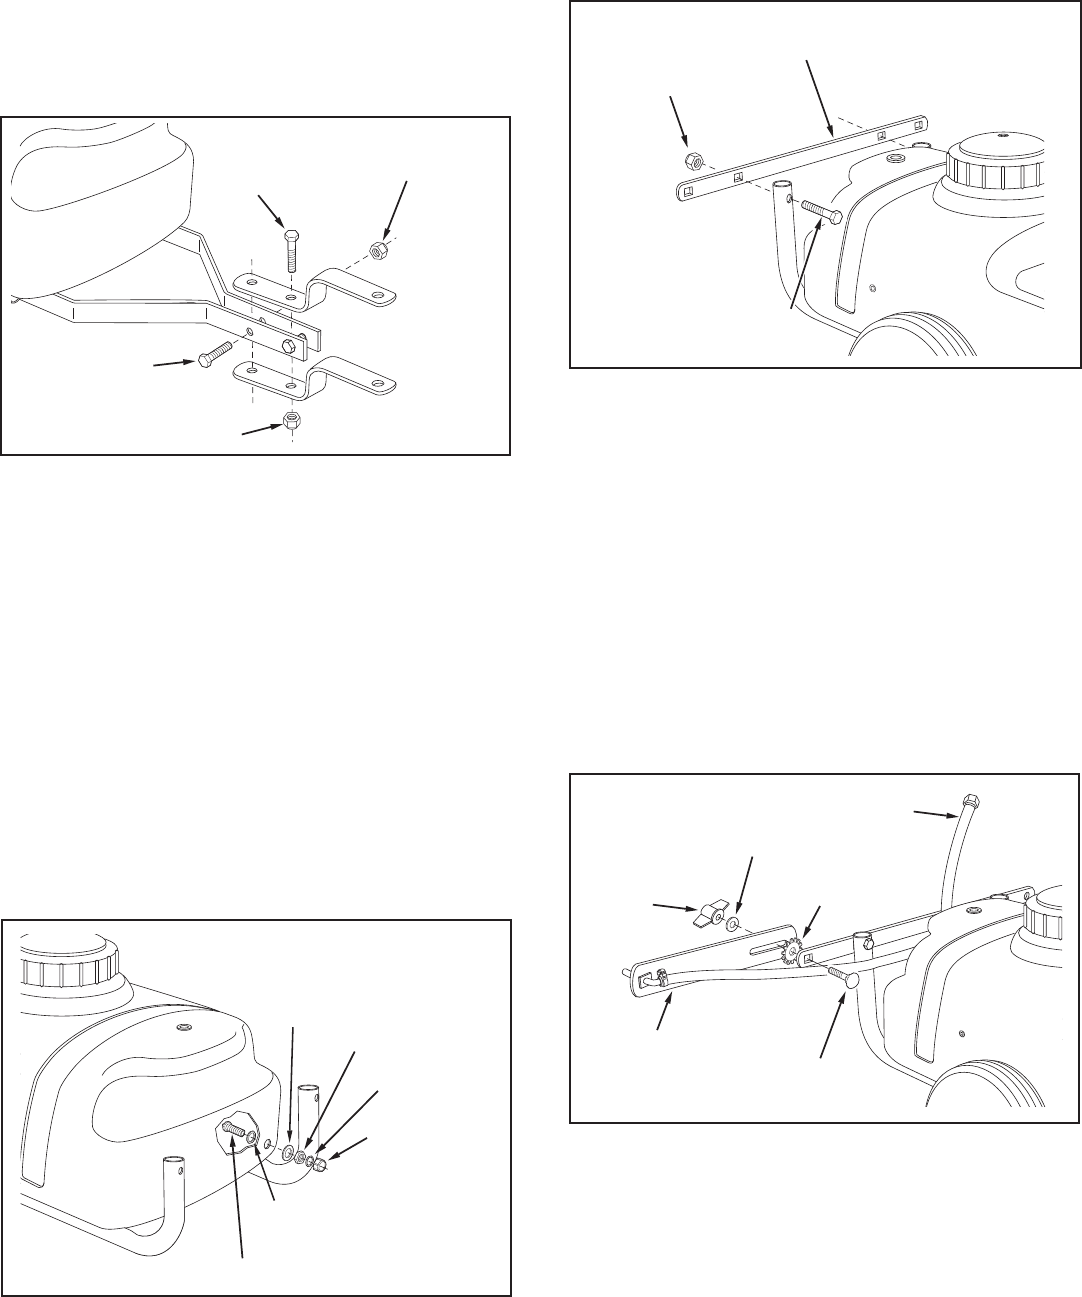
• Assemble the boom bars to the boom mount bracket
using two 5/16" x 1-1/4" carriage bolts, tooth lock
washers (between the bar and bracket), 5/16" at
washers and knobs. The boom connecting hose
should extend upward. See gure 6.
NOTE: Make sure the nozzle openings face straight
down when the boom bars are in the horizontal operating
position.
FIGURE 3
• At this time tighten all bolts starting with the bolts in
gure 2, then the bolts in gure 3.
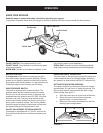
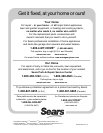
• Install the drain in the rear of the tank as shown in
gure 4. Place a 3/4" garden hose gasket onto the
drain body and insert the drain body out through the
hole in rear of the tank. Outside the tank, assemble
the nylon washer and then the nylon nut onto the
drain body. Tighten the nut securely enough to prevent
leaking, being careful not to damage the plastic parts.
Place the O-ring inside the nylon cap and screw the
cap onto the end of the drain body.
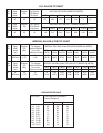
FIGURE 5
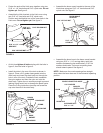
• Fasten the ends of the hitch arms together using two
5/16" x 1-1/4" hex bolts and 5/16" nylock nuts. Do not
tighten yet. See gure 3.
• Assemble the hitch brackets to the hitch arms using
two 5/16" x 2" hex bolts and 5/16" nylock nuts.
Position each bolt behind one of the cross bolts in the
hitch arms. Do not tighten yet. See gure 3.
NYLON CAP
DRAIN BODY
HOSE
GASKET
NYLON
WASHER
NYLON NUT
O-RING
5/16" NYLOCK NUT
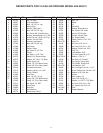
BOOM MOUNT
BRACKET
5/16" x 2"
HEX BOLT
• Assemble the boom mount bracket to the rear of the
hitch tubes using two 5/16" x 2" hex bolts and 5/16"
nylock nuts. See gure 5.
5/16" x 2"
HEX BOLT
5/16" NYLOCK NUT
5/16" x 1-1/4"
HEX BOLT
5/16" NYLOCK NUT
CARRIAGE BOLT
5/16" x 1-1/4"
KNOB
5/16" WASHER
WASHER
(TOOTH LOCK)
BOOM BAR
BOOM CONNECTING HOSE
FIGURE 6