


4 - 1
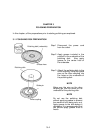
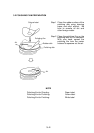
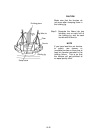
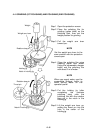
Holding jig
Clamping screw
Ball-end hex wrench
Ferrule flange
Ferrule
V-grove
CHAPTER 4
POLISHING PROCEDURE
When all of the polishing preparations have been made, ferrule polishing can begin.
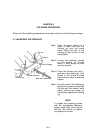
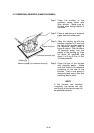
4.1 MOUNTING THE FERRULES
Step 1 Place the setup stand on a
desk or table and put the
holding jig onto the setup
stand, fitting the hole in the
holding jig onto the pin on the
setup stand.
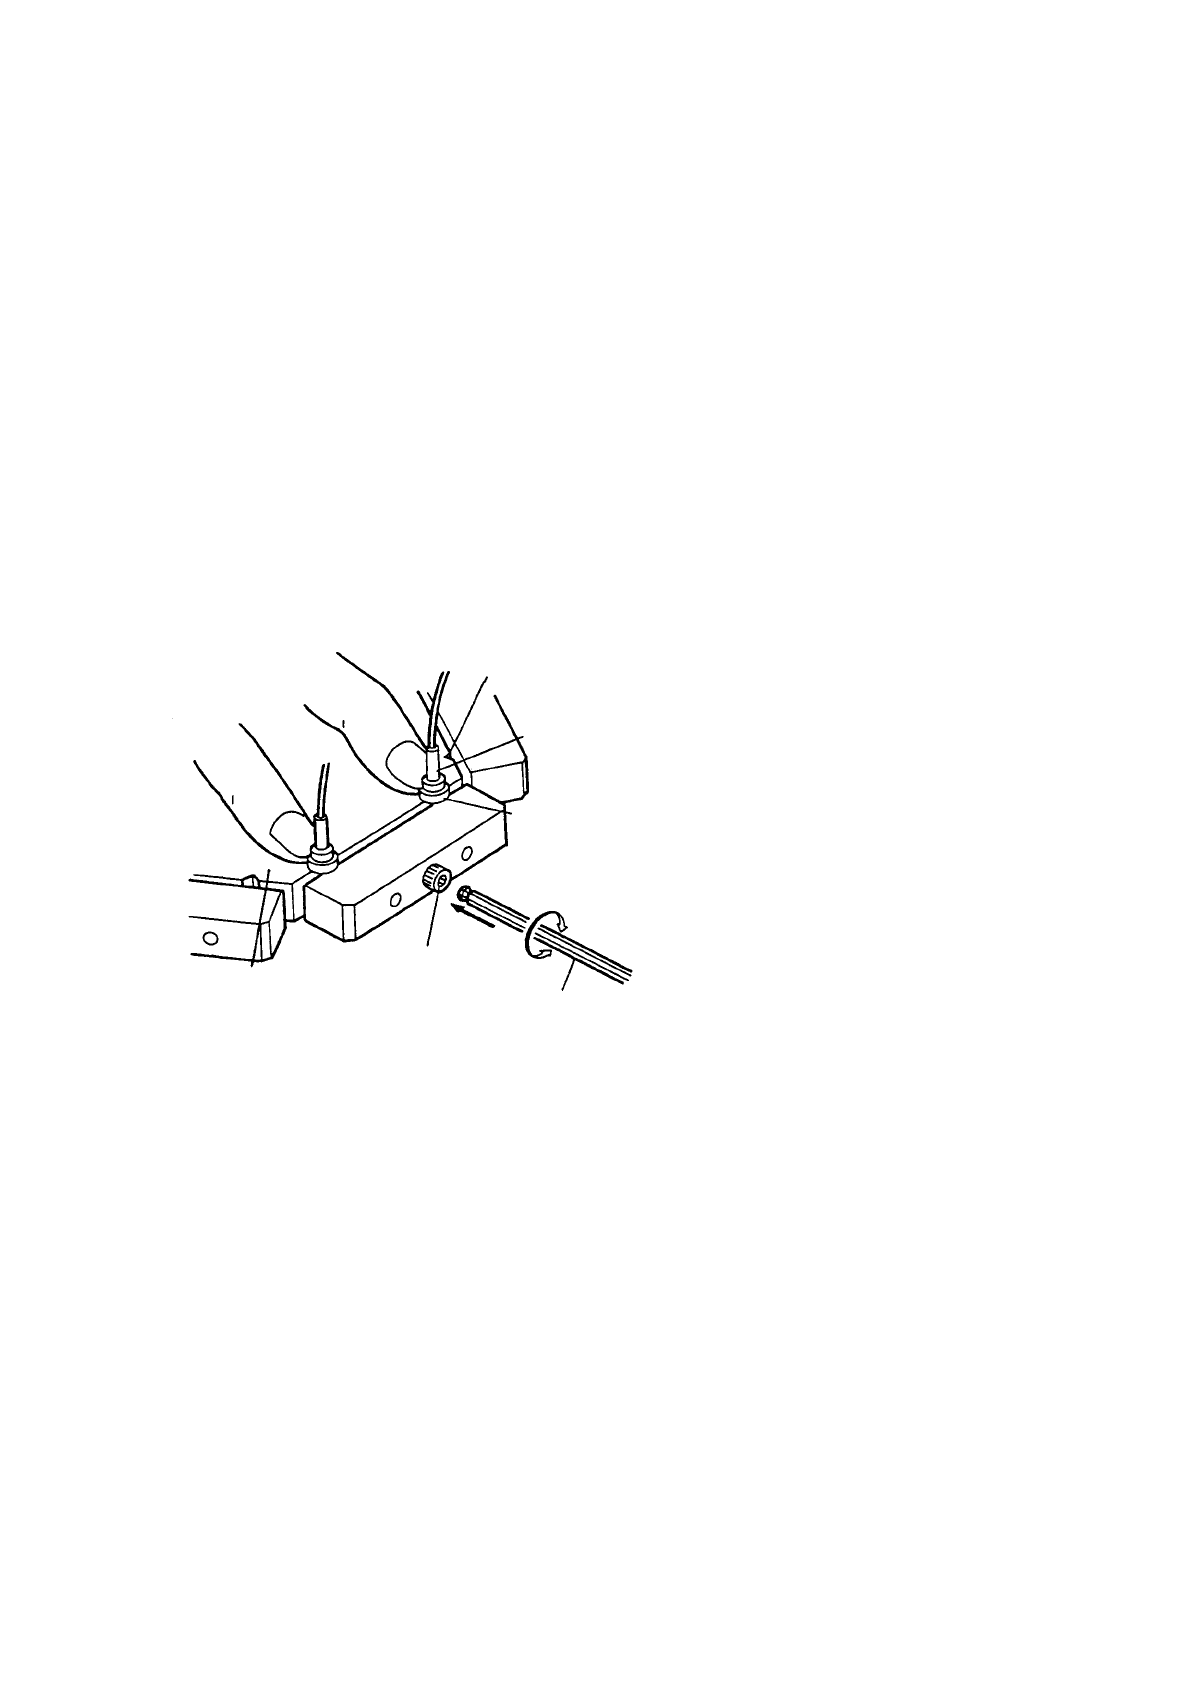
Step 2 Loosen the clamping screws
on the holding jig, turning
about 3 turns using the ball-
end hex wrench.
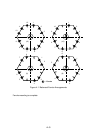
Step 3 Place the ferrules into the V-
grooves in the holding jig. See
Figure 4-1 for where to place
the ferrules to have a balanced
pattern.
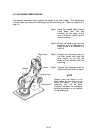
Step 4 On each side of the holding jig,
tighten the clamping screw with
the ball-end hex wrench while
lightly pushing the flange on
the ferrules against the holding
jig.
NOTE
To tighten the clamping screws
with the appropriate tightness,
tighten finger tight, then use the
ball-end hex wrench to tighten
one quarter turn more.