


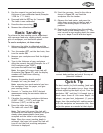

OPERATIONS
Emergency Stop
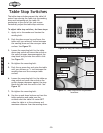
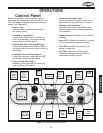
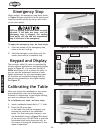
Figure 27. Digital display and key pad.
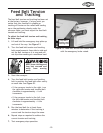
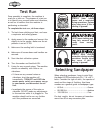
Figure 28. Table height handwheel.
-24-
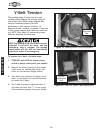
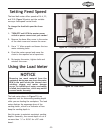
When pushed, the emergency stop plate shown
in Figure 26 stops electricity to the motors and
stops the sander quickly by using a disc brake
on the drive motor.
To apply the emergency stop, do these steps:
1. Push the bottom of the emergency stop
plate as far as it will go.
2. Hold the emergency stop plate until the
sander has come to a complete stop.
Figure 26. Emergency stop plate.
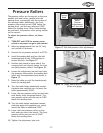
KEEP the sanding drum drive belts correctly
adjusted. If the belts are loose, and the
emergency stop is engaged, the sanding
drum pulley will slip and not immediately
stop in the event of an emergency!
Up and
Down
Keys
Input LED
Run
LED
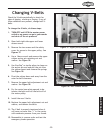
Calibrating the Table
When you change the sandpaper or you notice
and inconsistency with the actual sanding
thickness in relationship to your digital setting,
you must re-calibrate the table.
To re-calibrate your table, do these steps:
1. Insert a calibration board that is 1-
1
⁄2" thick.
2. Press the UP arrow key:
so the table lifts and the sandpaper just
touches the surface of the calibration
board. For fine tuning the clearance, use
the handwheel shown in Figure 28 instead
of the arrow keys. DO NOT hold or grab the
handwheel when using the arrow key, as
the motor is driving the handwheel in that
mode of operation.
Keypad and Display
The conveyor table lift motor is controlled by
the key pad and indicated on the digital display
shown in Figure 27. You can push the UP or
DOWN arrow keys to lift or lower the table, or
you can use the automated function of auto
height adjustment for your next sanding pass.
All functions are controlled through the key
pad and are presented on the digital display.
See Figure 27.